
|
|
Forum Index : Other Stuff : Some G scale Railway Stuff
| Author | Message | ||||
Chopperp Guru Joined: 03/01/2018 Location: AustraliaPosts: 1032 |
Great stuff Aaron The smaller nozzle sure makes for a better print Brian ChopperP |
||||
Revlac Guru Joined: 31/12/2016 Location: AustraliaPosts: 961 |
Works very well,  I might have another go at making the axle box covers, I did them in thin ply wood with the laser engraver last time, but the small .2mm nozzle might Actually print the lettering and details on the axle box covers for the QR Bogies. I might have another go at making the axle box covers, I did them in thin ply wood with the laser engraver last time, but the small .2mm nozzle might Actually print the lettering and details on the axle box covers for the QR Bogies.Cheers Aaron Off The Grid |
||||
| Revlac Guru Joined: 31/12/2016 Location: AustraliaPosts: 961 |
QR Bogie. Work in progress, will use better quality filament later, needs a few adjustments on some parts so it fits better and a little Easier to assemble. Still need the connecting rods and link bars for the brakes, had them working on another build some time back on a bigger model. 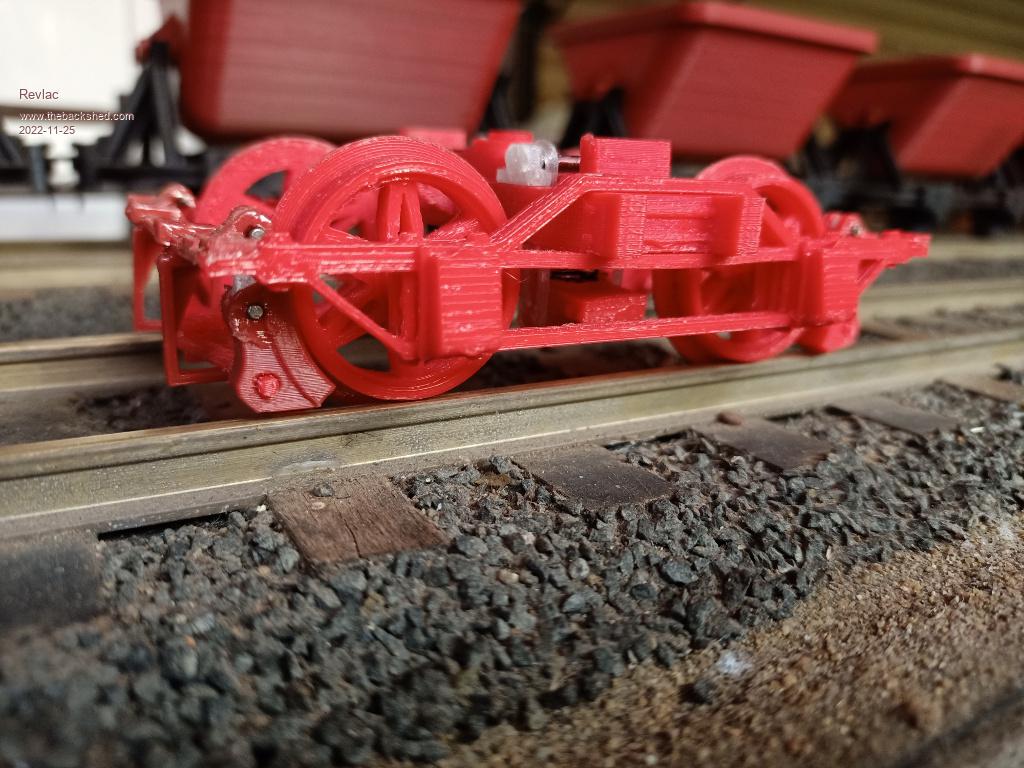 Cheers Aaron Off The Grid |
||||
| Chopperp Guru Joined: 03/01/2018 Location: AustraliaPosts: 1032 |
Great work again Aaron. What size nozzle & print speeds were you using here? Brian ChopperP |
||||
| Revlac Guru Joined: 31/12/2016 Location: AustraliaPosts: 961 |
Hi Brian, The nozzle was the standard .4mm this time, the print speed was fairly fast 80mm per second as its a test print, it looks better than the photo shows it. Printed using red PLA+ for most of it as its good for printing samples, but I have not had much success with this no name brand. Notice the brake shoe is a red brown colour, it is standard PLA and better quality and printed much better (same settings), the clear parts are PETG, will use more of that and ABS later. The main bolster has functional springs mounted underneath same as the real one.   Cheers Aaron Off The Grid |
||||
| Revlac Guru Joined: 31/12/2016 Location: AustraliaPosts: 961 |
I made up this little log wagon, its based on the smaller wagon and assembles the same way, its just as easy to build and was fun to make, standard printer settings .4mm nozzle with PETG. The old man put this one together, use brass rod on each side and threaded the ends and put nuts on the ends, a few rods sticking up to help hold the logs, need to find some small chain to go over the logs. I haven't made brakes for this one yet, since I don't have a detailed picture or plan to work from, there should be a hand break as well, these can be put on later without much hassle.  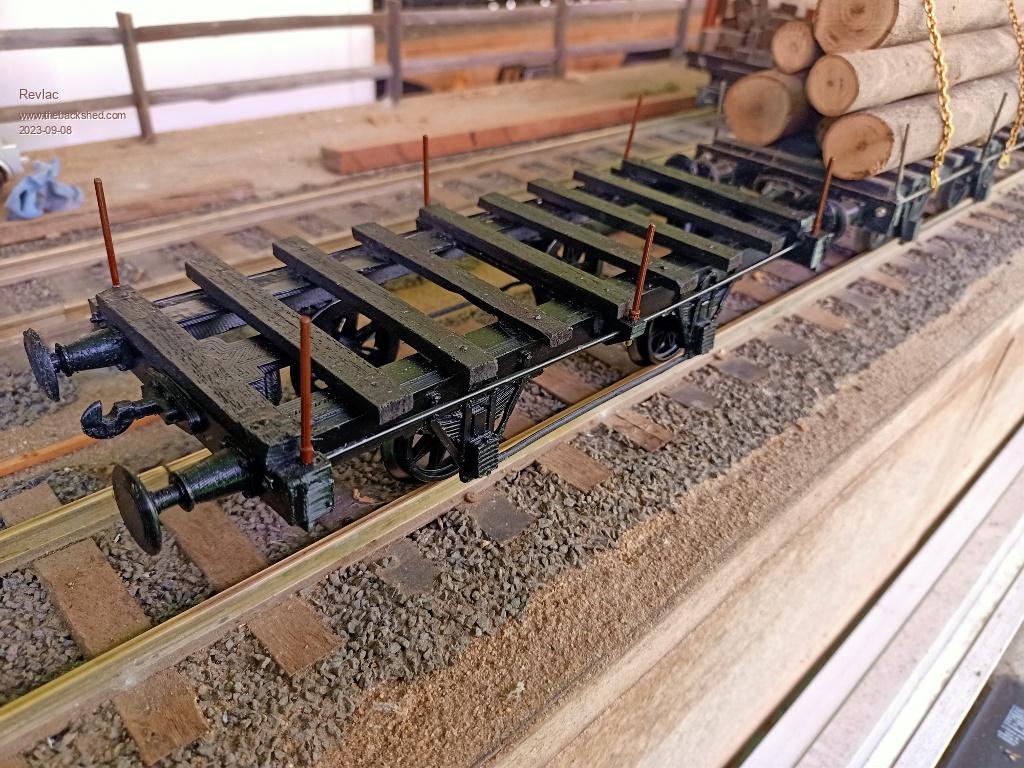 There is timber planks across the top of the frame, they are hardwood but could use anything.  Parts. Log wagon STL files.zip Log wagon scad files.zip I might also make a sheep wagon using this same design, not sure yet. Cheers Aaron Off The Grid |
||||
| Revlac Guru Joined: 31/12/2016 Location: AustraliaPosts: 961 |
McKenzie & Holland Non-Reversible Point Lever. As I have a full size one, Thought it should be easy to make a small scale model of it. There is parts for the reversible throw over type as well, will get to that later.  .png) .png) It printed ok using Clear PETG, it should connect up to some LGB point sets, I will figure that out later, one on the right is 1/18th scale for some other job, painted white and the part on the left is 1/22.5, its incomplete as I'm waiting for some white printer filament to get here. Anyway its functional, will need to get some brass rod or some thin wire for the pin on the pivot. Files included, Scad and STL.  Point Lever & Base.zip Will do another photo after I get the other parts. Cheers Aaron Off The Grid |
||||
| Chopperp Guru Joined: 03/01/2018 Location: AustraliaPosts: 1032 |
Good stuff there Aaron. ChopperP |
||||
