
|
|
Forum Index : Microcontroller and PC projects : Regulated PSU for breadboards...
| Author | Message | ||||
Grogster Admin Group Joined: 31/12/2012 Location: New ZealandPosts: 9063 |
Hi folks. 
I think you can get similar things to this on eBay, but I thought I would design my own one to give myself something to do on these long sober nights.  I got sick to death of having to run two different PSU's on the bench, and cable them to the breadboard for testing things. I got sick to death of having to run two different PSU's on the bench, and cable them to the breadboard for testing things.
TOP LAYER: 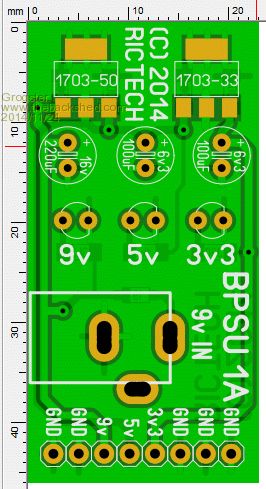
BOTTOM LAYER: 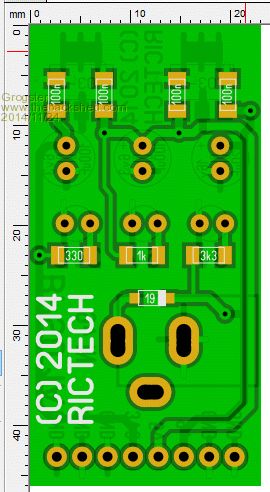
Very small board has 5v and 3v3 regulators on-board. Fed from a 9v regulated plug-pack, and this 9v is also available on the output at the bottom. DC in socket is very close to the output pins for board stability. My first attempt at this board had the DC socket on the top edge, and the PCB was more then twice the size of this one, and the cable from the DC socket would rock the board around on the pins it was plugged into the breadboard. The output is via a right-angled pin-strip, so you can plug the PCB directly into any breadboard to power your prototype. You then only need to run breadboard jumper wires to your supply rails. All neat and tidy, and only one DC supply cable. The 1703 regulators can provide up to 250mA and are 625mV LDO type, with a quiescent current of only two microamps - that's pretty good! (not that it really matters for a plug-pack powered setup like this, but they are a great regulator for battery powered stuff.) They are also short-circuit(over-current) and temperature protected devices. They are 72c each from Element14. Smoke makes things work. When the smoke gets out, it stops! |
||||
| viscomjim Guru Joined: 08/01/2014 Location: United StatesPosts: 925 |
Very Nice, I like!!! |
||||
| MicroBlocks Guru Joined: 12/05/2012 Location: ThailandPosts: 2209 |
I miss a USB connection! :) Microblocks. Build with logic. |
||||
| WhiteWizzard Guru Joined: 05/04/2013 Location: United KingdomPosts: 2794 |
Hi Grogs, Yes these things are really useful - various designs used daily by myself. As TZA 'hints', I would add a USB mini-B socket to increase it's usefulness. To keep same physical board size, put USB between your Power Plug input and the caps. Rotate the row of LEDs 90 degrees and place alongside your 'BPSU' text. A bit of space (and cost!) could be saved if you use SMD caps (bearing in mind you're already using SMDs elsewhere). One final thing I find useful is a Master on/off jumper or switch (saves plugging leads in and out of sockets!) Use a row of 3 holes and allow the end user to solder either a two pin jumper, or a two/three pin SPST switch. NOT 'design-by-commitee' - just meant as constructive improvements. WW For everything Micromite visit micromite.org Direct Email: whitewizzard@micromite.o |
||||
| Grogster Admin Group Joined: 31/12/2012 Location: New ZealandPosts: 9063 |
Heh, heh - it begins again! 
On the USB, that was never factored in, as it was a bench PSU, not ever designed to run from USB on a computer, as it is a bench-testing PSU, so no need for USB power if you see what I mean.
I could have put a switch on it, but pushing the DC plug in and removing it achieves the same thing. Smoke makes things work. When the smoke gets out, it stops! |
||||
