
|
|
Forum Index : Microcontroller and PC projects : Armmite F4: programming the firmware
| Author | Message | ||||
| CaptainBoing Guru Joined: 07/09/2016 Location: United KingdomPosts: 1985 |
Woot! My two units arrived today. Concise instructions got the first one up and running in about 2 minutes - Than you Peter! First impressions; ================== *Very easy setup. *Same USB hiccup as CD above but it seems it was around a new driver when not in program mode... gave it a minute then a reset and bingo. *the thing is quick. *The USB socket on the board is flaky. Pushing the connector fully home gives no power... seems to like it about half way in... won't matter as I will be running on serial console after playing here. *Using AUTOSAVE (F10) is not realistic using the USB console. At least with my setup. I have Putty and cut n paste between there and the > prompt to load software. Seems to be too fast and I get 127 lines of a 606 line program... which of course won't run. Small matter for me as I said about serial console in anger. I am very impressed with the beast and this is going to inject a power boost into one project that was struggling... massive overkill but who cares  EDIT: Second one up even quicker... The "twins" on test with one of my MM2 28 pin jobbies at the top. rough side-by-side tests, I reckon the F4 is 3 to 4 times faster than the MM2 at 48MHz just by judging the redraw of the screens you see here 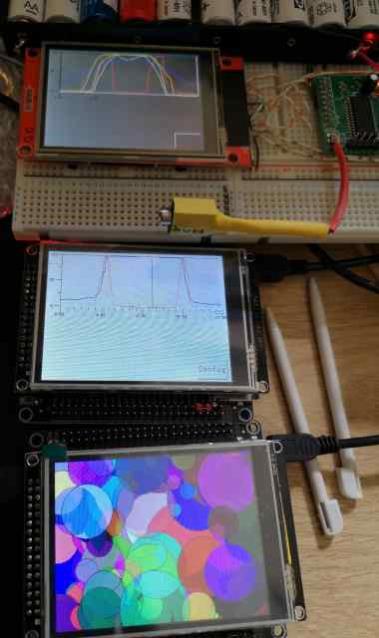 |
||||
| CaptainBoing Guru Joined: 07/09/2016 Location: United KingdomPosts: 1985 |
found a wrinkle   It is easy to work around but the functionality is not as expected... pop the following code into the F4 (I hoped to use it to make code platform agnostic) I have autorun on. watchdog 5000 On Error Skip 1 RTC GetTime run this and that is it... just goes round in a loop resetting itself - the USB console port even goes away, probably as a result of the reset. It is a very easy fix (don't use the RTC command) but I expected it to error out and thus skip the command... If I issue the RTC command at the > prompt, it does correctly cause an error, however if I issue (with autorun off) > watchdog 5000: on error skip 1: rtc gettime I lose the console port ... so I suspect this combination is breaking things somehow. I only discovered this because I loaded some code running on a MM2 With the MM.Device$ function, it is easy to write code to get around problems like this, but I thought you'd like to know I can kill your new baby repeatedly But so far, I am really enjoying playing - top work again!  |
||||
Grogster Admin Group Joined: 31/12/2012 Location: New ZealandPosts: 9060 |
My boards arrived today.  The programming was dead-easy thanks to this excellent thread.  I had exactly the same issue with the USB connection as CaptainBoing did, and my fix was exactly the same as his was. If you don't bump the USB plug once it is connected, it seems fine though. Now, to fit the LCD module.... EDIT: Bloody hell, this is one fast LCD port!  Excellent stuff. 1196 circles per second with GUI TEST LCDPANEL. The ONLY thing I don't like about this setup, is that the LCD and the main-board do not line-up, but that is only a grumble more then any kind of complaint. I like neat stacks of boards. There is no way to secure the LCD module to the main-board, as the holes are miles out from each other.  @ matherp - I seem to recall you saying you had already done an adaptor board. If so, can you please post it here? That would have to be my next move to solidify the arrangement. Smoke makes things work. When the smoke gets out, it stops! |
||||
| matherp Guru Joined: 11/12/2012 Location: United KingdomPosts: 8578 |
Your issue is nothing to do with RTC, or ON ERROR but with the WATCHDOG command. Any sort of reset will "lose" the console port, exactly like the MM+ when using the USB console. An error doesn't cancel an ongoing watchdog so after 5 seconds a reset occurs and the USB console drops. If you run your code with the serial console enabled you will see the watchdog timeout occurring. The attached code works perfectly Do WatchDog 5000 On error skip 1 RTC GETTIME Pause 1000 Print i i=i+1 Loop |
||||
| CaptainBoing Guru Joined: 07/09/2016 Location: United KingdomPosts: 1985 |
Thanks Peter. I am away from home at the moment, I'll give this a whirl tonight. What originally attracted me to the problem was I was getting a hang-up in my code at a certain point which I traced to a timer event (and its periodic RTC gets). At that time I wasn't using a watchdog timer, I only put it in as a rescue for the lock-up. This is what I hoped to demonstrate with the code snippet. If you are getting different behaviour I think I will re-flash the F4 (both of them do exactly the same though... hmmm) With my code above, the screen sits there run, reset... run, reset while just sat on my desk. This is what boiled down to my snippet above which I now see could be misleading. Not terribly worried about losing the USB console tbh. Only using it now because it is convenient. Eventually, I will use J6 in practice purely as a compatibility thing with other mites - I don't want to "need" a PC to access the console (use my tablet & phone too). I will try your code this evening and see if I can work out why I get a reset but you don't. all the best |
||||
| CaptainBoing Guru Joined: 07/09/2016 Location: United KingdomPosts: 1985 |
Hello Peter I know the documentation is not going to be ready for a while but I have noticed the CPU command is supported although I can't discern any difference. i.e. this works: > > ? mm.device$ ARMmite F407 > ? mm.ver 5.0506 > cpu 10 > No error, is this right? It seems to accept any value: > cpu 1 > cpu 2400 > cpu "fred" > cpu 22.7 > |
||||
| matherp Guru Joined: 11/12/2012 Location: United KingdomPosts: 8578 |
Should give an error, I'll fix i the next release. CPU RESTART, CPU SLEEP and CPU SLEEP n are supported but beware: all will drop the USB connection and then restart it so you need to disconnect and re-connect the terminal if using USB |
||||
| CaptainBoing Guru Joined: 07/09/2016 Location: United KingdomPosts: 1985 |
not urgent, and doesn't seem to cause any problems cheers |
||||
| Grogster Admin Group Joined: 31/12/2012 Location: New ZealandPosts: 9060 |
[Quote=That Guy There]@ matherp - I seem to recall you saying you had already done an adaptor board. If so, can you please post it here? That would have to be my next move to solidify the arrangement.[/Quote] If you have not done one, perhaps I could design one? Smoke makes things work. When the smoke gets out, it stops! |
||||
| matherp Guru Joined: 11/12/2012 Location: United KingdomPosts: 8578 |
I did a very simple adapter for a SSD1963 - normal 40-pin connector. I haven't made any yet so can't guarantee correctness 2019-05-18_203308_STM32F407.zip |
||||
| CaptainBoing Guru Joined: 07/09/2016 Location: United KingdomPosts: 1985 |
I think I have sussed it. I read in the documentation for this board that the USB output will wait until the console is established whence all the output will be dumped to the terminal - thus it must be buffered internally. I mentioned that the USB socket on the board is a bit flaky and after leaving the thing running for some hours and there is lots of output to the console. I must have knocked the lead because the console disappeared (PuTTY was crying) and it had started this restart loop thing at some point. I suspect the print statements are blocking (full buffer?) because the console has gone away and the watchdog is doing what it's supposed to, but not flushing the buffer - perhaps it's done at a lower level than MMBasic? Making the leap that subsequent PRINTs are getting blocked, the watchdog restarts it all only to get stuck in this cycle. It all makes sense to me but I could be wide of the mark (it is not unknown  ) )Resetting, either by the button or pulling the USB lead, brings the console back and then pussy-footing around it so as not to disrupt the USB lead... after half a day the console is still up (so the buffer being emptied) and no more reset loop. Question is; assuming my diagnosis above actually holds water, can the buffered USB console output be defeated? Can't wait to get rid of the USB console now!  |
||||
| CaptainBoing Guru Joined: 07/09/2016 Location: United KingdomPosts: 1985 |
EDIT: I am convinced this is the problem now. I closed the putty window and reset the module and it started running it's prog which chucks loads of stuff out to the console. I watched for a minute or two and the restart loop thing started. I connected putty, a whole load of text (everything from my startup message) appeared in the console and the restart loop was broken out of. the conditions are: OPTION AUTORUN ON WATCHDOG <WHATEVER> OPTION SERIAL CONSOLE OFF (so USB console) no terminal session open to the console. PRINT (plenty of) stuff out to the console Then I see the restart loop cycle start. To clear the problem: Attach a terminal to the console (Putty/terraterm to the COM port) or OPTION SERIAL CONSOLE ON and reset (I haven't actually tried this but Peter arrived at the same conclusion above) In a nutshell, it seems that printing to the USB console with no terminal attached is a no-no. |
||||
Chopperp Guru Joined: 03/01/2018 Location: AustraliaPosts: 1032 |
Hi, Could someone please point me towards the latest Armmite manual for this beastie? Thanks Brian ChopperP |
||||
| lizby Guru Joined: 17/05/2016 Location: United StatesPosts: 3013 |
None such so far specifically for the F4, I believe, but it's basically the H7 manual. PicoMite, Armmite F4, SensorKits, MMBasic Hardware, Games, etc. on fruitoftheshed |
||||
| Chopperp Guru Joined: 03/01/2018 Location: AustraliaPosts: 1032 |
Thanks. I thought as much. I just wanting the latest version. I think I found it. I got the hex file loaded ok & did a few tests. ChopperP |
||||
| CaptainBoing Guru Joined: 07/09/2016 Location: United KingdomPosts: 1985 |
I am loving these F4's - my goto workhorse at the moment. Still working out all the pins (a lot are dedicated to the peripherals) but 5V tolerance on everything is a treat. Thanks for your efforts Peter, very much appreciated |
||||
| Chopperp Guru Joined: 03/01/2018 Location: AustraliaPosts: 1032 |
Hi, Excuse my ignorance, lack of understanding etc but how do you get the LCD Panel to go? Is there a backlight connection required? OPTION LIST gives the ILI9341_16 etc but no pin connections. Does it need them? Connections are given for TOUCH Thanks. Brian Edit. Got something up on the screen. I'll keep plodding along Bit confused with the ILI9341 using parallel mode. ChopperP |
||||
| matherp Guru Joined: 11/12/2012 Location: United KingdomPosts: 8578 |
It should just work, there is no configuration needed. If you reset the options then just use: OPTION LCDPANEL ILI9341_16,orientation The backlight is automatically controlled using a 1KHz PWM signal. Use the BACKLIGHT command to control it (0-100) Touch is also pre-configured and pre-calibrated but you may need to calibrate again if it doesn't seem very accurate on your screen. |
||||
| Chopperp Guru Joined: 03/01/2018 Location: AustraliaPosts: 1032 |
Thanks Peter, I did a bit more browsing & found the BACKLIGHT command which worked. Went back to the basics of the LCD Panels in the manual & stuff came back to me. Haven't done much panel work. The test circles worked at blinding speed. Thanks again. ChopperP |
||||
| seco61 Senior Member Joined: 15/06/2011 Location: AustraliaPosts: 205 |
My 5 units arrived today (took about 5 weeks to arrive...). When I first attempted to power it up, I got a USB descriptor error I then looked closely at the USB cable supplied with the unit and could see that one of the pins in the mini-usb end looked "wrong". So used one of my own "known to be good" expensive mini-usb cables and all worked perfectly. I did do the GUI CALIBRATE as the default setup was off by around 2mm. This sure is a nice little platform to work with! Thanks Peter! Regards Gerard (vk3cg/vk3grs) |
||||
