
|
|
Forum Index : Microcontroller and PC projects : Pico Gamer
| Author | Message | ||||
| SimpleSafeName Senior Member Joined: 28/07/2019 Location: United StatesPosts: 286 |
So, I printed it out three times (I'm about to print it a fourth time), and here's a photo of the first two top half of the cases: 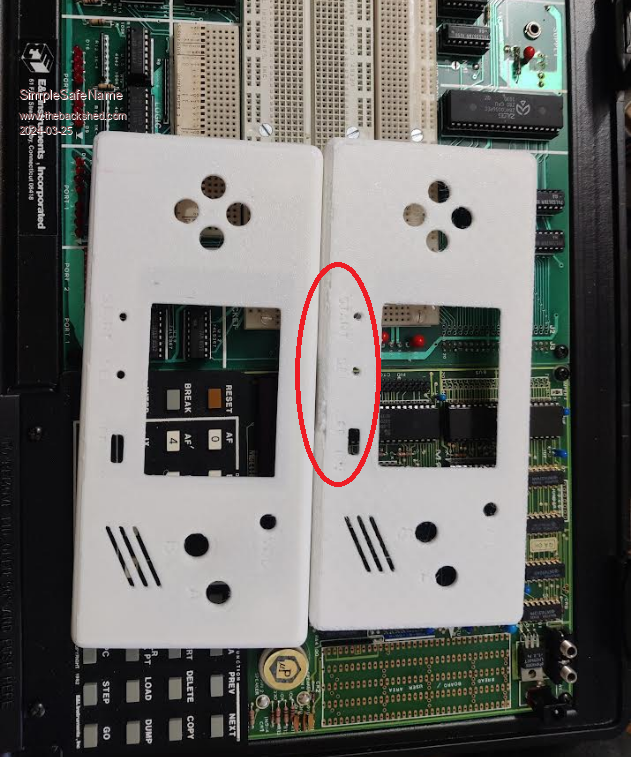 Neither one of them came out all that great, and they don't remotely approach the quality of Geoff's case. But they appear to be useable. And each one printed in about an hour, for about 25 cents. As for my experiences: So there's something going on with my QIDI X-MAX3. It's putting out crappy prints. I did a bit of maintenance and, meh, I'll have to keep looking for the problem. Specifically it want to print out rough edges as if it were have a Z-banding problem. The face of it is a bit rough, but I am using my PEI sheet (designed for excellent adhesion of the plastic to the bed), so that is to be expected. That part of the print came out perfect. So good that I can see where I scraped the PEI off of the bed in a few places (oops). For those who are curious, here's how I put the lettering on the .STL in OpenSCAD: $fn=64; difference() { translate([0,0,6.5]) import("TopNoLetters.STL"); rotate([180,0,90]) translate([-34,-38,-1]) linear_extrude(4) text("START", font = "Archivo Black", size=4); rotate([180,0,90]) translate([-9.4,-38,-1]) linear_extrude(4) text("SEL", font = "Archivo Black", size=4); rotate([180,0,90]) translate([11,-38,-1]) linear_extrude(4) text("OFF", font = "Archivo Black", size=4); rotate([180,0,90]) translate([26.2,-38,-1]) linear_extrude(4) text("ON", font = "Archivo Black", size=4); rotate([180,0,90]) translate([55.5,26,-1]) linear_extrude(4) text("VOL", font = "Archivo Black", size=4); rotate([180,0,90]) translate([75.0,-2.95,-1]) linear_extrude(4) text("A", font = "Archivo Black", size=6); rotate([180,0,90]) translate([57,-12,-1]) linear_extrude(4) text("B", font = "Archivo Black", size=6); }; And, why yes, that is an E&L MT-80Z trainer from days gone by that I'm using as a backdrop for the photo. :) Edited 2024-03-25 19:22 by SimpleSafeName |
||||
| Volhout Guru Joined: 05/03/2018 Location: NetherlandsPosts: 3532 |
That MT-80Z looks a lot like the "Micro Professor" that my nephew owned in the 80's. 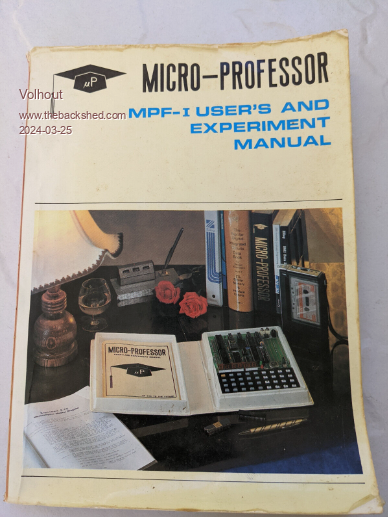 Volhout Edited 2024-03-25 22:21 by Volhout PicomiteVGA PETSCII ROBOTS |
||||
| Martin H. Guru Joined: 04/06/2022 Location: GermanyPosts: 902 |
The filament always needs something to lay on. Due to the curves at the edges, from the front to the sides, you should set the layer height setting to fine. I had a usable result at 0.12 mm layer height with a .6mm Nozzle (estimated 5 hours printing time) Edited 2024-03-25 22:52 by Martin H. 'no comment |
||||
| SimpleSafeName Senior Member Joined: 28/07/2019 Location: United StatesPosts: 286 |
The Keyboard and the ROM are different, other than that I think that they are the same. I bought this particular MT-80Z for the books that came with it. And in the listing the seller mentioned that he had fired it up using the MPF-I power supply, "Since it was the same as the MPF-I". I wondered what he was talking about. I never knew. LOL! Later on, E&L swapped out the MPF stickers with their own. And the complete trainer comes with another larger board (with the breadboard that you see) that has its own Z80. So I was fooled. :) BTW, I have the same book for my MPF-II (I gave my MPF-I away to a YouTuber "The Clueless Engineer" in Australia). Edited 2024-03-26 02:29 by SimpleSafeName |
||||
| SimpleSafeName Senior Member Joined: 28/07/2019 Location: United StatesPosts: 286 |
I used 0.12mm on this print (0.12mm is the best that comes "standard" with the slicer), and it took 2 hours. I'm now seeing "defects" in the print which appear to have come from my "repair" of the board. It looks like my repairs worked, the layer shift appears to have gone away revealing the pattern created by MeshMixer. The only thing that my fixed board has going for it is that it will play nice with OpenSCAD. It would be nice if OpenSCAD ignored minor errors since they apparently are the only ones that care. FWIW, the errors in the Thorn gun caused severe printing problems, so sometimes you have no choice. |
||||
