Guru
Joined: 13/10/2014
Location: AustraliaPosts: 1872
| Posted: 03:35am 12 Jun 2024 |
I though I'd attempt to show the following for anyone new to the Arduino Nano:
1: Program uploading - Hex file.
2: Backing up your Inverter and Calibration settings.
3: Restoring those setting.
4: Removing the Boot loader.
5: Reading and Setting Bit Fuses.
Not all in that order.
There will be a few separate posts - please bear with me until I post the last, then we can pick it to pieces.
Post 1: Starting with a New Nano with a preinstalled boot loader:
We are going to remove the boot loader, this also unlocks the protect fuses, which the boot loader keeps resetting until it's removed.
There are two ways to do this, both are simple, but the following has less steps and also gets the HEX Code file programmed in one go.
To do this, we are going to simply upload the inverter code HEX file, erasing flash at the same time.
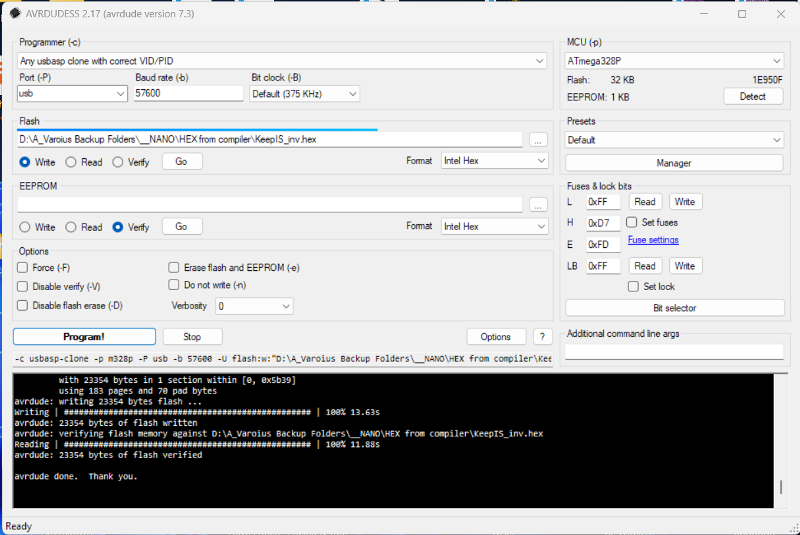
This is the screen of AveDudess - I have previously posted Links to this and will do so again at the end of the posts, this is the standalone, no install version.
There are drop down lists with 100 odd Micros and Programmers: I have edited Setup and selected just a few: You can click the Setup button and add or remove items from the Lists as you please.
Simply press the little button at the end of the Flash code file line [...] and select the HEX file to upload to the Nano.
The image below is how the program settings should look.
When ready to program, Press Program!
The output should look like the bottom black output window in the image below.
After uploading the Hex file:
1: Press the top "Read" button under Fuses & Lock bits"
2: Press the long button "Bit selector"
The Top line in the pop up window "Lock Bits" should not have any Blue tick boxes, especially BLB12, BLB11. These were the Boot block enable bits (see next post).