Guru
Joined: 22/02/2006
Location: AustraliaPosts: 1450
| Posted: 02:01am 20 Apr 2024 |
G'Day Guy's,
Well finally some shed time and got thinking about this project, now that old parallel port controller still worked from back in the day and years ago I did make a pcb breakout board to get access to all the pins.
Found all my data I recorded so got the old Mach3 info and the parallel port pin outs so connecting to the CMM2 will be easy.
I'm waiting on a PS2-usb dongle so I can get the mouse going, now I did have an old PS2/USB mouse a microsoft one and when trying to load that well the CMM2 reported the mouse didn't connect and went into error mode. Disabling the mouse fixed the problem and I do have an old PS2 mouse here.
Now the way I want to go is make a GUI file then each task can be done before moving on to the next one.
I did put 2 extra outlets on Z axis frame so the capture mode will be a good one to get going.
Regards Bryan

Guru
Joined: 22/02/2006
Location: AustraliaPosts: 1450
| Posted: 07:52am 21 Apr 2024 |
Well the fun continues I tried connecting my win10 laptop to the CMM2 and only to find windows said it couldn't recognize the drive
 So thats one hurdle to get over next week.
Anyway I got on to Altronics today and got some pcb connectors so that parallel port board can have all new connections and for the output pins on the CMM2 got a mixed pack of breadboard connectors where I can simply solder on longer wires to suit.
Made a start on the code and with only a 3 day work week all the stuff should be here by mid week and I'll keep on writing the code at work over night for a few hours each night. Plenty of comments in the code so I can see just what I'm doing but I will get there in baby steps.
So my plan of attack is to use this old parallel port 3 axis controller which does have a second port for other items like a lcd displays etc. Also need to find just how the parallel port signals are used like OC or digital etc so more hunting.
Cheers Bryan

Guru
Joined: 22/02/2006
Location: AustraliaPosts: 1450
| Posted: 05:57am 03 May 2024 |
Well that PS2/USB dongle finally turned up and now got the mouse working
 So straight back down town to Altronics to get some Dinkle connectors so all the axis's and everything can be dis-connected so the stepper board can be worked on.
Worked nightshift last night and still no sleep as this CMM2 coming to life can't wait any longer. Just on sorting my code so I can get the first GUI screen up and as the limits and E-Stop are all active low get the GUI working with them first.
I also grabbed 10 off 4N35 opto's and I'll setup my breadboard for getting this project going.
Also got MMEdit working and transferred over the code I was working on the laptop was just too easy

So let the fun begin.....

Regards Bryan

Guru
Joined: 22/02/2006
Location: AustraliaPosts: 1450
| Posted: 03:58am 30 Aug 2024 |
G'Day Guy's,
Well with confirmation a pico zero can run the Y axis via the DM556 micro stepper I don't think I need a PIO when the CMM2 can handle everything.
So now I have the step resolution using the zero where an average of 432 steps for a 0.098" movement with gives the X and Y axis 0.00268"
.
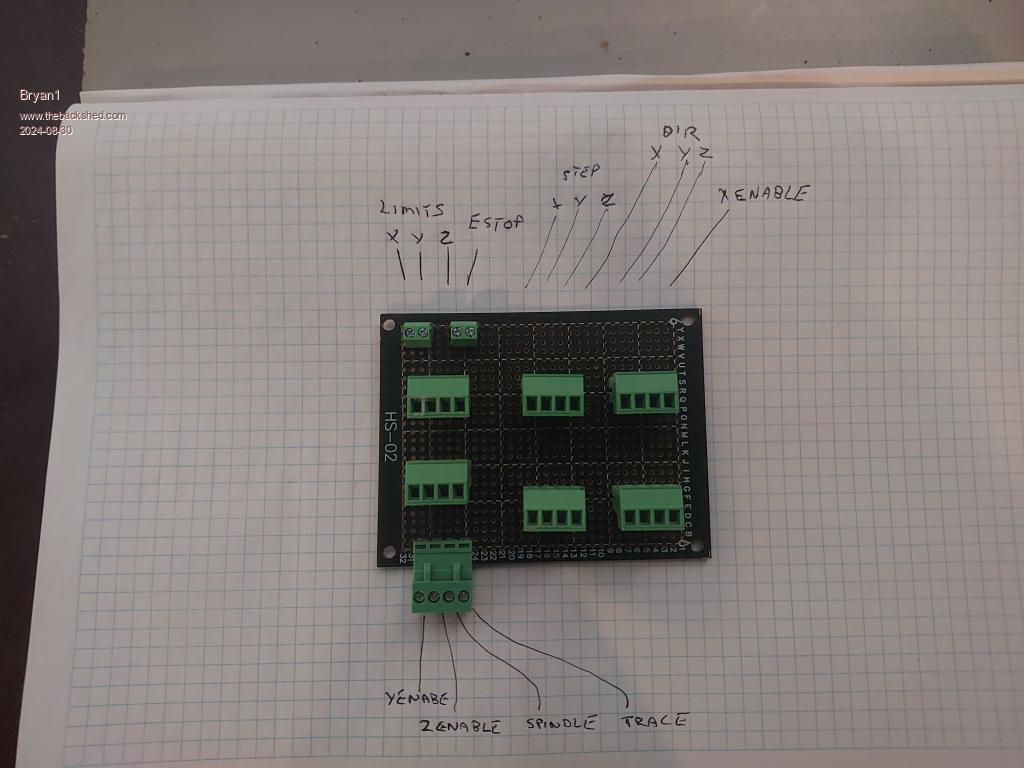
I have made up a interface board to get the signals to the CMM2

I will have to use the enable signal as when enabled and not used the stepper just heats up. So my plan is use baby steps and do each task at a time so I learn to program as I go.
As I have a heap of those proto boards I need to make up an opto isolated board so the CMM2 pins are protected. I do need to get more dinkle connectors and tallying up an order for Altronics so I can finally get the 18 zener and 10nf 3Kv caps which will give me everything to finish the Madboard.