
|
|
Forum Index : Other Stuff : Other Strange Contraption’s
| Author | Message | ||||
Revlac Guru Joined: 31/12/2016 Location: AustraliaPosts: 1288 |
Other Strange Contraption's for odd projects I had a 10T excavator that needed the track rollers building up a bit, I wasn't going to buy new ones as they are a bit pricey, so after thinking about fixing up all 12 of them I was not going to be stuffing around welding each one by hand. Ihe idea was to use then old Herbert lathe to turn the rollers at a steady speed, the 15hp electric motor was already off so I cobbled an old wisconsin motor and reduction gearbox onto the drive, that gives a good low speed for continuous welding.  Used the old wire feed unit from the busted CIG MIG WELDER, mounted that on the tool post mount. Made up a short cable and hand piece for the 1.6mm flux-core. There is a large Copper strap rapped around the shaft that is welded to the roller so as not to weld up the bearing's in the lathe. 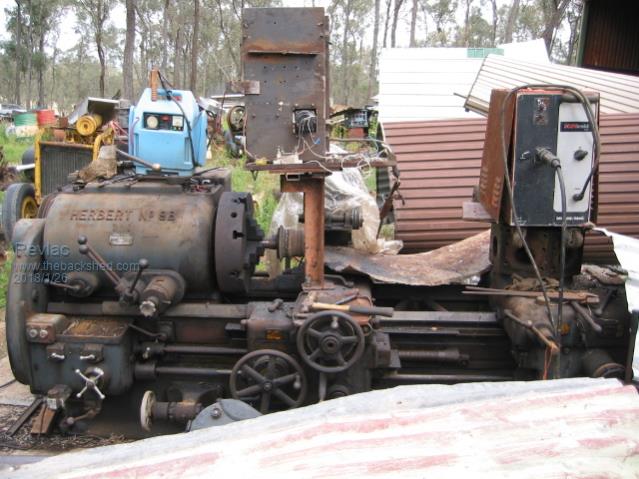 The Scanweld mig sitting on the turret did not have enough power to run that size wire. I ended up running the 225amp tractorpac flat out to get a half decent weld, however running flat out for to long was starting to over heat the welder a bit, I could tell because there was a smell and a bit off smoke coming out of it. Then We made up a half decent tool post grinder 2.4Kw 2900rpm, this did a good job using the power feed, although we did overload and stall it a few times. The only real nuisance problem apart from everything overheating (Me including) was the speed control on the wire feeder, it would often stop the wire feed motor when starting the arc, but after some thought I reckon it had something to do with the reverse polarity from the welder when running with flux core wire. 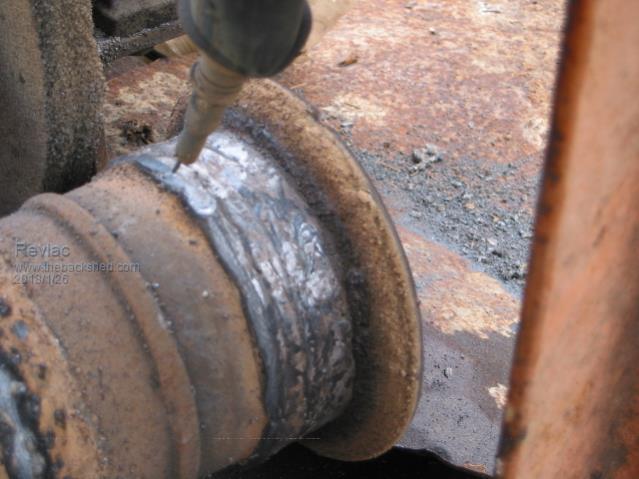 Still I'm happy with the job it did in the end.  Cheers Aaron Anyone made an odd contraption for a one off job? Plonk it hear with a Photo if you like.  Cheers Aaron Off The Grid |
||||
| Alastair Senior Member Joined: 03/04/2017 Location: AustraliaPosts: 161 |
Brilliant. Need is still in deed the mother of invention and improvisation. I had a school friend whose grand father had a farm that was like a machinery museum spread over many acres. He knew where every bit was and could design something in his mind sitting on the verandah and then go out in the ute and collect all the bits he needed. His wife was very understanding! Years later I realised that he was actually very well off and could afford to buy whatever he needed. It was just the principle of minimising waste and having grown up when times were tough. Cheers, Alastair |
||||
| Revlac Guru Joined: 31/12/2016 Location: AustraliaPosts: 1288 |
Exactly right Alastair Many Ideas and things are built from junk that Quite often the Ball And Chain rejects it as all rubbish and wants it removed, thankfully some times they end up impressed by what has been built and how useful DIY things can be. I can remember were most things are around here until things get shifted somewhere els, and then Ill be recking my brains trying to workout were something went. Always like to re-purpose things rather than let the scrappers have it, or go to waist. Just looking at the first photo on the left side, There were trees growing in the shed back then.  Cant seem to take a photo around here without seeing some junk in the background.  Cheers Aaron Cheers Aaron Off The Grid |
||||
| Revlac Guru Joined: 31/12/2016 Location: AustraliaPosts: 1288 |
I think this is still relevant as it is a DIY Repair. Had to fix the rams on the excavator some time back and was told I would have to take it to some specialist place to get the nut off the end, and apparently there weren't many places locally that could do the job. 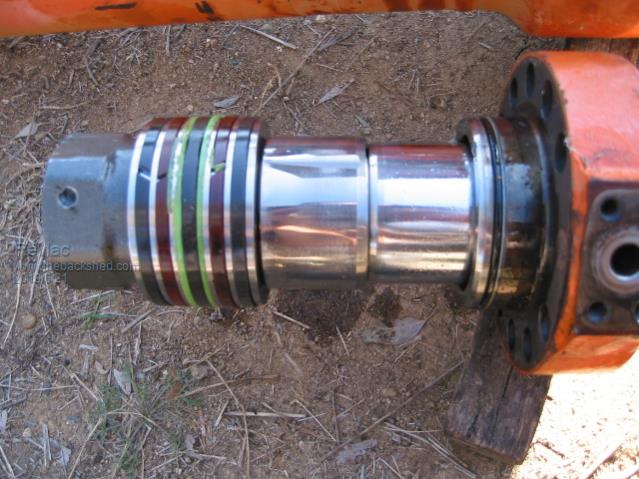 Was also told it could not be done any other way...Hmmm well then, Worth the challenge, I'll give it a go.  Had some Hardox and some other bits of steel, welded them together as sockets 75mm and 80mm to fit the nuts on the end of the rams, also had a 1 inch square drive in the end if necessary. 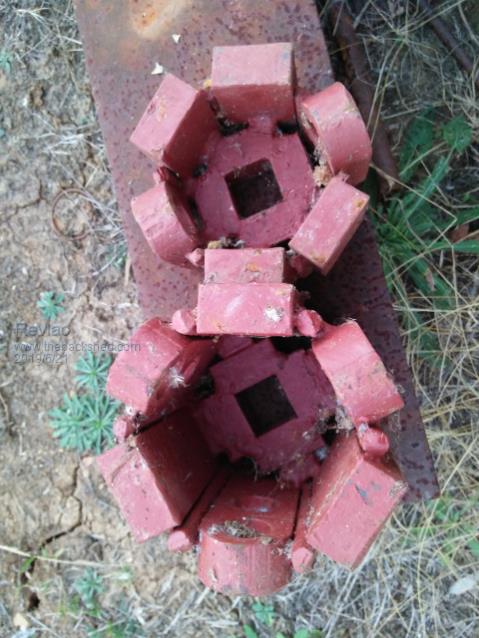 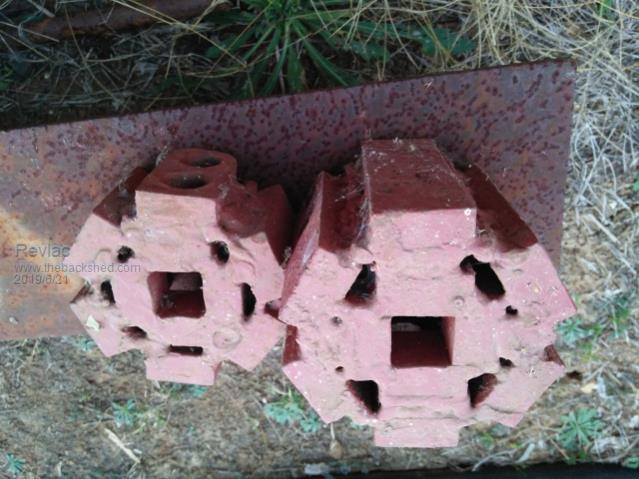 Some more pieces of steel that connect on to the socket so a long bar/pipe extension could be fitted as a handle to turn the socket and and nut..The other end of the ram was held firm by another excavator,(don't hold it in a big bench vice it will tear it off the bench or tip the bench over). 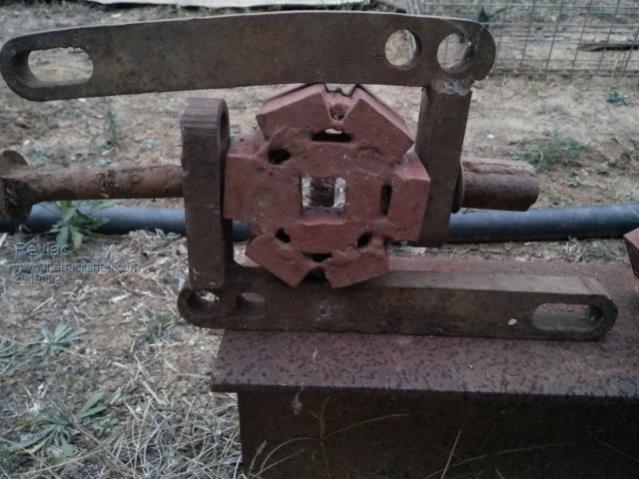 Well, jumping on one 2.5m extension bar was not enough (see the bend in the steel bar), so add another 2.5m extension bar with the endless chain pulling it up while I jump on the other one, I could see the shaft twist and knew something had to give, eventually the nut started to unscrew. Did the same for all the rest of the ram's, works well. I was told that "If you have enough LEVERAGE you could move just about anything" Its a good line to remember when doing old engine repairs or even putting up a windmill. It always surprise me, the things we can build when we put in some thought and some effort to achieve it. Nice to build the tools for the job and find it works so well, even if its a one off job. Cheers Aaron Off The Grid |
||||
| Tinker Guru Joined: 07/11/2007 Location: AustraliaPosts: 1904 |
Was that nut fixed with something like Loctite to the shaft or did they use a gigantic torque wrench to fit it? I'm wondering how you are going to tighten that nut again  PS.  to your welding - if I had welded these blocks of steel the welds would have cracked long before the nut. to your welding - if I had welded these blocks of steel the welds would have cracked long before the nut.Klaus |
||||
| Revlac Guru Joined: 31/12/2016 Location: AustraliaPosts: 1288 |
Hi Tinker, They didn't use loctite, they tighten the nut with with a powerful hydraulic torque wrench then lock it with a bearing ball under a grub screw, tighten that down and center punch the edge of the grub screw thread to stop that coming out...works well. I tightened the nut the same way I got it off, very pleased with how it went and has never give any trouble since. I did 4 all up and hopefully I don't have to do it again for a long time. Heavy machinery presents some unique challenges. Cheers Aaron Off The Grid |
||||
| Warpspeed Guru Joined: 09/08/2007 Location: AustraliaPosts: 4406 |
This is kiddie stuff in comparison, but... I once had to remove and replace the 1 3/4 inch nut on the end of a Wisconsin crankshaft. It was recessed into the flywheel and only a socket would fit in there. The cost of a suitably large socket that I would only ever use once was just outrageous. Filed out a junk flange I found, to 1 3/4" hex, and filed out a rectangular hole in another piece, and bolted the two together.  Cheers, ĀTony. |
||||
| Revlac Guru Joined: 31/12/2016 Location: AustraliaPosts: 1288 |
That works well Tony  Yes your right.. I also got a shock when I found the price of the large sockets, Definitely worth a little time and effort to make something up and save a few $$$. Cheers Aaron Off The Grid |
||||
Chopperp Guru Joined: 03/01/2018 Location: AustraliaPosts: 1126 |
Good stuff Aaron. Great when you have the room for leverage. I like your socket Tony. I have a situation where we need to pull out fire tubes from a C16 Steam loco (C106, originally built here in Toowoomba, QLD, AU) where I volunteer. 180 odd of them. The tubes were replaced a while ago but were not installed correctly hence the need for their removal. Our initial method shown below was with a long rod with thread at each end & pulling them out by winding the thread up with a spanner with a Boss or die thingy over the pipe to come out & the threaded rod up the middle. The far end has a similar fitting which slips inside the pipe but with a flange to fit the edges. The rod goes through that & fitted on with a nut. Doing this was hard & awkward work & wasn't getting any easier. We then made up some extensions & used a 1" drive sitting in a scissor lift on the outside of the smoke box. (Thanks Aaron for that photo) This arrangement was better for a while until the smoke box door started to get more in the way. I had been toying with the idea of modifying a trolley jack to use as a puller & eventually got around to designing & making a prototype. This worked well & with a couple of mods, it worked even better. I knew that we could not use the puller for all the tubes as it was. Today we reached the point where we needed some more mods. Extensions were made so we could use the puller outside of the smoke box resting on the scissor lift. Bit more awkward to use, but still worked well. 175 odd tubes removed. 8 to go. Our process for removal ended up as follows. - Grind the far end of the pipe down flush with the fire box plate.(The pipe is still expanded at this end) - Insert the rod, fit the boss thingy, put the pulling gear on the smoke box end & try to pull about 200mm of pipe out. Normally the far end (Fire box end) of the pipe requires a bit of persuasion with a big hammer to get it going. - Depending how the pipe initially comes out, we are either:- - able to pull it straight out. (easy ones, only about 10%) - pull the pipe through as far as the smoke box plate, cut the pipe & push the end back into the boiler & fish it out a bigger hole (don't ask) - cut the pipe off at the 200mm mark, push (Belt) the remaining length of pipe back into the boiler & pull it out a bigger hole. This is how we ended up doing most of the ones. Remember, these tubes were not fitted correctly. Hope this makes some sense. Photo Below: Original method. We had to either push or pull on the spanner depending on the location of the tube. Not easy at times especially with a round floor & lack of height. 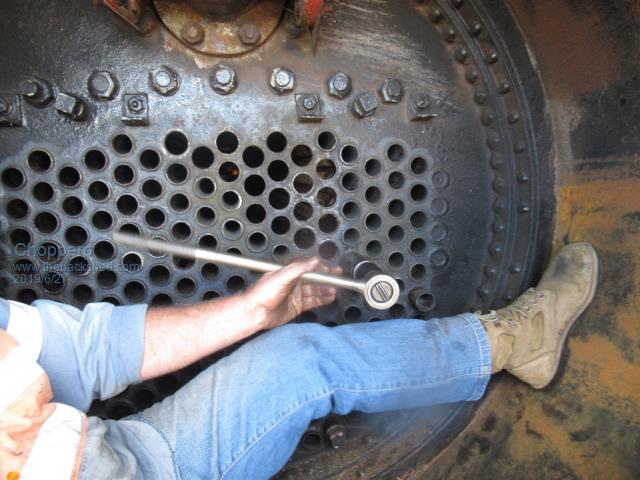 Below. 1" drive extensions. Enabled work to be carried out in the scissor lift outside the smoke box. Much better 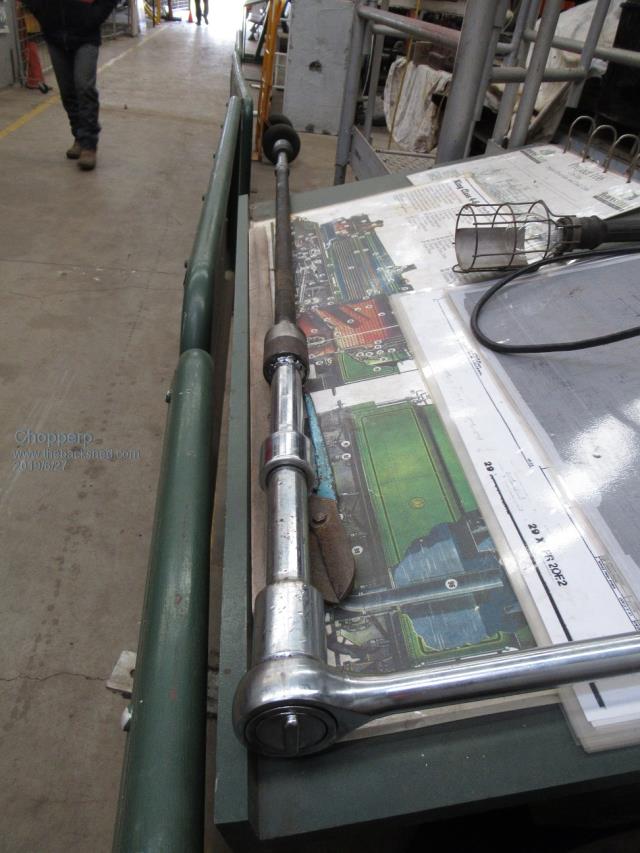 Hydraulic puller after a few mods 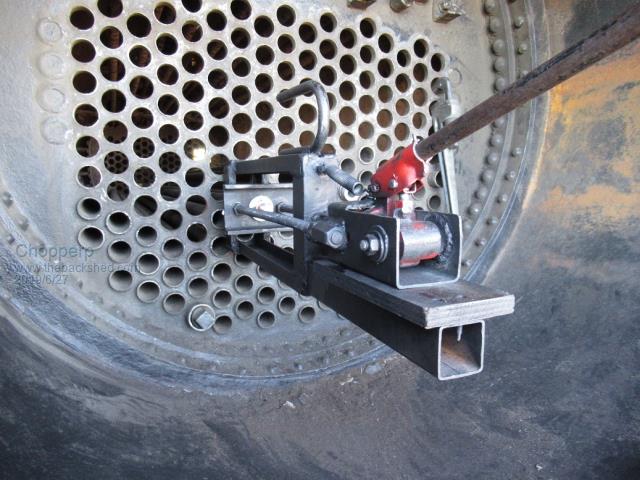 Puller business end 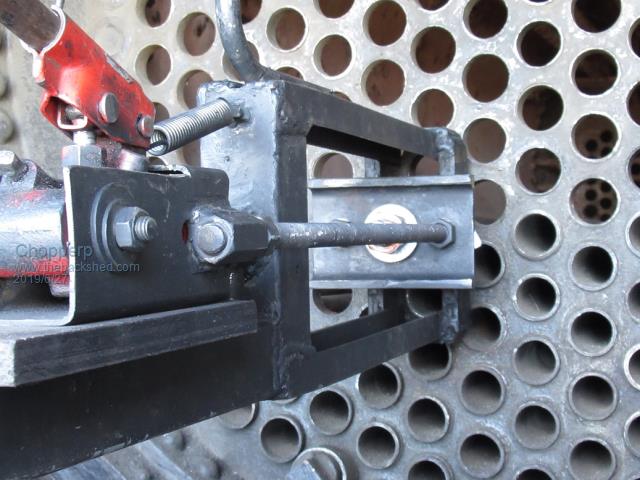 Puller with extensions to gain access to difficult tubes 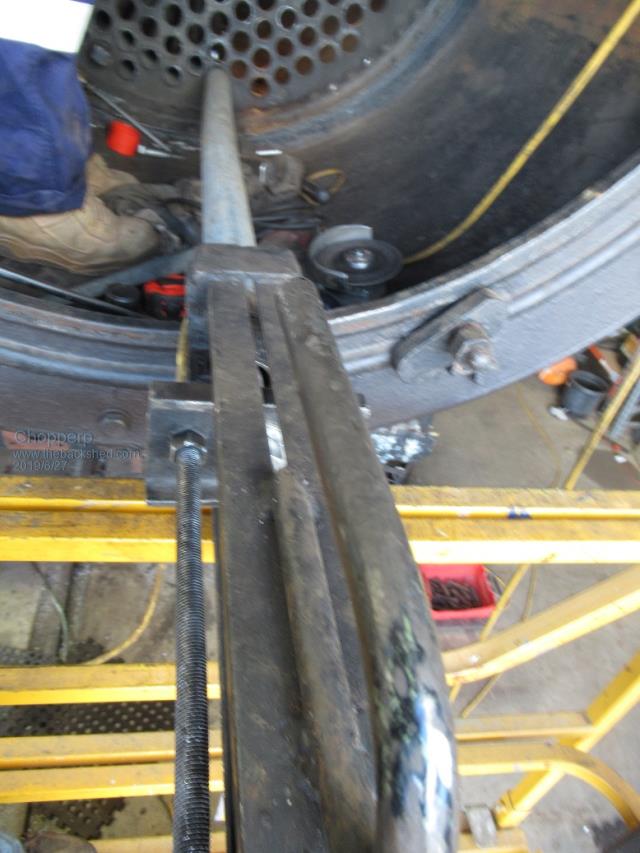 ChopperP |
||||
| Revlac Guru Joined: 31/12/2016 Location: AustraliaPosts: 1288 |
Nice work Brian Its great to to see the process involved from the start and the development of the tools and ideas to do the job. I think it deserves a nice coat of paint once all done, and its own place in the workshop. Cheers Aaron Off The Grid |
||||
| Tinker Guru Joined: 07/11/2007 Location: AustraliaPosts: 1904 |
Interesting, after the replacement tubes are inserted, how are the tube ends sealed against the steam pressure inside the boiler? Klaus |
||||
| Chopperp Guru Joined: 03/01/2018 Location: AustraliaPosts: 1126 |
See if this will post. Gizmo's having problems @ Aaron...coat of paint....it had one. A quick spray-on job. Been using it mate!!! Does look worse for wear though. Thanks for the comments I hope we will NEVER have to use the thing again......& I do want to reassemble the trolley jack. @Klaus. I haven't got into the replacement bit yet but from what I understand, after the tubes are cut to the correct length (these weren't) & holes made ready, the ends of the tubes are annealed (softened), inserted & then an expander device is fitted & the tube ends are pressed into the plate holes hopefully giving a good seal. I assume in operation, the hot pipes will try expand into the holes maintaining the seal. The pressure of course is on the outside of the pipes, trying to crush them & break the seal. I'm not sure if the plates themselves are pre-heated or not. At the firebox end, the ends of the tubes are also swaged or folded over to give better heat distribution over the end of the pipes to lessen the chances of burning. Extra length has to be allowed for for this. The firebox plate is made of about 1", (25 mm) copper for better heat distribution, while the smoke box end is 1" steel. We will be getting a team of experts in to do the tube replacement for us. BTW, I didn't include in my spiel above of the other dubious methods we initially tried to use to get the tubes out. ChopperP |
||||
| Tinker Guru Joined: 07/11/2007 Location: AustraliaPosts: 1904 |
Thanks, those boiler intricacies are way more complicated than I thought. Did not know the endplates are made from a different material at each end. Had assumed the tube ends are flared or welded in place... When I was a kid there lay a boiler just by itself at a nearby railway siding. It was huge - to us kids anyway. We had no idea what it was but discovered the many pipes made a funny noise when hit by the palm of a hand, sort of reverberating. That boiler was all rusty and all made from steel. The tube ends were either folded over or welded, can't recall but hitting them was not painful so no sharp ends sticking out. Have fun putting it together. Klaus |
||||
| Chopperp Guru Joined: 03/01/2018 Location: AustraliaPosts: 1126 |
All tubes now removed. Still much work to be done ( & money required) to get the old girl up & running. @ Tinker link to PDF on tubing. Yet to read it all myself. This assumes the tubes have been put in correctly in the first place. tubing Some Photos Pull Rod in Final Tube 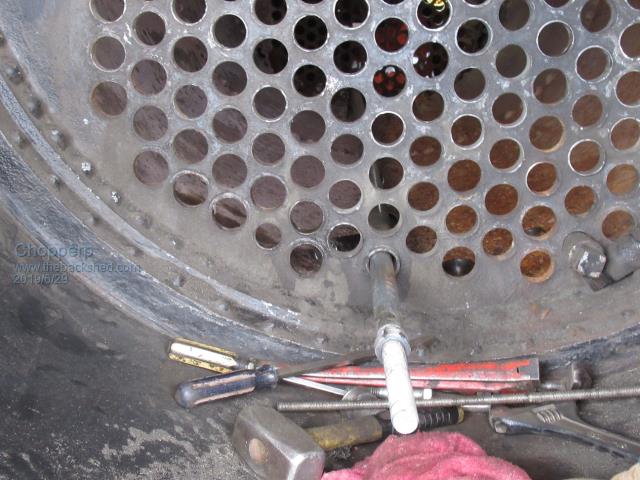 Puller on the Rod. Tube just come loose. 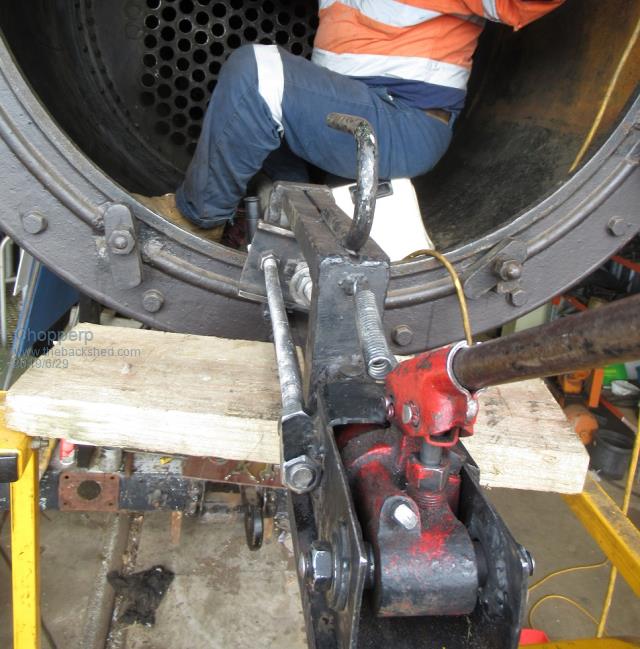 Smoke Box Plate  Within The Firebox 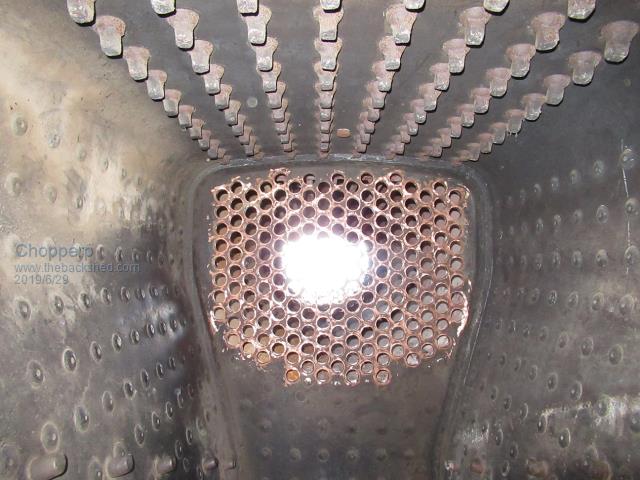 Stack of Tubes 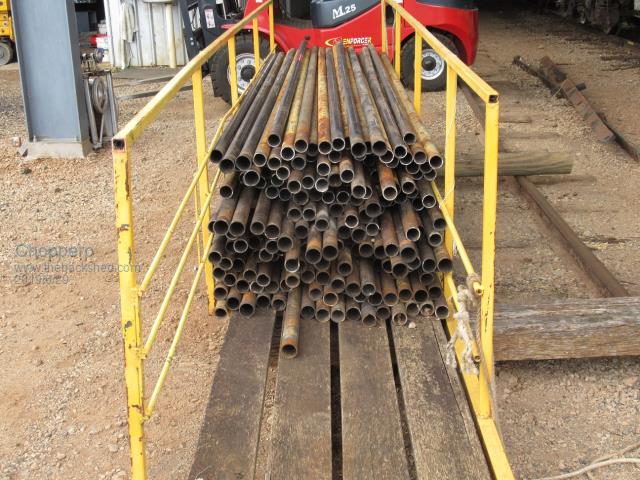 ChopperP |
||||
| Warpspeed Guru Joined: 09/08/2007 Location: AustraliaPosts: 4406 |
Steam engines and boilers are extremely interesting things to study. Valve gear development is really fascinating study as well. This all evolved as a very highly perfected technology in its day, and is worthy of a very great deal of respect. I have often wondered about boiler tubes and fire box stays, how they were designed and built, and how later removal and maintenance was even possible before the age of effective and reliable welding. Great stuff Chopper ! Cheers, ĀTony. |
||||
| Chopperp Guru Joined: 03/01/2018 Location: AustraliaPosts: 1126 |
Thanks Tony. Learning a fair bit myself. Photo below of the top tie rods viewed from the firebox end. Some of them will need removing so we (someone young & skinny) can get inside the boiler & clean it out etc. 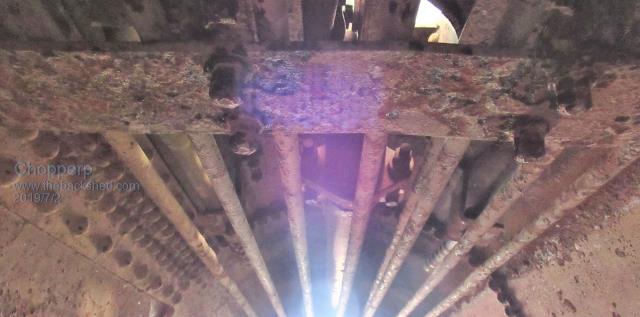 ChopperP |
||||
| The Back Shed's forum code is written, and hosted, in Australia. | © JAQ Software 2026 |
