MacGyver

Guru

Joined: 12/05/2009
Location: United StatesPosts: 1329 |
| Posted: 10:33pm 13 Feb 2010 |
 Copy link to clipboard Copy link to clipboard |
 Print this post |
|
Okay, as promised, here are some pictures of stuff I've concocted. I dug through the "dunnage" closet and pulled out several old projects for show and tell. Unfortunately, the closet didn't hide anything that even remotely resembles a "windmill" except for a small sterling-cycle engine with a 4-blade fan mounted on it. Here are some pictures.
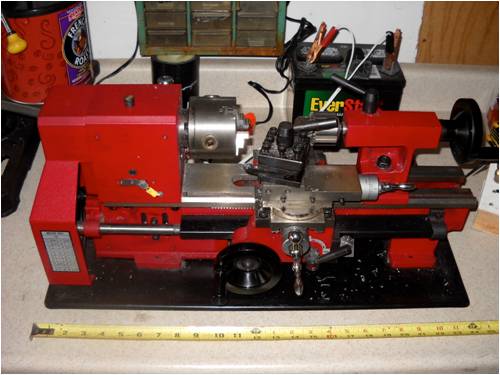
This first picture is of MacGyver's mammoth lathe. If you look closely, you'll see it's not very big. I use a small one (I was trained on a Southbend 9") because I want to retire living in my 29-foot travel trailer and I am turning one room into a mini shop. Gotta have small equipment for that so:
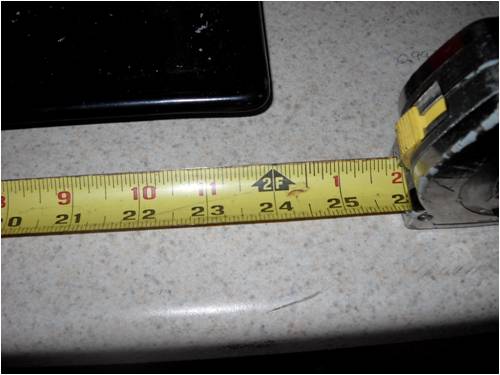
Yes, that's a ruler at the base and that's how long my ways are; 24":
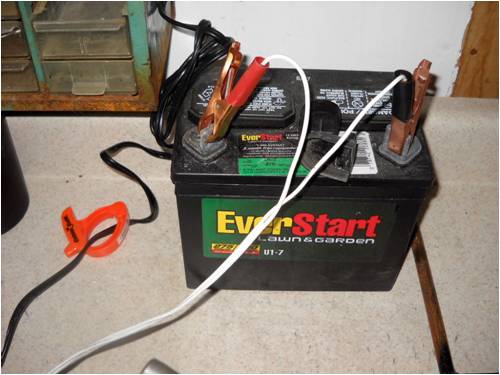
This garden tractor battery is what powers the lathe. It cost me $15 at Walmart. I'm hoping to keep it charged in my trailer "shop" using solar and or wind power.
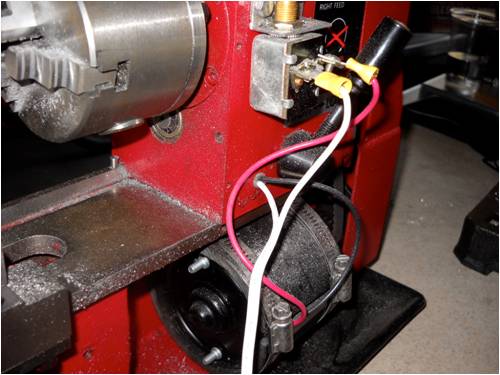
I ripped all the fancy speed-control stuff off the lathe (Harbor Freight) and replaced the motor with a 12-volt one from a surplus place. I installed a boat light switch on the back of the head stock so I can turn the thing off in a hurry. It's a "panic" switch and laugh if you want, but I've had to use it several times. Even though it's a teensy little lathe, it can still get wedged on a cut just like the big boys can.
Okay, enough of that. Now for a few looks at air engines. This first one is made from a 2-cycle weed-eater engine. I made what is termed a "bash" valve, which doesn't show. All it consists of is a little poppet valve inside. When the piston gets to 7 degrees BTDC (before top dead center), the piston top slams into the valve stem and lifts it off its seat, allowing compressed air to enter the cylinder. This is what is called a "uniflow" engine. The steam (air here) path is one direction, in at the top and out through the regular exhaust ports machined into the skirt of the cylinder.
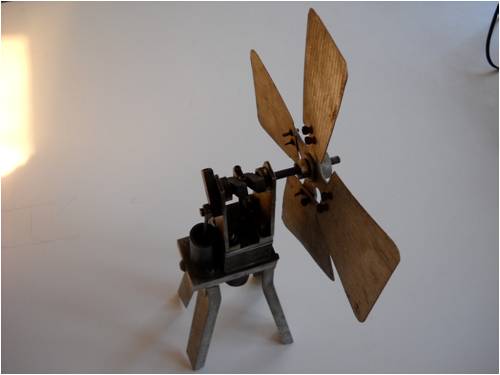
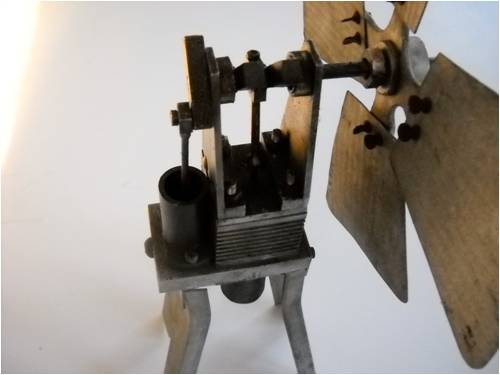
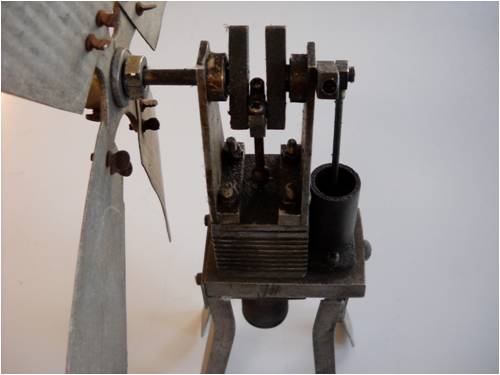
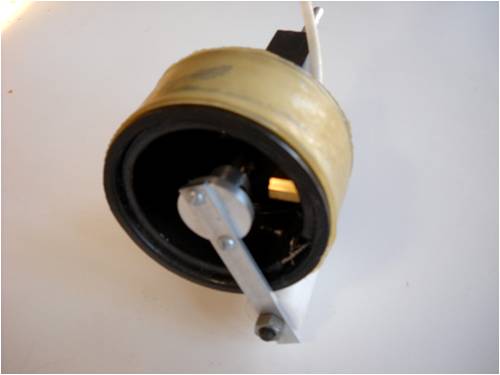
This is a Sterling-cycle heat engine with a fan blade attached. Heat is applied to the little canister at the bottom. When the thing glows red hot, you merely give the fan a crank in the correct direction and away it goes. it's WAY inefficient, but it's fun to watch.
Here's the top end:
From the front:

The little cylinder on the right is equipped with a piston that is 90-degrees out of phase with the main one. This air engine actually runs on suction. The alternating piston actions shuttle a gulp of air back and forth from the hot to the cold side and back again. As the air "cools" it shrinks and "pulls" the piston instead of the normal Rankin-cycle method, which is the reverse.
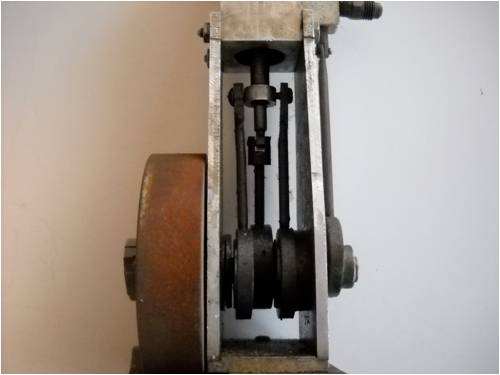
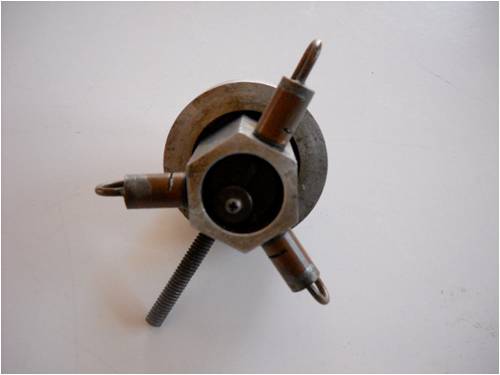
This is a piston engine, which was originally built as a uniflow design. Then it was made into something else, then something else and finally became a 10-pound paper weight!
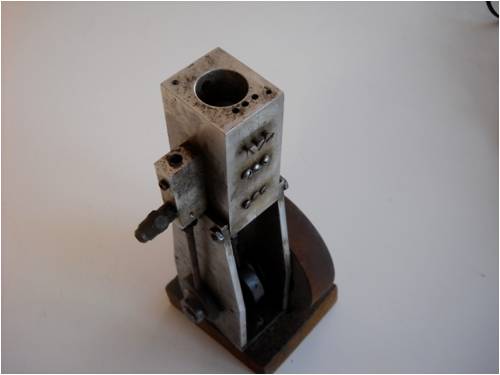
Here you see (barely; sorry) the valve cam assembly on the main shaft:
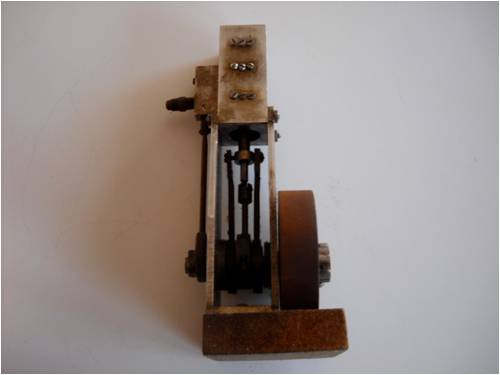
Here's a better view of those valves:
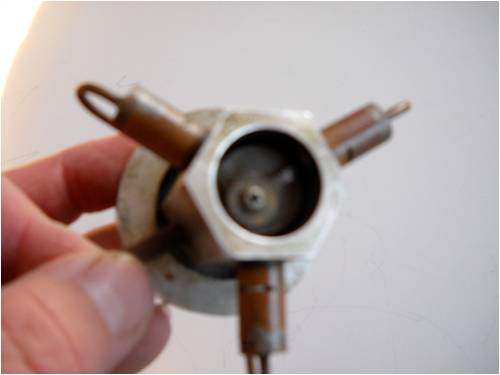
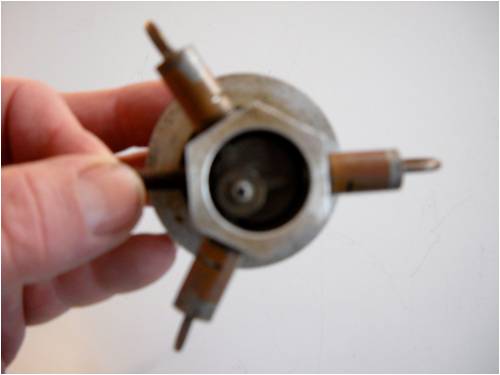
Another uniflow desigh here. This was made from a piece of aluminum hex-bar stock. This is a tiny, bitty engine:
One main journal and three tiny con rods. This thing will turn at just under light speed with about 30 pounds of compressed air, by the way. It screams!
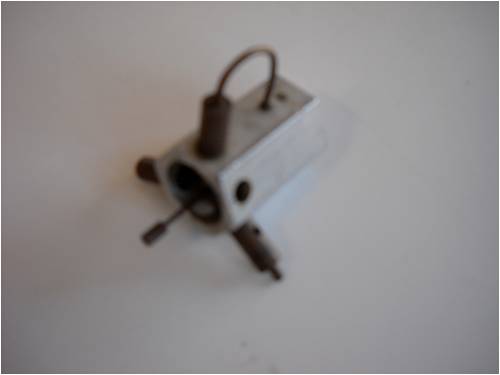
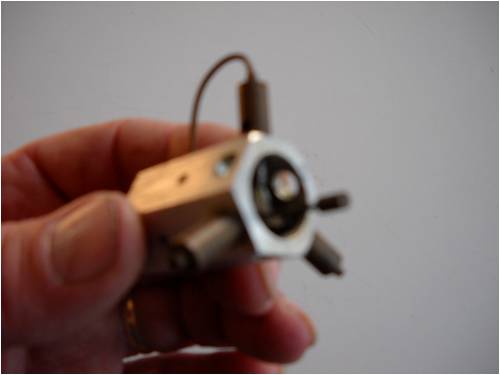
This is for size comparison. The body of the engine is about as big as my thumb.
If you think the one above is small, this one is less than half its size! This one never ran very well. Something hangs up somewhere, but it was fun to build. Both this one and its big brother have a rotary inlet valve built into the main crank. The exhaust goes through a little slit at the bottom of each cylinder. Each needs a flywheel, due to the extremely-small size of things.
See? I told you; it's itsy-bitsy!

Here's another view of the little guy. Believe it or not, something like this can consume 100 hours or more from idea to actual engine. They really suck down your spare time.
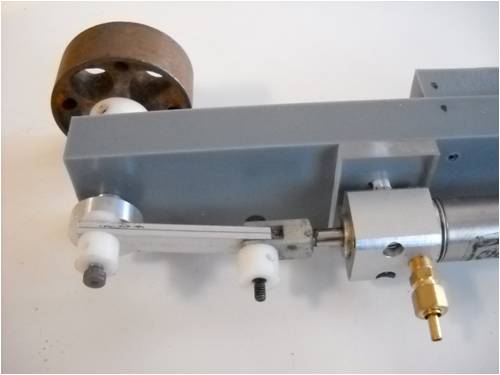
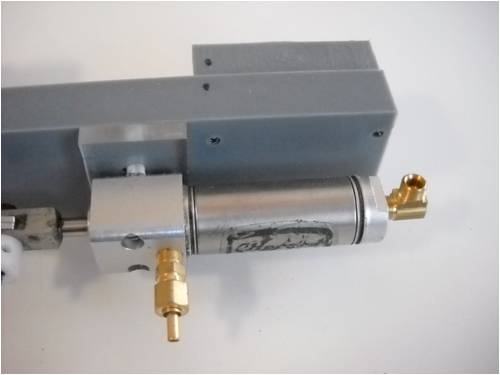
This is "Jack's" engine. It's a little single-cylinder, double-acting engine I built for my grandson so he could see how it works. The valve is not done yet for anybody critiquing things.
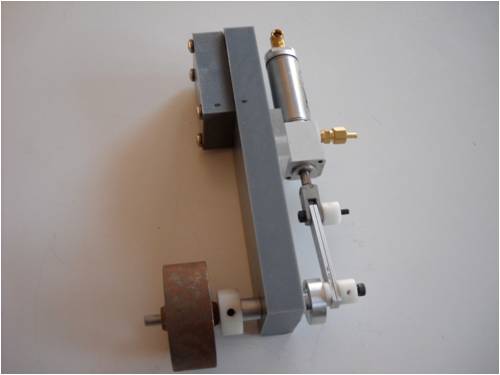
This is the crank end. The cylinder is to the right and the valve will be built on the opposite side. Small hoses will connect to the ends, which serve as both inlet and outlet ports.
The "cylinder" on this one is made from a surplus air-activated thingy that is used to trim controlling surfaces. I usually turn things from scratch, but thought it might be a novel way to recycle surplus airplane parts.
This is one of a number of engines I made using "off the shelf" stuff. The idea was to design an engine that almost anyone with a few hand tools could make, without needing a lathe or mill. By the way, I use an "end mill" mounted in my lathe chuck and the "table" attaches to the cross feed. Again, very small stuff. Oh, back to this picture: the piston is a piece of oak and the cylinder is extruded aluminum square stock. This is called an "oscillating" engine. It pivots on the spring-loaded stem. The inlet and outlet are the same hole in the cylinder, but different in the block.

This engine has an "external" piston. The idea here is compressed air enters through the inside (look for a brass fitting) and it blows up a tube made of latex rubber. As the tube swells, it makes a bump and a roller is pushed ahead of the expanding rise in the rubber. At the end of the "stroke" the air exhausts through an open port on the inside of the central cylinder and the whole process repeats. It worked about as well as my 10-pound paper weight and now shares a coveted spot on the same shelf!
The "roller" or "piston" in this case, is at the top of this shot and is made of white HDPE plastic (stands for High Density Poly Ethylene).
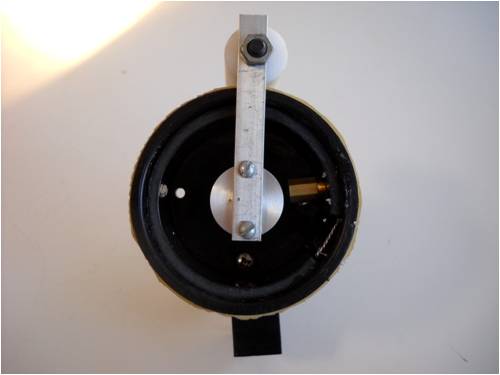
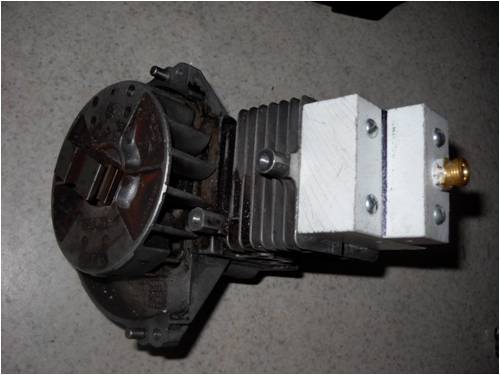
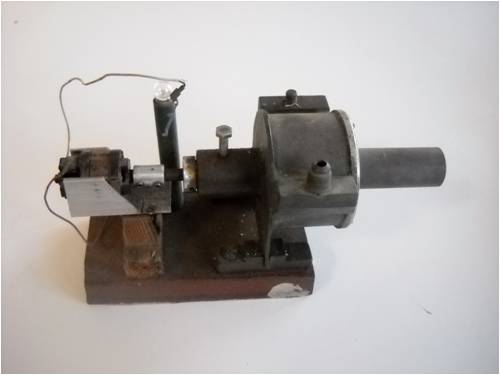
This is an attempt at a "turbine". Compressed air enters at the bulky center part, which spins a blade inside. The exhaust is at the extreme right-hand side through a large pipe. At the other end (left) is a direct-current (d.c.) permanent magnet (PM) motor. If you look closely, you'll see a little 1.5 volt flashlight (torch) bulb mounted on a little pipe sticking up above things (on a post). This little sucker will use up 50 gallons of compressed air in about 30 seconds. It's much the same as spinning a bearing with compressed air only safer, since the blade is enclosed.
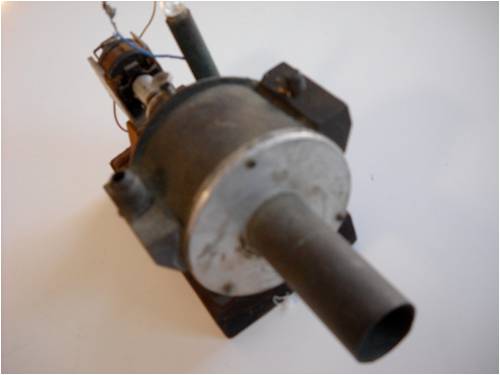
Here's the same thing from the exhaust end. This took weeks to build, by the way! It now serves as closet ballast, if you catch my drift (junk).
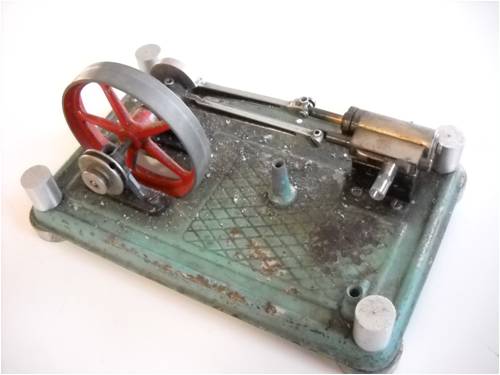
I purchased this one at a flea market. It was a "kit" from years past. I re-bored the cylinder and remanufactured the piston and a few other little changes were made, but it basically works the same as it did 50 years ago; it just runs faster and more powerfully. It's a good engine to use while explaining how stuff works.
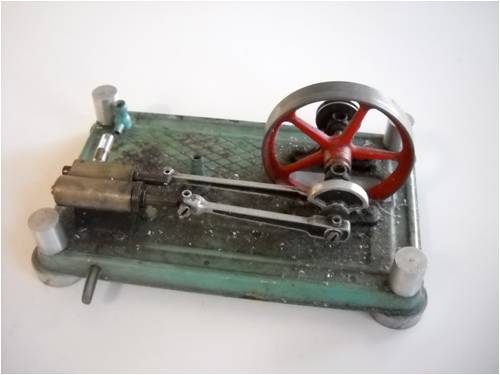
Here it is again from the other side.
That's about all I have to share for now. I'm switching gears to start making more "wind" and more "solar" toys. As those things progress, I'll post pictures.
I'm currently pulling my remaining hair from its roots trying to manufacture a generator from scratch. Oztules has been a great help as well as Dinges and a few others. All I can say is "I'm working on it!"
For newbies, please realize that of the few pictures on this page (which are only a small portion of all the crap I've built in the past 45 years) each represent sometimes hundreds of hours of shop time as well as thought and tinker time. It's a great way to spend your time, but it is just that: very time consuming.
My point here is, if you want to do stuff like this, great. Just be prepared for it to be less gratifying than whipping up a batch of instant pudding! Many (most) of the projects featured on The BAckshed Forum take weeks, months and even years to complete. Hang in there!
. . . . . Mac
Edit: SpellingEdited by MacGyver 2010-02-16
Nothing difficult is ever easy!
Perhaps better stated in the words of Morgan Freeman,
"Where there is no struggle, there is no progress!"
Copeville, Texas |


