| Author |
Message |
MacGyver

Guru

Joined: 12/05/2009
Location: United StatesPosts: 1329 |
| Posted: 02:30am 06 Jun 2010 |
 Copy link to clipboard Copy link to clipboard |
 Print this post |
|
Crew
Got as far as I could on the ax-fx build today; have to wait to use a friend's lathe (larger than mine) to turn the iron magnet backing plates. Not being one happy to "sit around" I decided to build a plane.
This is going to be a design out of my head. Will it fly? Haven't botched one up yet, so I'd say it likely will. It's going to be a motor-sailer. By that, I mean it will be lightweight and bullet-proof (very robust), will be able to glide and thermal, but will also have an electric-motor assist for launching.
The wing span will be in the neighborhood of 48" give or take, depending on how wide I make the fuse. The wings are being constructed out of 4mm Coroflute plastic. Building the wing is just a matter of laying it out, folding and gluing in place. Kind of like an "origami" airplane, if you will.
This will be a "wingeron" control system. That means it will have a stationary vertical stabilizer and no rudder and no elevators. Each wing has a larger-than-life aileron and the radio mixes the signals so that I can turn left and right and using the same two servo motors also make the craft go up and down. Just two flight servos control this pup.
My usual "M.O." flying is; I toss the thing into the air, then jam it in high gear and climb it up to around 1,000 feet. That should take no longer than 8 to 10 seconds. This little plane will fly easily 100 + mph (actual!). Once it reaches ceiling, I turn off the motor and fly it like a glider. The propeller folds back against the nose cone when not spinning, streamlining the flight characteristics.
Is this an expensive hobby? Yes and no; play any golf lately? By comparison, it's no more than anything else, but the kicker here is I build "bullet-proof" planes. The usual weekend flyer spends 15 seconds in the air and 15 hours back in the shop gluing the remains back into some semblance of an airplane again!
All I got done with today is represented in the following pictures:
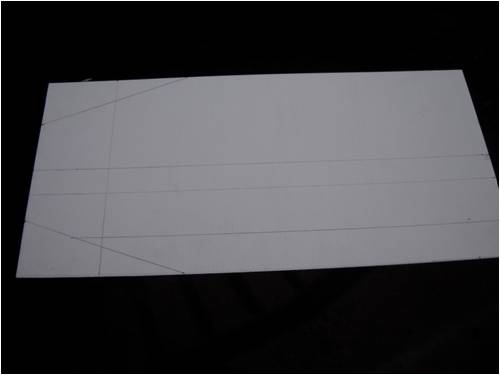
I start with a slab of 4mm Coroflute sign material; plastic corrugated
cardboard, if you will.
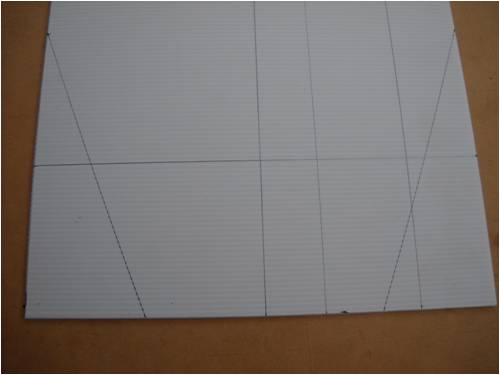
Next, I draw in all the cut and fold lines. This is what goes through my
head when I should be sleeping by the way!
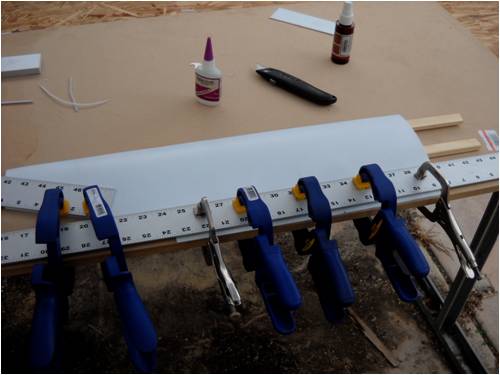
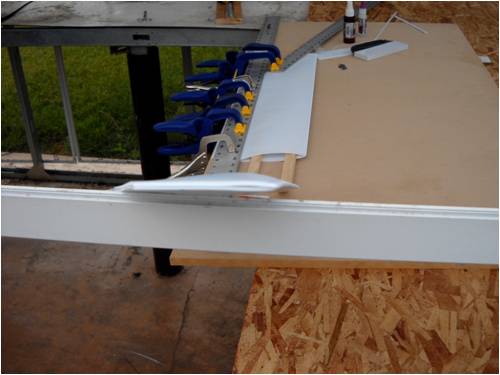
I use "Gap-Filling" CA (cyanoacrylate) glue to hold things together.
Gotta have lots of clamps. CA cures in about 2 hours. I "kick" the
seams. "Kicker" is a spray-on glue-cure accelerator. Smells lovely!
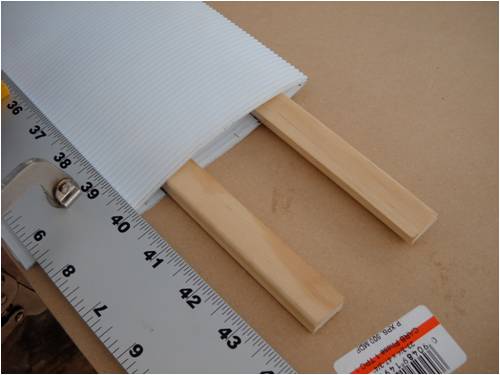
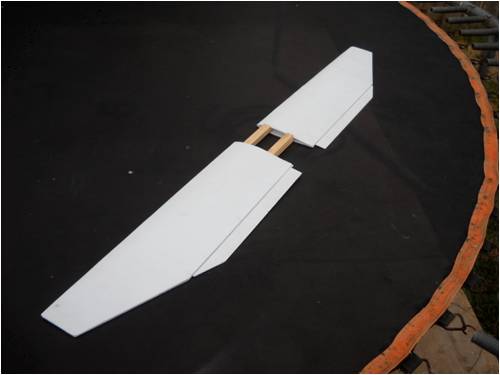
This shows the spars exiting the "root" of the wing. That's the inboard
edge next to the fuselage ("fuse"). The wing is 24" and the front spar
is 24", but it's pulled inboard 4" to allow me to "wash-out" the tip in
an effort to prevent "Tip Stall" at low speed. I use two spars because I
like to take chances and fly way, way, way too fast! 
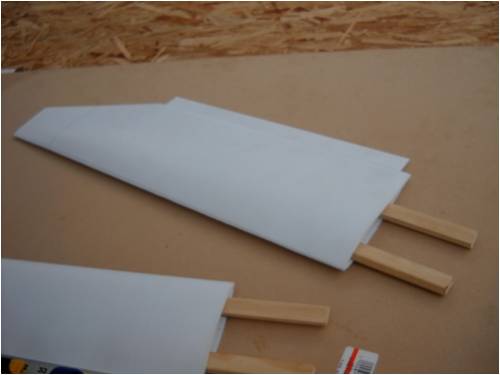
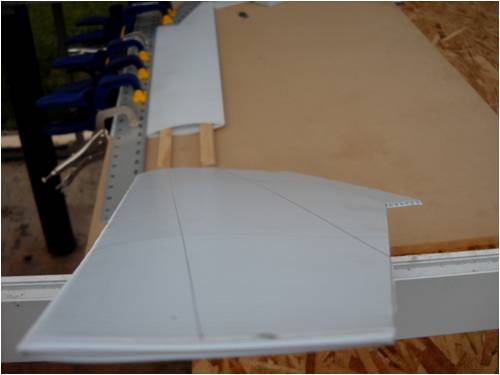
This shows one done (nearly) and one getting done. After the glue sets,
all that needs to happen is trimming the sharp corners, "kicking" the
trailing-edge seams, hardware (control horn) and paint. Note the
aileron is Coroflute also. More on that in a later picture.
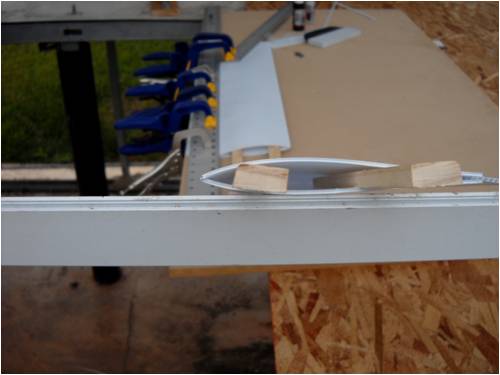
Here's a view down the wing from the root (inboard edge). There is a
slight wash-out just aft of the lower leading edge. Eipler does a trick
similar to this with their wings too; it makes them fly faster!
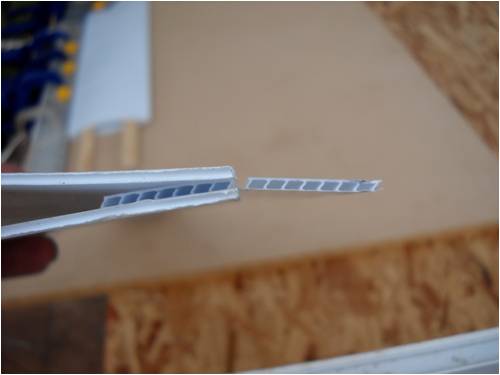
Here's that Coroflute aileron again. Note how it's made: One side of
one cell is cut out (no easy process I might add!!!) and the rest of it
"hinges" on the remaining plastic making up the other side of the cell.
This stuff can bend back and forth a zillion times and not break!
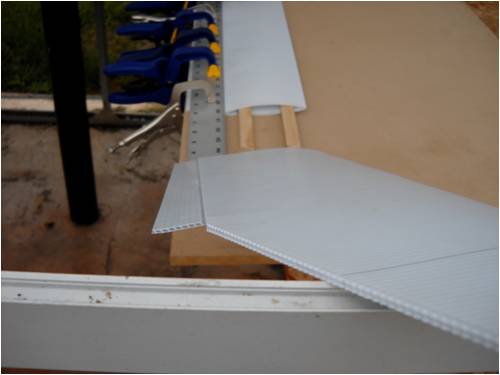
This is the wing tip. Note there is a small gap left open. This is to
make a place for more CA glue when I round the edges and do the
final clamping.

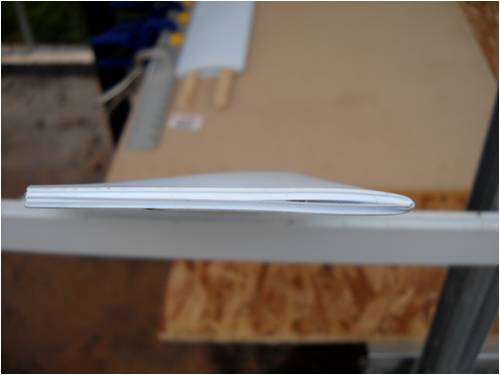
Here's a shot tip-to-root of the top surface of the new wing. It's
symmetrical-section for the most part, but I leave the front 2/3 almost
flat and wash out the front lower leading edge using clamps and a lot
of foul language!
I'm trying to show that lower front leading edge in this shot. Don't know
how well it'll post; maybe just use your imagination, eh?
Here's the nearly-finished trailing edge and aileron. I'll trim the aileron
and make it blend with the curve of the back of the wing tip when I'm
all done; gotta make it pretty.
This final shot shows the view across the bottom of the wing. That
aileron is 14" long by the way. This plane will be anything but short on
control!
More as I get-'er-done!
. . . . . Mac
Nothing difficult is ever easy!
Perhaps better stated in the words of Morgan Freeman,
"Where there is no struggle, there is no progress!"
Copeville, Texas |
| |
Downwind

Guru
Joined: 09/09/2009
Location: AustraliaPosts: 2333 |
| Posted: 04:44am 06 Jun 2010 |
Copy link to clipboard |
Print this post |
|
Well Mac when i said you should make a plane any fly in for the expo, i was joking.
So do i take it this is a "Big Mac" with wings.
Looks good thus far but will it be a chicken or an eagle.
Pete.
Sometimes it just works |
| |
VK4AYQ
Guru
Joined: 02/12/2009
Location: AustraliaPosts: 2539 |
| Posted: 04:51am 06 Jun 2010 |
Copy link to clipboard |
Print this post |
|
Hi Mack
We should call you PLASTIC MACK I think, or maybe core flute man. All aside very good hobby though. Those spars are huge but will ad weight to aid penetration so that's.
good.
All the best
Bob
Foolin Around |
| |
MacGyver
Guru
Joined: 12/05/2009
Location: United StatesPosts: 1329 |
| Posted: 06:02am 06 Jun 2010 |
Copy link to clipboard |
Print this post |
|
Pete
Those spars are necessary! If you saw me fly, you'd see why. If I have a chance to do an outside loop even in the face of certain demise, I take it!
I weighed the one nearly-finished wing and it weighs 5.9 ounces even with the two spars. I plan on making a "receiver" in the welded-aluminum fuse to hold the wings with a small, nylon 1/4 - 20 screw on each side or maybe a snap-in detent pin; don't know which yet, to hold the wings on.
I built one similar to this years back and it'd do a snap roll so violently, it literally corkscrewed through the air. I tore the wings (built-up balsa and heat-shrink covering) off one doing a snap roll with it at about 80 mph once back in the day!
If you've ever done an "Emil-man" in a real airplane, that's how violently I fly. For the rest of the crew, that's an outside loop where you are merely flying straight and level, minding your own business and you hold the rudder pedals each tight and jam the throttle and the joy stick full forward. The blood from your toes pools just behind your eyes as you look "up" at the ground!
Both my parents were pilots; my mom flew stunt and her last (and almost fatally last) flight was in a Stutz; the engine quit on take-off.
[Quote=Downwind] . . . but will it be a chicken or an eagle?
Neither. The wing design was influenced by the red-tailed hawk and the mechanics by the Starship Enterprise!
I'll post more on the toy airplane build as it happens. Working on the ax-fx again tomorrow.
. . . . . MacEdited by MacGyver 2010-06-07
Nothing difficult is ever easy!
Perhaps better stated in the words of Morgan Freeman,
"Where there is no struggle, there is no progress!"
Copeville, Texas |
| |
MacGyver
Guru
Joined: 12/05/2009
Location: United StatesPosts: 1329 |
| Posted: 12:30am 07 Jun 2010 |
Copy link to clipboard |
Print this post |
|
Update June 6, 2010
Finished the wings today. Here are the pictures:
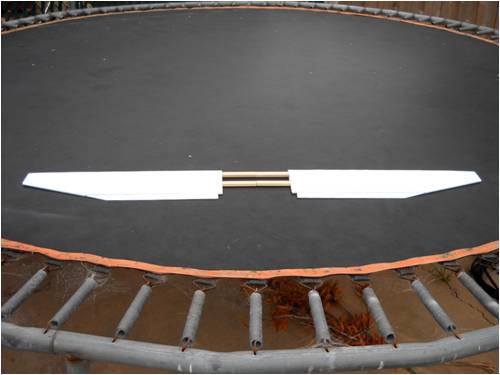
Here are both wing halves lying side by side on the kids' trampoline
in my back yard.
Here's another view with the left wing atop the right at the center and
a little closer together.
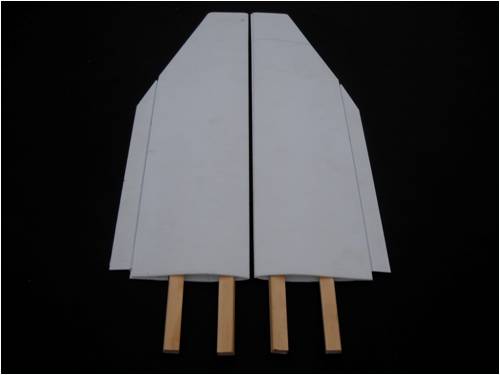
Here's something to remember when you're scratch-building from your
head: Build a "left" and a "right" wing. They're mirror images of each
other and the last thing you need is two of one side! I only mention
this because I've made that mistake before; it happens 
A little paint so we can tell top from bottom when this puppy is a thousand
feet high and some hardware then it's on to the next portion.
The fuse is next on my to-do list. After that, we'll stuff in the radio-
control gear and then we're off to test things out at the flying field.
. . . . . MacEdited by MacGyver 2010-06-08
Nothing difficult is ever easy!
Perhaps better stated in the words of Morgan Freeman,
"Where there is no struggle, there is no progress!"
Copeville, Texas |
| |
gabbro
Newbie

Joined: 14/06/2007
Location: AustraliaPosts: 4 |
| Posted: 12:14am 28 Aug 2010 |
Copy link to clipboard |
Print this post |
|
Hey Mac,
Any progress on the airplane build? I'm really curious to see how it all comes together. |
| |
MacGyver
Guru
Joined: 12/05/2009
Location: United StatesPosts: 1329 |
| Posted: 02:56am 28 Aug 2010 |
Copy link to clipboard |
Print this post |
|
gabbro
Well, err, um . . . . no. That's the way it goes sometimes. 
I'm well known for my "starts" but not very good at finishing stuff done on a whim, like the little plane. I was going to build the fuse out of welded aluminum tubing, but thought about how that would feel crashing through the side of my head at 100 mph and decided to do it another way. I suppose anything going that fast would likely do me in, but I think I'll go for something that might crush instead of penetrate like mach ammo!
What I'm looking for is a neat toy helicopter body that someone will let me use as a mold plug. Pete (I think it was Pete anyway) told me a cool way to make a mold around a plug using aluminum foil, then lay up a casting inside that, but I haven't found the shape I want yet. I could carve one out of balsa and use it as a plug, but that's even more time than just waiting for the "perfect" shape to come bouncing down the road.
Right now, I'm in the middle of what I really like to do and that is designing and building windmill generators from scratch. I'll get back to the little plane soon sometime, but like I said, I have to build the fuse first so I can match motor, battery, controls, etc. and make it all fly well.
Hang in there; sorry for the delay. I've got a lot of plates in the air right now.
. . . . . Mac
Nothing difficult is ever easy!
Perhaps better stated in the words of Morgan Freeman,
"Where there is no struggle, there is no progress!"
Copeville, Texas |
| |
