
|
|
Forum Index : Other Stuff : How do you Solder wires?
| Author | Message | ||||
Jaffasoft Senior Member Joined: 03/11/2010 Location: AustraliaPosts: 102 |
Hi, I've got around to begin Soldering a first F&P i have cut all the copper wires to do the first in the Star configuration. I bought a roll of Resin Cored Solder, Diam 1.0mm, type 35, 60/40% from Dick Smiths. Sanded the copper wires and twisted the first three together. Heated the 80Watts Soldering Iron and began to melt solder to the wires. This is where the problem is coming in! The Solder goes everywhere else but doesn't stick or melt into the wire. Can someone give me some specs of solder or methods to get better results. I've never done much Soldering.  |
||||
| Robb Senior Member Joined: 01/08/2007 Location: AustraliaPosts: 221 |
This sanding..... you have to get it back to bare copper. I find scraping with a hard square edged blade works best. Something like the non sharp edge of a stanley knife. You want to see bright copper. The solder will not take to the copper until the copper is hot enough. You can't put a hot iron to cold copper and expect it to instantly solder. Put the iron on the copper. Add a small amount of solder at the junction of the two to help with heat transfer. Wait until the solder starts to flow onto the copper. Then and only then start to add more solder. |
||||
| Gizmo Admin Group Joined: 05/06/2004 Location: AustraliaPosts: 5186 |
Hi Jaffasoft. Youtube is your best bet. Look up "Soldering Wires" ( or as our american friends call it "soddering"  ), and you should find a few videos of the technique. ), and you should find a few videos of the technique.
First, make sure the soldering tip is clean, wipe it on a damp sponge, or dab a little solder on it and flick it off, but watch out where the hot old solder goes flying off to. The tip will remain clean for only a few seconds, dust and moisture in the air will soon contaminate the solder layer on the tip, so its an idea to clean the tip just before each new soldering join. Next press the tip against the wire/pad/terminal/whatever, wait 1 second for it to heat up the join, and them press the solder into the join. Only needs 1 or 2mm of solder to be fed in, and should only take 1 or 2 seconds. Thats it. Practice it a few times once you have it sorted. The soldering iron is heating the join, and then you are feeding the fresh solder into the heated join. The solder contains flux, and you need to keep feeding the joint with flux while the iron is heating it, dont keep the iron on the joint once the solder has been removed. The YouTube videos will help heaps. Glenn The best time to plant a tree was twenty years ago, the second best time is right now. JAQ |
||||
| Jaffasoft Senior Member Joined: 03/11/2010 Location: AustraliaPosts: 102 |
OK, thanks for tips.. think not scrapping it all off well enough may be the problem, will give it a try now. |
||||
| Jaffasoft Senior Member Joined: 03/11/2010 Location: AustraliaPosts: 102 |
It just runs off and won't stick to it! It's scrapped right back to shiny new copper twisted tight together, heated with a clean iron tip and little solder on the tip to transfer the heat. Clean the tip again and heat and dip some solder onto the wires it just runs around it through the tip everywhere and everywhere but sticking to the wires runs around the wires and all end up below the between the coils somewhere in a blob. Will look at some youtubes must be an art to this i thought it was a pretty simple straight forward process. |
||||
| brucedownunder2 Guru Joined: 14/09/2005 Location: AustraliaPosts: 1548 |
Hi Jaff,,, get a short piece ,300mm, of ordinary car or house copper wire .. Cut a short length or two and remove the plastic covering . This now is your practice piece .. Twist the cleaned ends together .. Heat the iron ,clean the tip on a damp piece of foam plastic ,,like the clearners you use when doing the wshing -up in the kitchen. Apply some solder and it should stick to the hot iron and be shiny. apply this to the twisted wires and after a couple seconds ,apply some more resin-cored solder til it flows all around a nd along the twisted section .. Do this 10 times , you'll get it perfect .. Bruce Bushboy |
||||
| Jaffasoft Senior Member Joined: 03/11/2010 Location: AustraliaPosts: 102 |
Yep improving a little bit. Will give some practive on some other wires. This video is what you have described i think. http://www.youtube.com/watch?v=BLfXXRfRIzY This'd be a good link to go in the instructions page! |
||||
| Jaffasoft Senior Member Joined: 03/11/2010 Location: AustraliaPosts: 102 |
How to Solder Video YoutTube |
||||
mid north Matt Regular Member Joined: 06/01/2011 Location: AustraliaPosts: 58 |
for a small job like 2 twisted wires to save time getting the solding iron hot i just use a gas ciggy lighter,heat wires till the solder flows into the joint,works every time and easy to carry on the bike or in the car Pt Wakefield Matt |
||||
| Jaffasoft Senior Member Joined: 03/11/2010 Location: AustraliaPosts: 102 |
Woow.. i made a hydrogen cell the other day and once get a home made touch for it it can make a very small fine hot flame that might be handy for thing like that to. Though don't think i will carry a Hydrogen cell in my pocket. |
||||
| Jaffasoft Senior Member Joined: 03/11/2010 Location: AustraliaPosts: 102 |
At the end of the day and we're getting a good lot of steady rain here in Hamilton, Vic. I just finished soldering it up, not sure of it's integrity but it is lighting up a 12Volt LED hooked raw to it 'as is'. Thanks for your guidance seems the timing is the key. I also dipped the end of the tip well in lots of solder and tap it back into an old pan of scrap solder. Still it's much easier to solder the thick 16 gauge to the thin wires. It was the three twitched that was bit unstable for me. |
||||
| Jaffasoft Senior Member Joined: 03/11/2010 Location: AustraliaPosts: 102 |
Photo of first finished Star Configuration F&P generator. 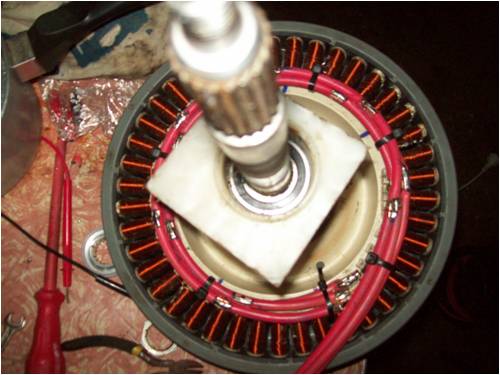
Not sure why i can't IMAGE link direct to Google's Picasa would be handy if you could. |
||||
| Jaffasoft Senior Member Joined: 03/11/2010 Location: AustraliaPosts: 102 |
Just finished number two on midnight. 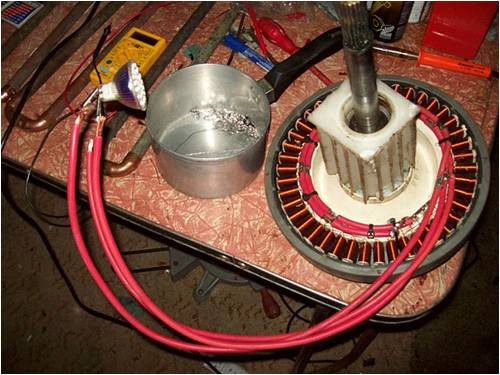
|
||||
| Tinker Guru Joined: 07/11/2007 Location: AustraliaPosts: 1904 |
When I have to solder thin wires together I always 'tin' them individually first. This shows right away where the wire needs more cleaning.Only when each wire is nicely tinned all around do I twist them together and do the final soldering. Its important that there be no solder blobs on the individual wires or the twisting together is not easy. Practice makes perfect with this soldering task. BTW, the blobs of solder you saved in your pan will not work well for soldering wire since the flux has disappeared. The blobs might be useful for pre tinning some thicker wires, do use a resin stick (looks like a felt tip pen) to put flux on your work first. Klaus |
||||
| Jaffasoft Senior Member Joined: 03/11/2010 Location: AustraliaPosts: 102 |
No (to the pen). How do you "tin" a wire? Tink i know what you mean by "Tin" cause i started to notice the soldering iron tip would go a glowing silver color on first dipping solder and tapping the solder off into the pan again and then fade to blackish if left little. I don't even know if a new soldering iron Tip need to be used bit to get working but did notice eventually it went all silver after i applied the dip in solder tips. What i eventually did was: Warm the sire first. Then tin the tip and get some fresh solder on the tip and apply the tip again. Begin dabbing the solder wire at the heating wire until it begins to melt and get that stuff in there as quick as by putting it on the hot wire near the tip and around but not directly on the tip. Didn't know the old solder flow solid would not be any good for reuse. Tinker the thinker. Tink i taw a tinished F&P motor though I'm not sure.. time for another tinny! |
||||
| The Back Shed's forum code is written, and hosted, in Australia. | © JAQ Software 2026 |
