
|
|
Forum Index : EV's : EV Conversion
| Author | Message | ||||
Trev Guru Joined: 15/07/2006 Location: AustraliaPosts: 639 |
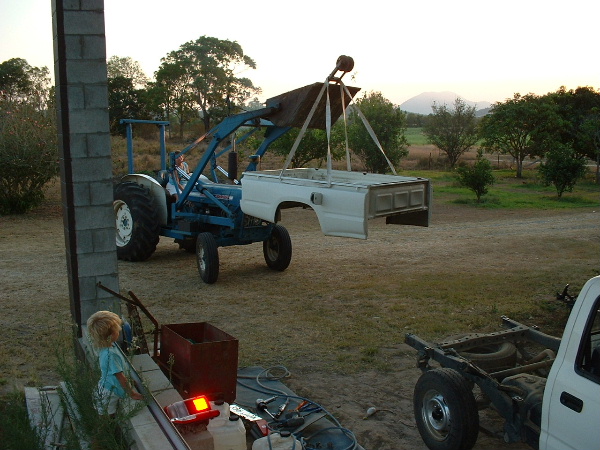
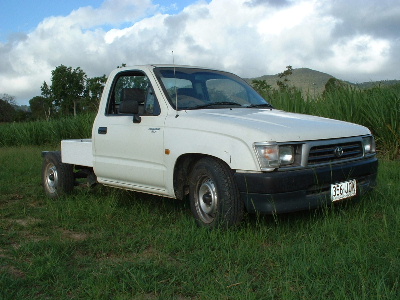
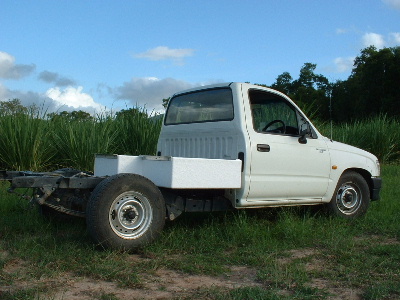
30/11/06 Hi All, Finally started the Electric Vehicle (EV) conversion. The plan is now to focus with this to completion, so I will endeaver to keep you all updated on progess. The vehicle is a 2000 Hilux. For those of you that don't know, This extension to our business (EV Parts & Conversions) we have been working on for some time. We now have all the necessary bits and just starting the hard stuff now - remove all petrol equipment, design & manufacture the adaptors, battery holders, and fit out all the electrical stuff. Canopy is off, Ute Body off, measured up for battery box to be fitted under tray, obtained steel and other materials. The battery box has been cut out. You too can convert your car. Info gleaned from a number of sources, indicates that general cost for electricity is $1 per 100km. Petrol can't compete. And then with solar and wind power - you take a guess???????? Hav'n Fun Trev Foundry & Fibreglass P O Box 55 (326 Proves Road) Kuttabul Qld 4741 Ph/Fax: 0749540285 Mobile: 0423125400 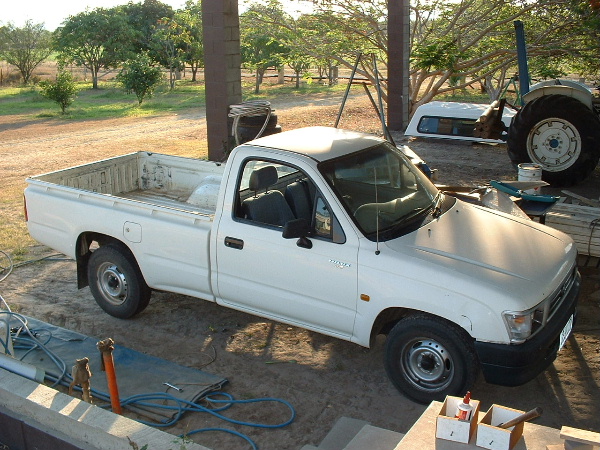
 Trev @ drivebynature.com |
||||
| Trev Guru Joined: 15/07/2006 Location: AustraliaPosts: 639 |
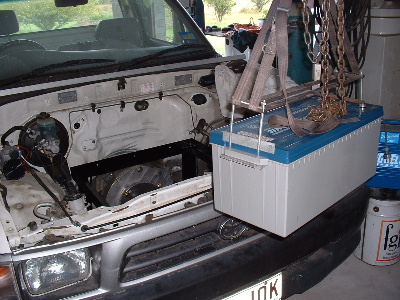
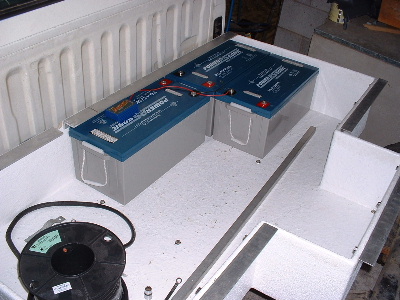
The vehicle now is stripped as much as posible. Engine, Engine computer control, radiator, exhaust, fuel tank, fuel lines, all clutch parts, air cleaner, bolts & brackets (everything possible) are all out. We have a pile of spares if anyone is interested???? The battery box for the back (under tray) is made from ply and fibreglass coated inside & out. It will hold 10 x 226 A/hr batteries. Just sitting in place for the pic. The steel work is done underneath. 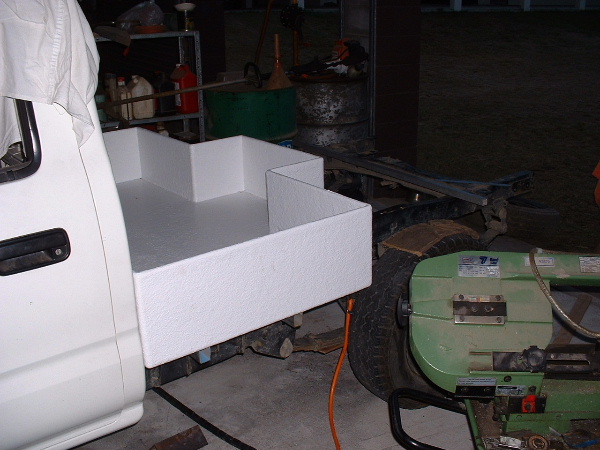 Trev @ drivebynature.com |
||||
| Trev Guru Joined: 15/07/2006 Location: AustraliaPosts: 639 |
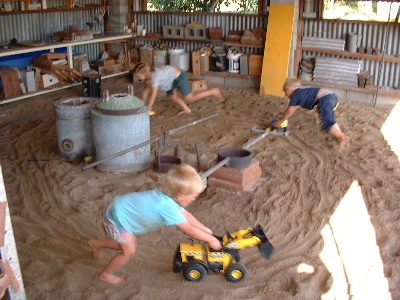
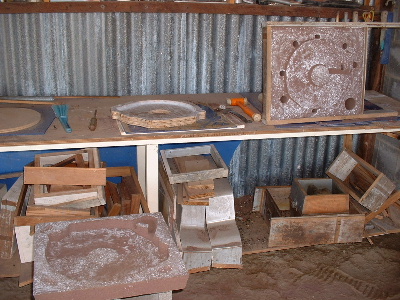
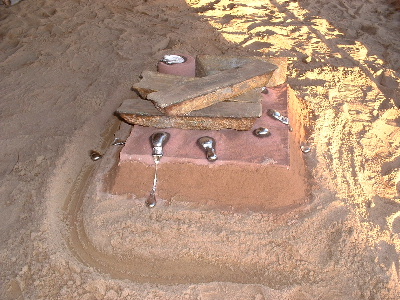
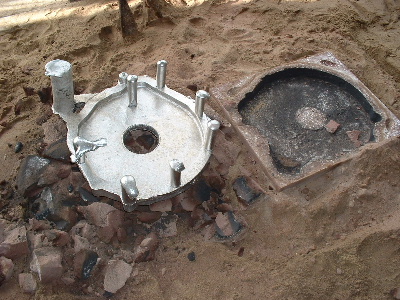
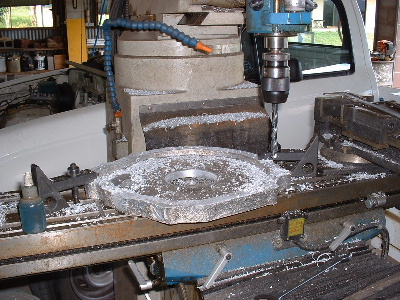
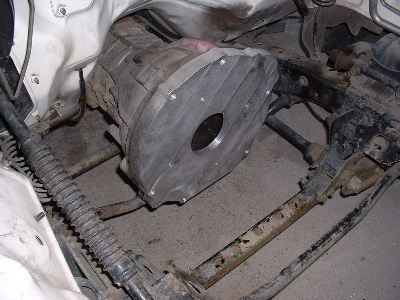
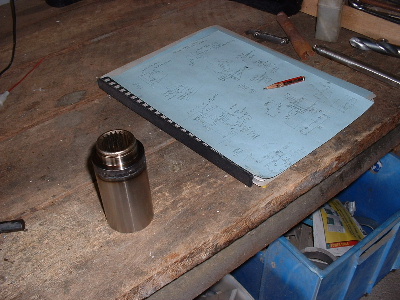
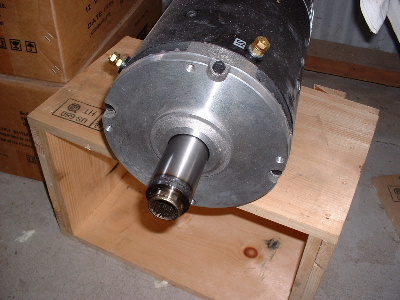
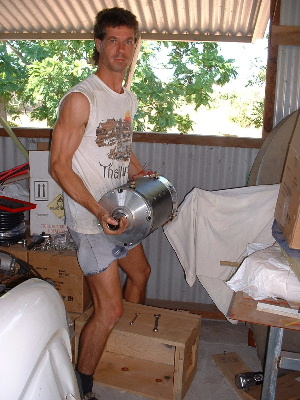
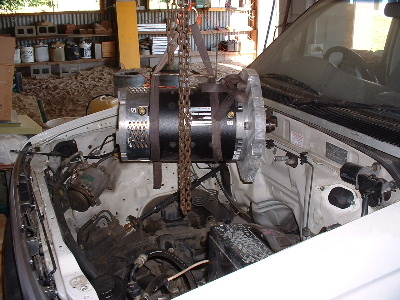
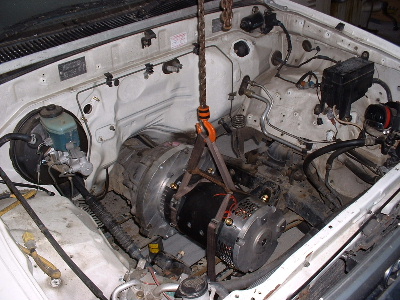
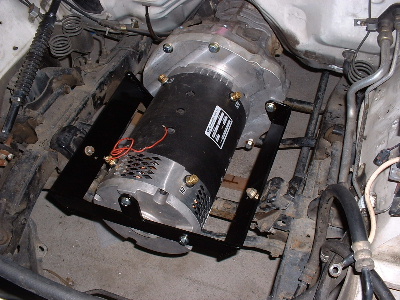
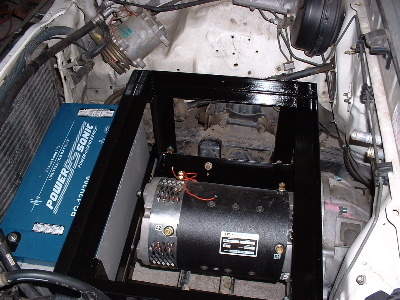
Another busy week. Started with getting the motor out of the box, measuring everything up, & drawing rough sketches of what had to be made to fit the motor to the gearbox. The adaptor plate pattern made from ply. Then kick the kids out of my sand pit (Foundry) and get the piece cast in alloy. Machine the adaptor plate on the mill. On to the lathe to machine the shaft connector. The spline is out of the centre of the clutch plate, the machined part is heat shrink onto this spline centre and then TIG welded. There is no clutch needed so it is removed. The motor stops when throttle is released. Gear changes can then happen, but is not generally needed because electric motors have all torque at zero revs and these will rev to 7000 rpm +. Just put in gear & away you go. Motor was lifted in by hand... just joking...we did it with the chain block and fitted to the bell housing, shaft connected, & fitted perfectly. Next is to make the engine mounts. 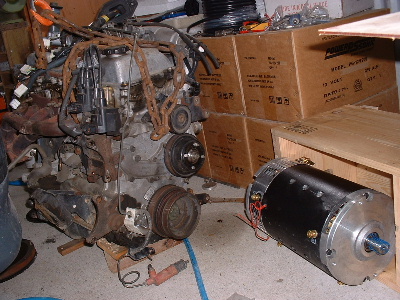 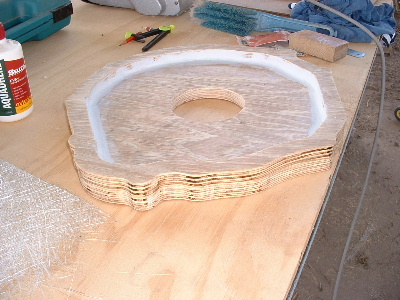
 Trev @ drivebynature.com |
||||
| Feral Newbie Joined: 03/12/2006 Location: AustraliaPosts: 39 |
Trev, Can ask what is the dc motor out of and what are it's details, ie, volts , amps, number of poles and weght ? |
||||
| Gizmo Admin Group Joined: 05/06/2004 Location: AustraliaPosts: 5012 |
This has got me interrested Trev. Once you've finished the conversion you should let us know how much it would cost. The other day I was looking at a car that was for sale, it was a 80's Ford Meteor, and I was thinking EV conversion. They wanted $250 for it, pretty cheap and it was almost road worthy. But then I noticed the automatic gear box, and didn't think this would be suitable for EV conversions, too much power lost in the torque converter. Glenn The best time to plant a tree was twenty years ago, the second best time is right now. JAQ |
||||
Pt w/field Matt Senior Member Joined: 24/02/2006 Location: AustraliaPosts: 105 |
hi gizmo you would not be using the t/converter but would have to have a small hydraulic pump for the hydraulic systems in the box,most modern autos take little power to drive these circuits matt down south |
||||
| Trev Guru Joined: 15/07/2006 Location: AustraliaPosts: 639 |
Some info that may answer some of the q's... Feral, don't know the exact amp draw and its not correct but to get an idea divide the watts by the volts. No idea of the number of poles, these are brand new made by Advanced DC Electric Motors. I am using the FB1-4001 in this Hilux ute. Glenn, you may do away with the gearbox, reverse can be done by reversing the poles on the motor, and speedo can be worked out by other means. It has been done before. Click on the link, scroll down to find the 'White Zombie'. It has no gearbox. http://www.nedra.com/ http://www.nedra.com/ Advanced DC Electric Vehicle Motors A90-4002 Suitable for small vehicle (e.g. golf cart) Operating range 24 to 36V Weight: 25kg Diameter: 17cm (6.7") Length: 24.4cm (9.6") At 24 volts Continuous rating: 1.5 kw (2.0 hp) One-hour rating: 1.65 kw (2.2 hp) At 36 volts Continuous rating: 2.25 kw (3.0 hp) One-hour rating: 2.5 kw (3.3 hp) AOO--4009 Suitable for small electric vehicle (e.g. golf cart, people mover) Operating range 36 to 48V Weight: 25kg Diameter: 17cm (6.7") Length: 26.4cm (10.39") At 36 volts Continuous rating: 3.1 kw (4.15 hp) One-hour rating: 3.5 kw (4.65 hp) At 48 volts Continuous rating: 4.5 kw (6.0 hp) One-hour rating: 4.8 kw (6.4 hp) K91-4003 Suitable for on-road electric motorcycle, or micro car. Not more than 750 kg. Operating range 48 to 96V Weight: 25kg Diameter: 17cm (6.7") Length: 29cm (11.5") At 72 volts Continuous rating: 6.0 kw (8.0 hp) Peak output: 16.5 kw (22.0 hp) At 96 volts Continuous rating: 7.3 kw (10.0 hp) Peak output: 21.3 kw (29.0 hp) X91-4001 Suitable for small to small-medium electric car. Not more than 1250kg. This motor gives excellent performance at 120V in a car under 1000kg. Operating range 72 to 144V Weight: 37kg Diameter: 17cm (6.7") Length: 39cm (15.3") At 72 volts Continuous rating: 7.5 kw (10.0 hp) Peak output: 24.0 kw (32.0 hp) At 96 volts Continuous rating: 9.0 kw (12.0 hp) Peak output: 39.0 kw (52.0 hp) L91-4001 Suitable for small to medium-size car. Not more than 1600kg. Better suited to vehicle weight under 1250kg. This motor is physically similar to the x91-4001, but wound to give higher speed. Maximum system voltage for this motor is 120V. Operating range 72 to 120V Weight: 37kg Diameter: 17cm (6.7") Length: 39cm (15.3") At 72 volts Continuous rating: 8.7 kw (11.5 hp) Peak output: 28.5 kw (38.0 hp) At 96 volts Continuous rating: 10.3 kw (13.6 hp) Peak output: 46.5 kw (62.0 hp) At 120 volts Continuous rating: 12.0 kw (16.0 hp) Peak output: 54.0 kw (72.0 hp) 203-06-4001 Great in a small to medium-size car for its superb acceleration and top speed. Will drive a family-sized electric car very well. Not more than 2000kg, but better suited to vehicle weight under 1600kg. Operating range 72 to 120V Weight: 48.5kg Diameter: 20cm (8.0") Length: 37cm (14.7") At 72 volts Continuous rating: 12.1 kw (16.0 hp) Peak output: 31.5 kw (42.0 hp) At 96 volts Continuous rating: 14.4 kw (19.0 hp) Peak output: 51.0 kw (68.0 hp) At 120 volts Continuous rating: 16.3 kw (21.7 hp) Peak output: 62.0 kw (83.0 hp) FB1-4001 The top of the range. This motor gives stunning acceleration in a car 1200 to 1500kg. Drives a 2000kg vehicle very well. High torque means you get superb pulling power from a standstill or accelerating from low speed. Ideal for sports or racing cars. Has been successfully used in heavy electric vehicles. Generating up to 100 horsepower at 144V, this motor redefines the concept of a car that is "fun to drive"! Operating range 72 to 144V Weight: 65kg Diameter: 23cm (9.1") Length: 39.7cm (15.6") At 72 Volts Continuous rating: 12.8 kw (17.0 hp) Peak output: 31.5 kw (42.0 hp) At 96 Volts Continuous rating: 15.0 kw (20.0 hp) Peak output: 52.5 kw (70.0 hp) At 120 Volts Continuous rating: 19.0 kw (25.2 hp) Peak output: 63.8 kw (85.0 hp) At 144 Volts Continuous rating: 21.5 kw (28.5 hp) Peak output: 75.0 kw (100.0 hp) Typical application for various motors Up to 750 kg K91-4003 Lightweight (e.g. motorcycle) X91-4003 Low current draw, range-minded L91-4003 Higher acceleration and performance 750 to 1250 kg X91-4001 Very efficient, range orientated L91-4003 Excellent acceleration and performance 203-06-4001 High performance, good in hilly areas 1250 to 1600 kg L91-4003 Commuting with few hills 203-06-4001 Performance oriented, hills & inclines FB1-4001 Hills, inclines & payloads 1600 to 2000 kg 203-06-4001 City commuter vehicle FB1-4001 Heavy loads, area with hills & inclines Pricing The following table lists the current pricing within Australia. Prices - include GST - subject to change without notice A00-4009 �$1419 K91-4003 �$1595 X91-4001 �$2222 L91-4001 �$2195 203-06-4001 $3245 FB1-4001 �$3949 Trev @ drivebynature.com |
||||
| Trev Guru Joined: 15/07/2006 Location: AustraliaPosts: 639 |
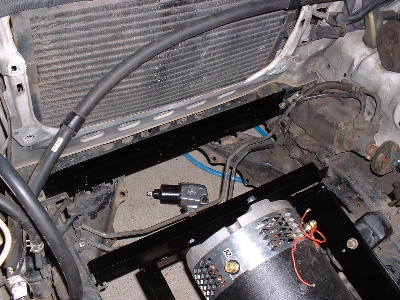
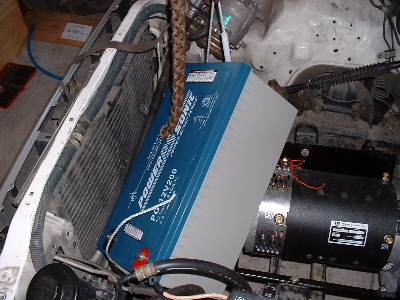
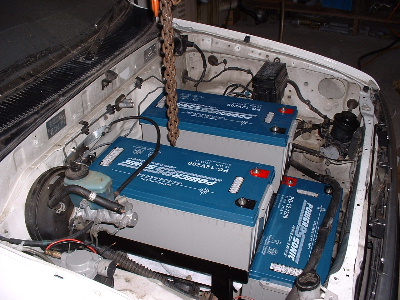
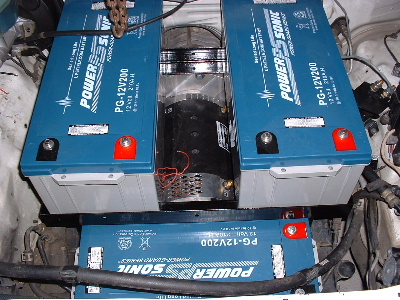
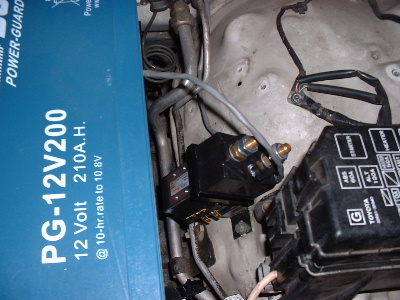
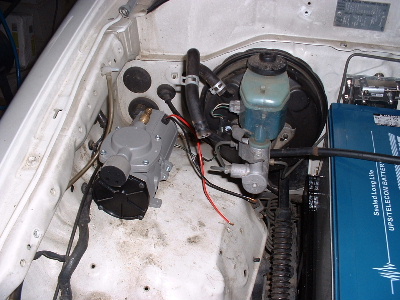
Engine mounts, and battery mounts made, painted and fitted. Steel under the battery box is also painted. Of course there is always something to annoy along the way....battery rope handles......several batteries are sitting in place, 3 under the bonnet. 1 is for the 12v system, lights, blinkers horn etc. Normally it is not needed to be this big, but I plan to experiment - see if it is possible to run the air conditioner using the 12v system. The other 2 are to be connected in with the 10 from the battery box in the back, thus making up the 144v system for the drive motor. The battery box is bolted down, with 3 batteries in. The throttle potentiometer is fitted and cable is connected. Main contactor is bolted on. Vacuum pump is sitting where it needs to go.  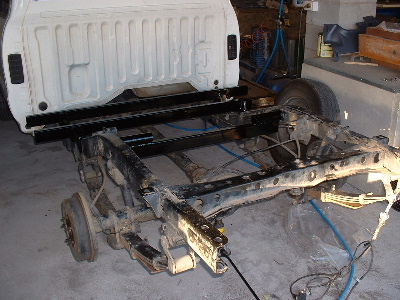
  Trev @ drivebynature.com |
||||
| Trev Guru Joined: 15/07/2006 Location: AustraliaPosts: 639 |
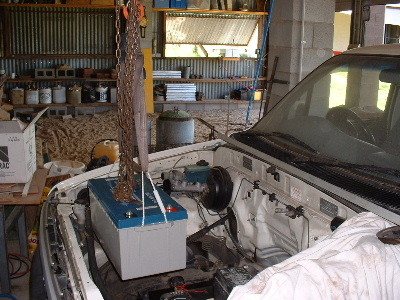
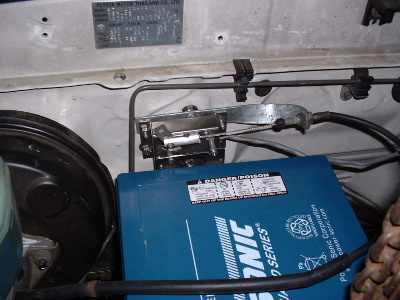
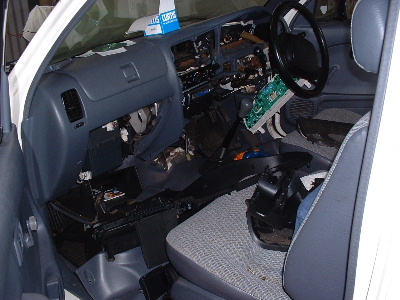
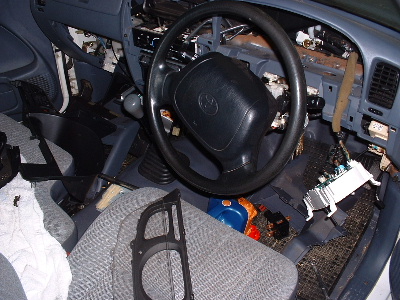
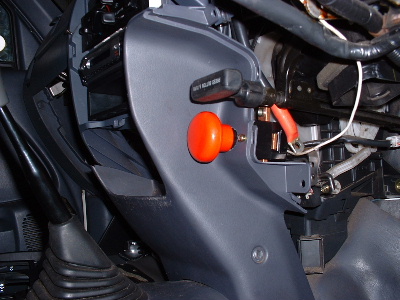
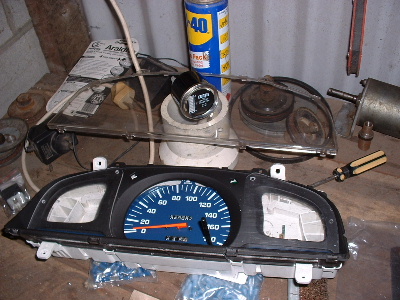
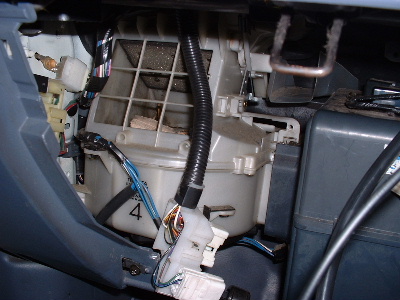
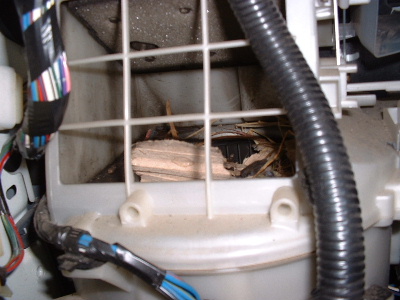
A lovely week, hope you all had a great Christmas. Some very exciting happennings this week, mounted the motor speed controller, 12v battery charger & the 144v battery charger. The vacuum pump is mounted. The BIG RED knob(safety push button)is also mounted. All batteries are fitted. Then to running the cables. Excellent. We have acchieved the 144 volts at the front, with 50mm cable clamped securely underneath from rear battery box to the batteries at the front, in flex conduit. The 50mm cable lengths are cut to connect the BIG RED knob. Still to connect is the Main Contactor, Speed Controller, & Motor. But of course there is the dash, my intention is to make it look authentic, not just adding higgilty piggy. There are still some panel meters I wish to put in, but don't have yet. In the pic of the instrument panel you can see the 'fuel guage' for the 144 volt system. As for disasters this week, none really...... but I hate RATS. Found a nest in the air-con fan. May you all have an exciting NEW YEAR, ALL YEAR.  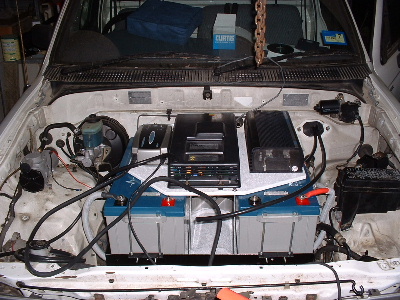
  Trev @ drivebynature.com |
||||
| Trev Guru Joined: 15/07/2006 Location: AustraliaPosts: 639 |
Had to sort out a few thing on the net, so have looked at the windmill stuff a little also. The motor is up and running yesterday. 12v charger is now connected. The 144v will be soon. And the Megapulse units. Need to make the tray and fit the panel meters (I don't have yet). Can't wait to drive it....... Trev @ drivebynature.com |
||||
| Trev Guru Joined: 15/07/2006 Location: AustraliaPosts: 639 |
Got the 144v Zivan battery charger connected and left both this and the 12v charger run to charge up the batteries, while I continued tidying up some minor things. The vacuum pump for the brakes fitted and connected. It is activated when the brakes are applied. This is the only thing Marcy doesn't like. It sounds like some one doing a big loud fart!!! Some did say once, "skid marks" in that part of the clothing. The Megapulse (battery desulphator) units are fixed and connected in the front, except one, ordered another batch (any body want one). These in the front are all 12v units. In the back, there will be 2 x 48v Megapulse units and a 24v Megapulse unit. It would have been better if I had all the batteries for the 144v system in the back, then I could have just used 3 x 48v Megapulse units. The dash it still in pieces, still some wires to trace and reconnect, like the dash fan. It used to go through the engine computer control which is no longer in there. Other minor things still yet to do also. The most exciting event was this afternoon we took it out for a spin. First went to see my sister and Marcy's brother (married) (they met at our engagement)(keep it all in the family). About 2 km from here. They too are interested in this electric concept. Spent some time there. When Dale woke from his afternoon nap, Dale and I went for a ride, down the cane paddock. Marcy then had to take it over to the neighbors. It is excellent. I cleaned up the shed a little while she was gone. When Marcy got back, I continued tracing some wires. Still don't have the amp and volt panel meters that I want for the dash, but we are getting much closer now, I have found two suppliers, tomorrow I should have some more info. Internet is so much easier to find stuff compared to years gone by, but still can be so frustratingly time consuming. The main fuse to the speed controller should be here tomorrow too, 500 amp. Not sure if I have said it before, but I beleive that I will be the first in Australia to be able to do a complete EV package. Motors from one place, speed controllers from another place, batteries from another, chargers from different places, panel meters, fuses, vacuum pump etc are all different places, the list goes on. It has been quite some time to get this all together too. We started considering the concept a bit over a year ago. And its all very exciting. Anybody that is interested just give us a call, we will take anybody for a ride & discuss the options available. 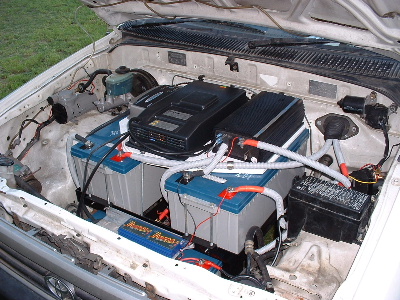 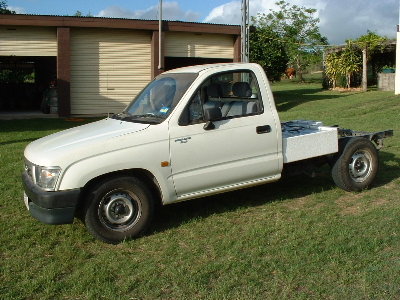
  Trev @ drivebynature.com |
||||
| Trev Guru Joined: 15/07/2006 Location: AustraliaPosts: 639 |
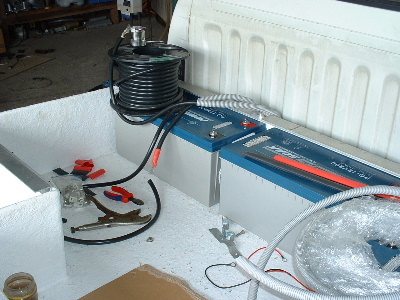
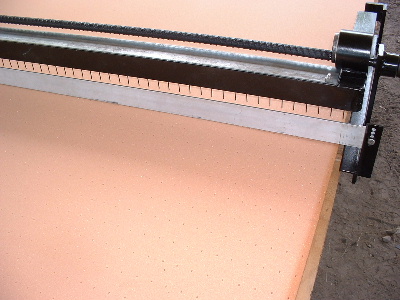
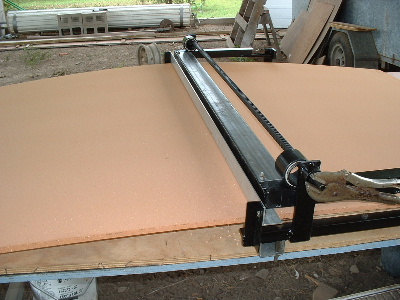
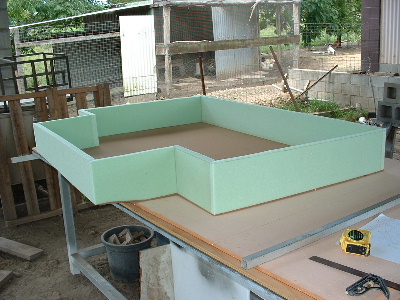
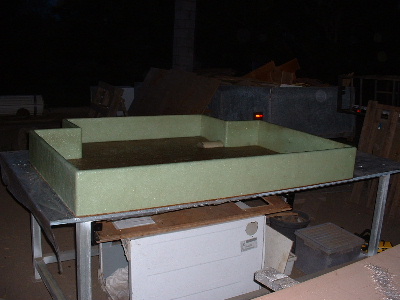
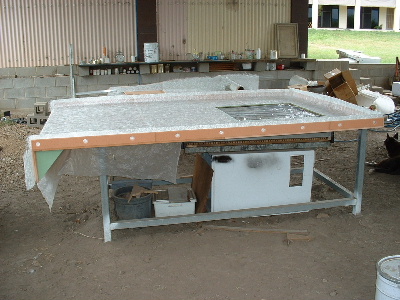
Not much done to the EV this week. Wasted too much time building a hole punch machine,(& dismantling, modifying, & reassemble too many times). In the past I used to have the holes put in at Foxcon Aviation. If you want a good, extremely light F/g plane, these are worth a look. I cast & machine the reduction drive units, front wheel mounting, and the brake parts, for these planes. The 5mm Klegecell foam is Ok with the drill to wind it through, but the 12mm is just too much. I had to wind it through with a vice grip as a handle. The holes are to add a sthrengthening tie between the layers. Just like the centre of an I beam. I used the 5mm Klegecell foam for the base on the rear storage box, ( which fits under the tray) and 25mm Polyurethane foam for the sides. The top - the tray itself - will be made from the 12mm Klegecell, all glassed over. It will be very light. In terms of the electrics, the fuses (500 amp)have arrived. The amp & volt guages have been orderd, but I expect will take some time - hopefully not too long though. 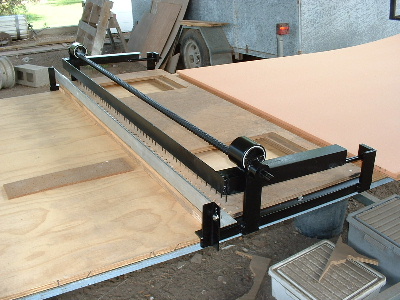 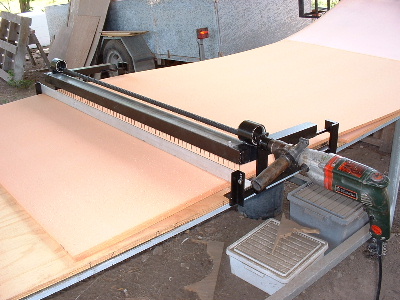
  Trev @ drivebynature.com |
||||
| Trev Guru Joined: 15/07/2006 Location: AustraliaPosts: 639 |
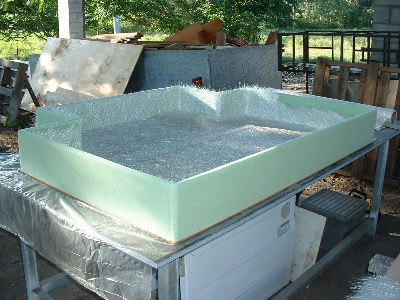
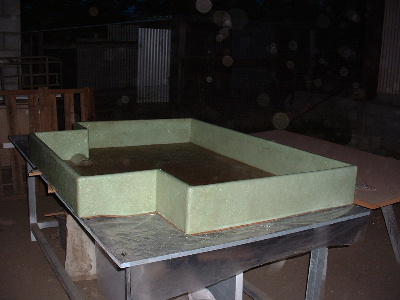
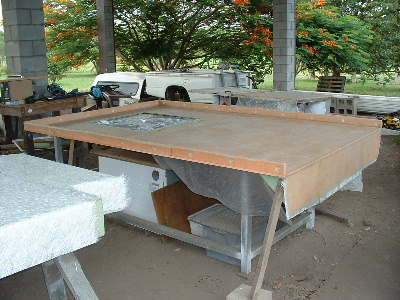
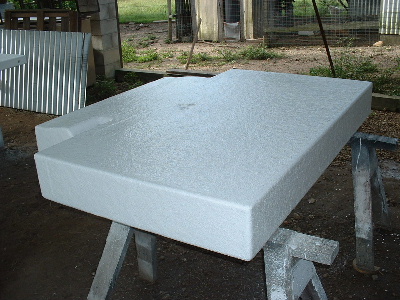
More foam & fibreglass work. The rear storage box is glassed on the outside. The tray is together now with only the under side glassed. 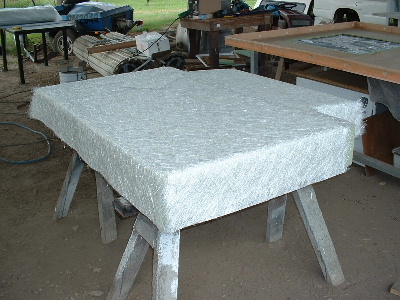 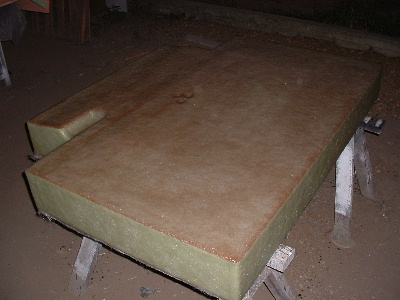
  Trev @ drivebynature.com |
||||
| Trev Guru Joined: 15/07/2006 Location: AustraliaPosts: 639 |
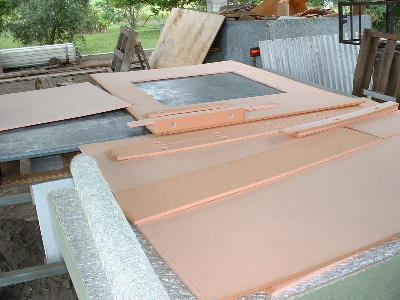
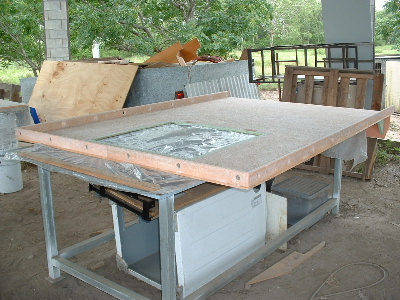
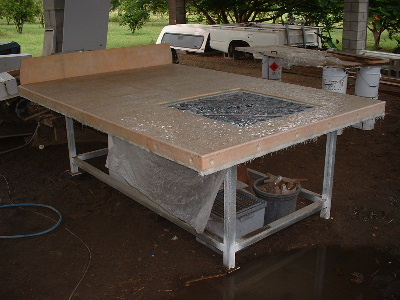
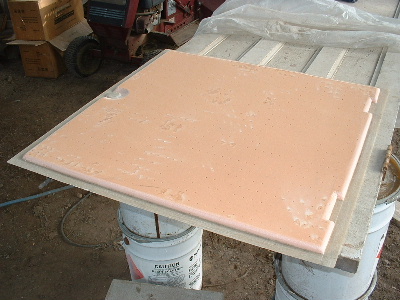
Difficult circumstances has hindered progress with the fibreglass work. High humidity and wet, wet , and more wet. 275mm. Just for Bruce - 10.8 inches. A pic of the rain, the flash picks up some of the rain droplets. It also shows where a storm took out the tail on the double White Pointer wind gen. It was only a piece of acrylic. One day this will be made of fibreglass. Nothing else damaged. We had not long finished laying the glass on the top side of tray and down came the rain and very strong wind. I am glad the resin had gelled off, or else there would have been a real big mess. The top side of the hatch lid is glassed. The indent is for the lock to go in, so that the lock will not be higher than the top surface of the tray. 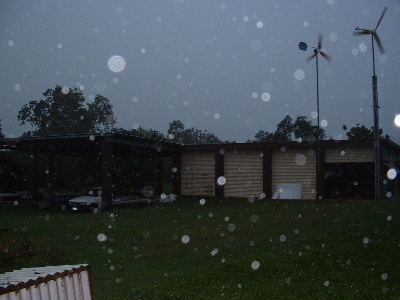 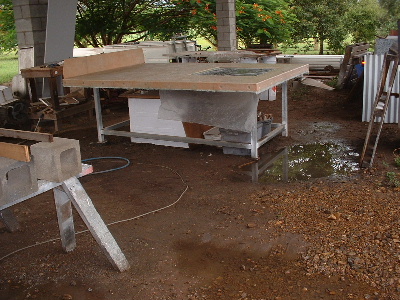
  Trev @ drivebynature.com |
||||
| Trev Guru Joined: 15/07/2006 Location: AustraliaPosts: 639 |
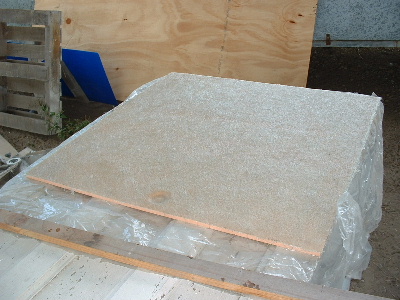
More wet, even more than last week. 316mm (12.44 inches). Even had to drive through flooded waterways to get out of here thismorning. It is not finished yet either. As I type, it is still raining. Though, we did get some time ealier this week where the humidity (& rain) dropped off enough and so we got the tray and rear storage box flowcoated. (And our grass 2acres? & our neighbours grass 1 acre? cut). The hatch lid has been cleaned up & underside foam is shaped for the lock & hinges etc. I did get glass on it, but not photo'd. Another whole day with the fan on the dash. It really had me confused for so long, but I have discovered that Toyota have used negative switching for a positive power. It has nothing to do with the engine control computer, as I originally thought. It appears to be a break in the wire somwhere. Still will require more time. 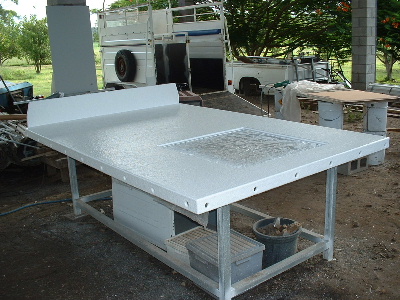 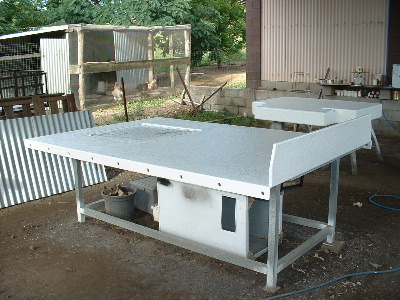
  Trev @ drivebynature.com |
||||
| Trev Guru Joined: 15/07/2006 Location: AustraliaPosts: 639 |
Hi all, This thread is getting too long, so will start another thread " EV 2" For those who have not yet navigated this site yet (MUM & DAD), this is the link to Trev's Diary, http://www.thebackshed.com/Windmill/FORUM1/forum_topics.asp? FID=9 Trev @ drivebynature.com |
||||
