
|
|
Forum Index : Microcontroller and PC projects : Armmite H7 first project build.
| Author | Message | ||||
| KeepIS Guru Joined: 13/10/2014 Location: AustraliaPosts: 2099 |
Hope it's OK to post a few photos of my first Armmite controller prototype, this was initially designed and built around the Micromite Plus Explore 100 running at 120 MHz, as the cost escalates and the problems I had with 100 MHz parts being supplied instead of 120 MHz parts, I decided to switch to the Armmite running at 400 MHz, the $36 price for a fully assembled development board was the clincher. And the fact that the same code written for the Micromite Plus worked first time with only the pin assignments changed. The controller drives 3 stepper motors and has a number of micro switch and optical sensors for sensing Home and limits, also has a touch plate for cutter home and cutter edge detection, manual position control by rotary encoders or automated control via touch screen entry or full automated return to any saved job settings, and the list goes on. The back panel has 4 main sockets with 24 I/O connections plus two USB ports that are the connections to the 2 Digital scale slide position sensors, there is a Micro SD holder, console port and a Keyboard port with a wireless keyboard receiver plugged in.  - - 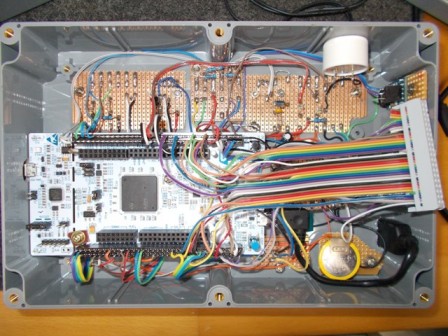 I built and wired this up over the past two days, the dam thing worked first time, did not have to change a single wire - I must have had a really good day. A few menu screen shots. 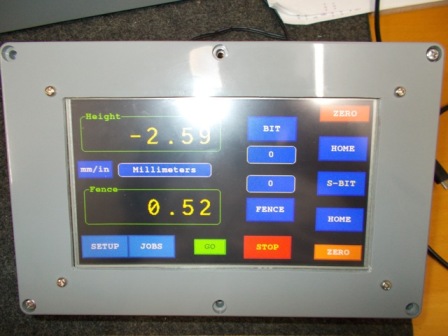 - -  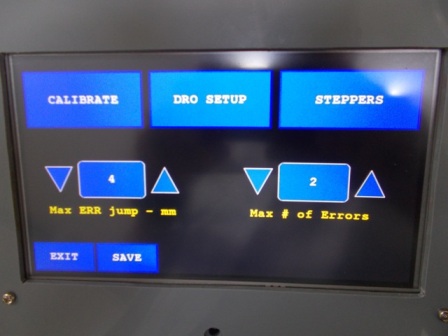 - - 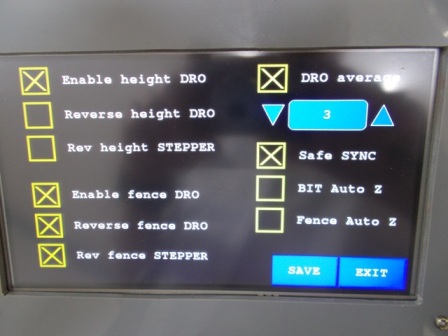 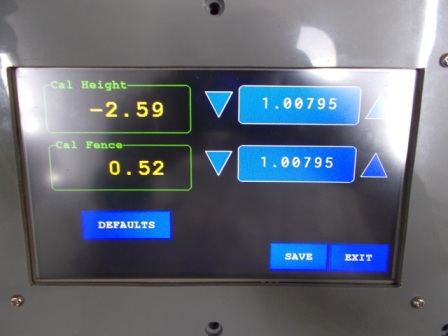 - - 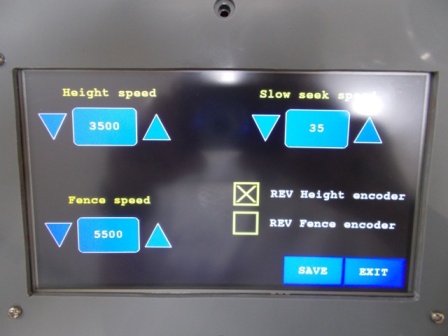 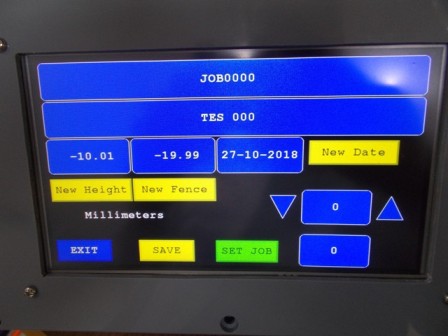 Absolutely love the Armmite with MM.Basic. NANO:Inverter V 8.2ks - Linux AvrDude GUI script V4.1 |
||||
Azure Guru Joined: 09/11/2017 Location: AustraliaPosts: 446 |
Very nice work KeepIS, thanks for sharing the pics and info. What it is controlling a CNC or something else? Would love to see the code if you are willing to share it. |
||||
| KeepIS Guru Joined: 13/10/2014 Location: AustraliaPosts: 2099 |
Thanks, it's controlling a router table, so fence and router motor lift (CNC Spindle motor). I started out to redesign everything to do with this type of woodworking machine with respect to 100% dust extraction, I mean nothing left on the table or in the air no matter what job, having achieved that it just went on from there. Using CNC bearing rails and bearing nut drives, steppers, dual drives on the fence (think wide heavy gantry about 1 meter wide) and driven at each side. All of this possible due to prices which have dropped to rock bottom along with low cost DRO's - managed to sync and decode the slide scales independently of the small OEM head readouts and it took off from there. I may release the code at a later time as there is some interest in it at the moment. Actually it's all pretty simple due to MM.Basic, it's driving and decoding of the scale slides that's a bit tricky, especially in Basic for obvious critical timing reasons. It's nothing new really but everyone who sees it is is just blown away by how accurate and simple it is to use. EDIT: There is something misleading in the first post, I said 2 USB ports for the DRO scales, actually it should read 2 USB sockets as the DRO's use these as interconnects, they are not running USB protocol. NANO:Inverter V 8.2ks - Linux AvrDude GUI script V4.1 |
||||
| The Back Shed's forum code is written, and hosted, in Australia. | © JAQ Software 2026 |
