
|
|
Forum Index : Microcontroller and PC projects : CMM2: Case and panels assembly hints.
| Author | Message | ||||
Grogster Admin Group Joined: 31/12/2012 Location: New ZealandPosts: 9051 |
Hello all.  As I am making a few of these now fully boxed up with panels, I thought I would post a quick thread showing you how to assemble the CMM2 board into the case with the panels, WITHOUT losing your marbles, as it can be a bit fiddly.  STEP 1: Gather together the CMM2 board, the case, the panels, the spacers and the securing screws. �Place the half of the case with the PCB standoff's on a flat and LEVEL surface. 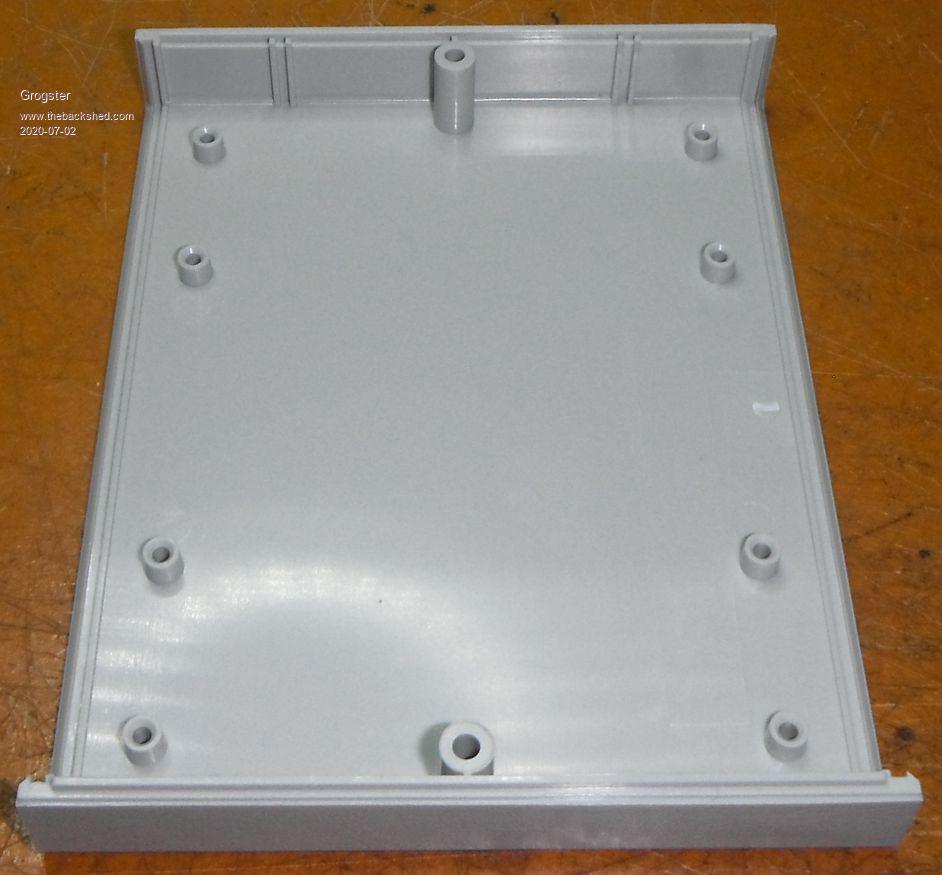 This is important, as a level surface will help prevent the spacers from sliding off the PCB standoff's moulded in the case half. STEP 2: Place the four 5mm spacers as shown here. 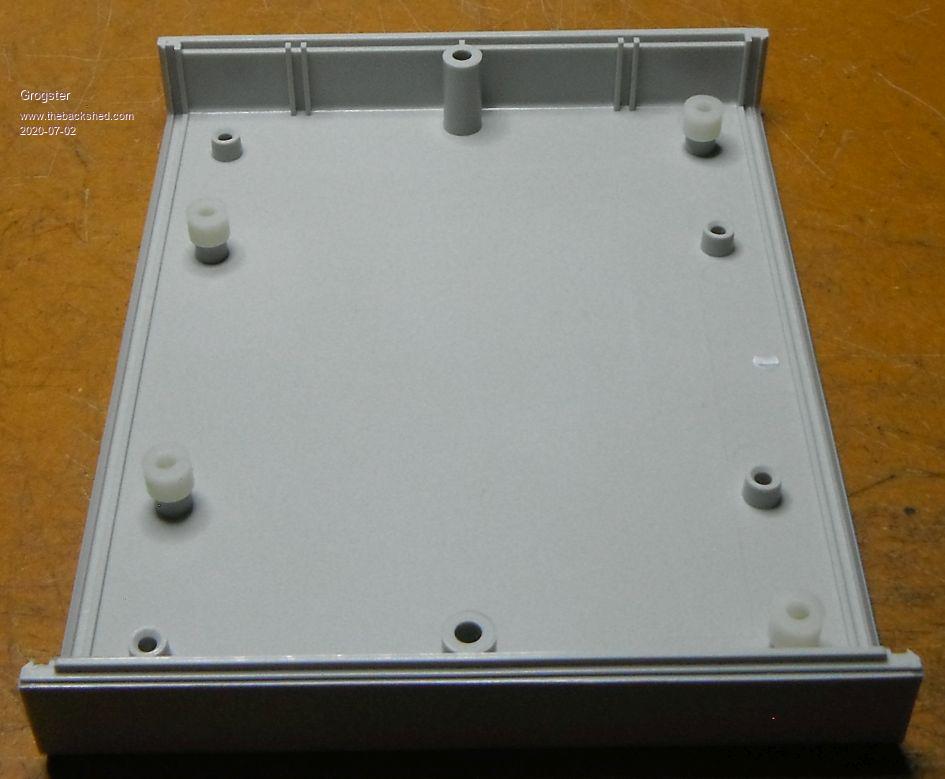 You don't need to glue the spacers down, or even stick them down, just place them as shown, and then DON'T bump the case! STEP 3: Fit the front and rear panels to the CMM2 board, then pick up the board using both hands VIA THE PANELS. �IE: Don't try to pick up the board, as the panels will immediately fall off. �  �Provided you use a SLIGHT side-to-side force to hold the panels against the edge of the CMM2 board, everything will stay put while you lift it and lower it into place in the case. �Provided you use a SLIGHT side-to-side force to hold the panels against the edge of the CMM2 board, everything will stay put while you lift it and lower it into place in the case.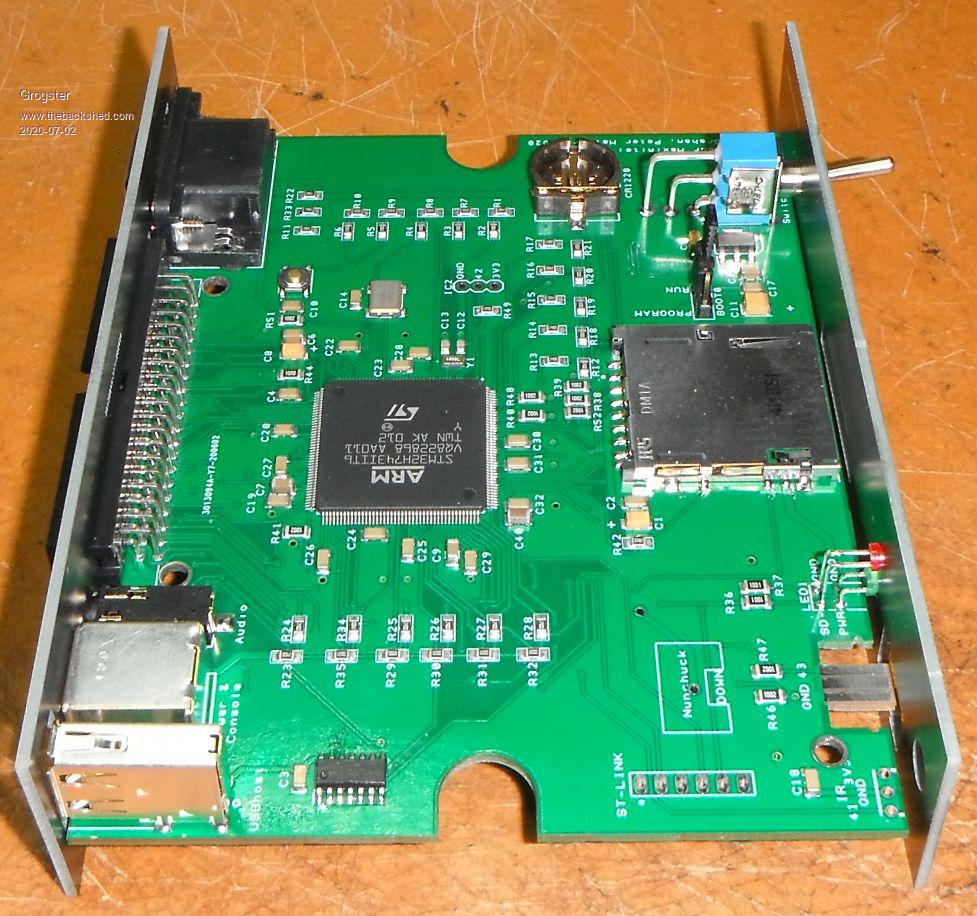 STEP 4: GENTLY lift the board up off the table, and lower it down into the case. �You must be precise, and you must also be gentle as you line up the front and rear panels in the slots in the case, but it is very easy to do, once you have done a couple of them. �The key is to be SLOW and precise, and DON'T try to rush it or force it, or you will bump the case, and you WILL dislodge the spacers. 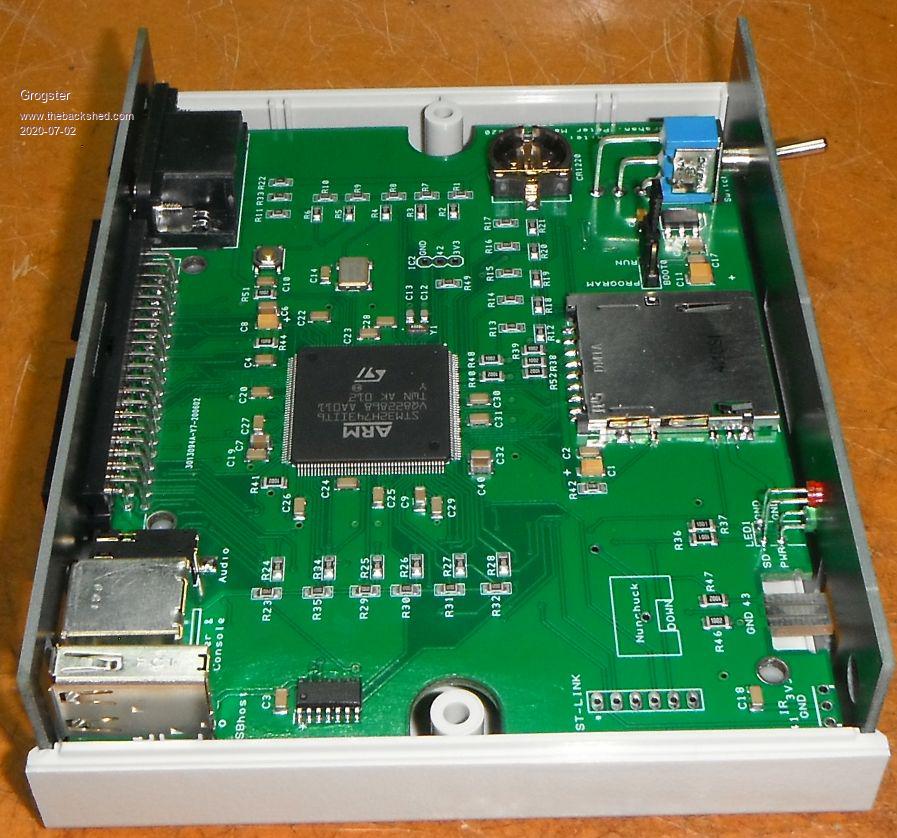 This image shows the complete panels and CMM2 board assembly lowered into the case, but not yet screwed down. STEP 5: Visually check that the spacers are still where they should be, and if not(they will move very easily), then use a fine screwdriver to GENTLY coax the spacers back to where they should be. 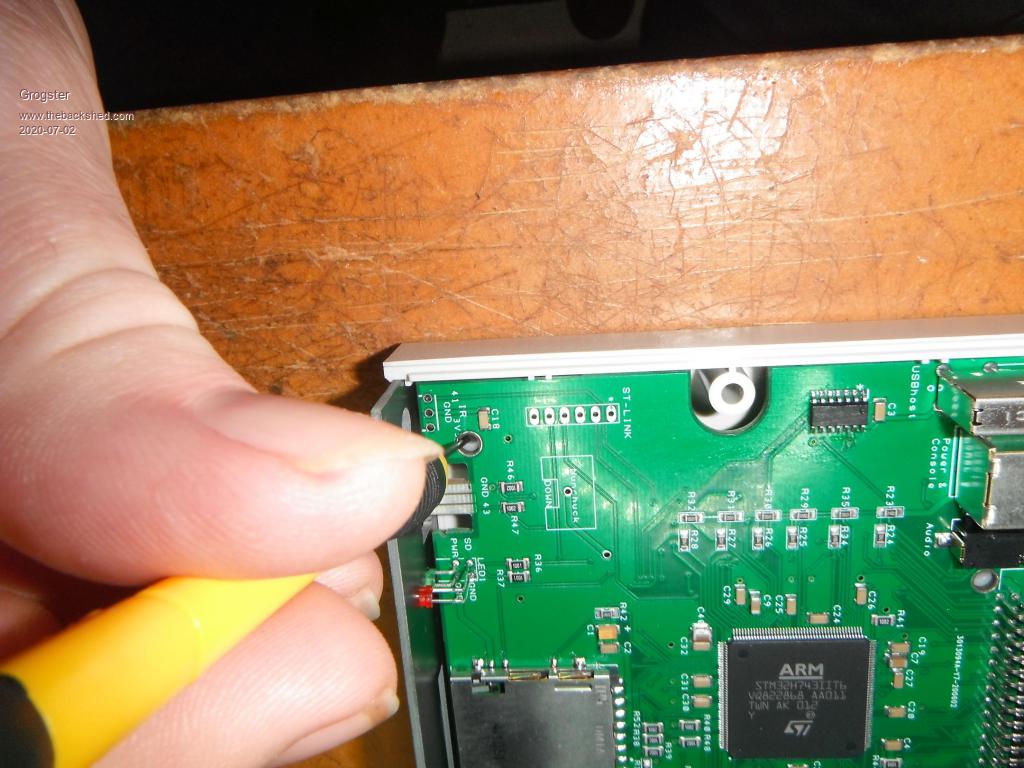 STEP 7: Now fit the screws and tighten. �You DON'T need much force, so don't overdo it, or you will just strip the plastic standoffs then they are useless.  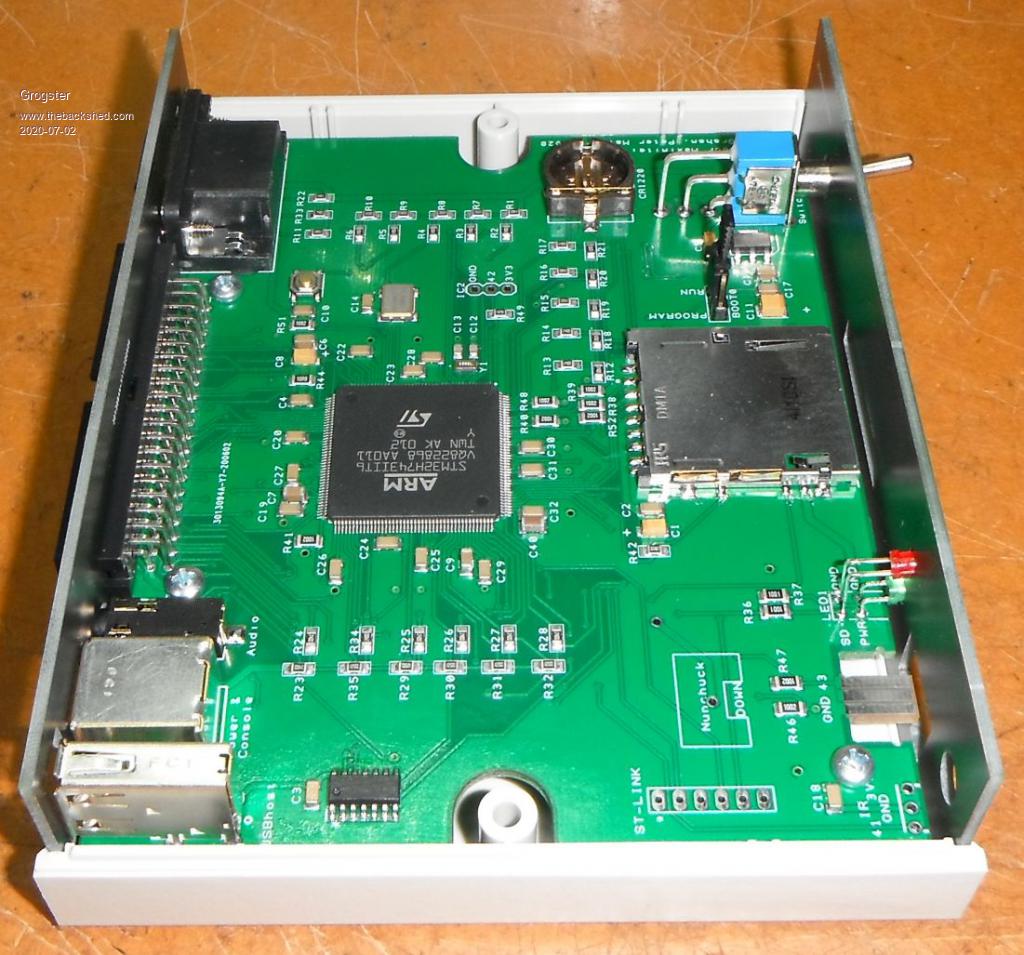 Hopefully that will help people save sanity while assembling cases. Edited 2020-07-02 15:27 by Grogster Smoke makes things work. When the smoke gets out, it stops! |
||||
| Volhout Guru Joined: 05/03/2018 Location: NetherlandsPosts: 3496 |
Hi Grogster, Does one screw require a nylon washer ? Looks like traces are quite close to the screwhead. 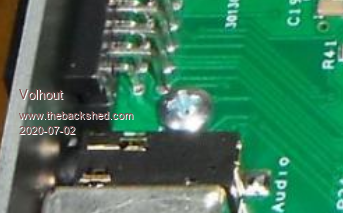 Thanks, Volhout PicomiteVGA PETSCII ROBOTS |
||||
| Poppy Guru Joined: 25/07/2019 Location: GermanyPosts: 486 |
About initially cutting the screws threads into the plastic I recommend to do it first before mounting the PCB, very softly, not overstressing and adding some lubricant, a drop of oil, vaseline/petro jelly or something. My best choice always is some silicone oil when it comes to metal on plastic, but always very sparingly for not covering any surrounding contacts.  Andre ... such a GURU? Andre ... such a GURU? | ||||
| Raul Newbie Joined: 06/05/2020 Location: United KingdomPosts: 11 |
Why not, what risk? |
||||
| Poppy Guru Joined: 25/07/2019 Location: GermanyPosts: 486 |
Hearing Damage! Andre ... such a GURU? | ||||
| Grogster Admin Group Joined: 31/12/2012 Location: New ZealandPosts: 9051 |
@ volhout: Yes, that is probably a good idea, but I have never found it to be a problem so long as the hole is not plated-through, and/or so long as you don't do the screws up so tight as to cut through the soldermask with the screw head. @ Poppy: NEVER used any kind of lube to cut threads in plastic. An interesting idea! Re: Dave - It really depends on how you catch him on the day. Sometimes, he is full of praise for something, but get him on a bad day, and he can rip a design to bits for no other reason then that he just does not like it, or would not do it that way. Smoke makes things work. When the smoke gets out, it stops! |
||||
| Poppy Guru Joined: 25/07/2019 Location: GermanyPosts: 486 |
I always do and specifically on this case (for the CMM1 it was) I did it very intentionally and it worked really fine. Just have some feeling in your fingertips for it and the screws must be of correct size of course. Andre ... such a GURU? | ||||
Quazee137 Guru Joined: 07/08/2016 Location: United StatesPosts: 522 |
On a project many many years ago I use a similar case also need spacers. Now the trick is to break a tooth pick in half and drop point up into each hole with spacer. I had the bigger type of pick for holding fat hamburgers in the buns and they where thick enough to go in snugly and made lining up the pcb a snap. Be SAFE and above all else have FUN. Quazee137 |
||||
| abraxas Regular Member Joined: 16/06/2020 Location: CanadaPosts: 99 |
Dumb question but searching the web turned up scant info... where does one buy a CMM2 case for their board? |
||||
| matherp Guru Joined: 11/12/2012 Location: United KingdomPosts: 8567 |
google "G738 instrument case" and "G738A instrument case" |
||||
| Turbo46 Guru Joined: 24/12/2017 Location: AustraliaPosts: 1590 |
Quazee137, That's brilliant! So simple. Match sticks would also do the job. Cut them down to say 5mm above the spacer. Bill Keep safe. Live long and prosper. |
||||
| mkopack73 Senior Member Joined: 03/07/2020 Location: United StatesPosts: 261 |
Anybody have some STL files for 3D printing one? Seems silly to buy something when I have a printer... |
||||
TassyJim Guru Joined: 07/08/2011 Location: AustraliaPosts: 5882 |
I drilled through the mounting holes and used 2mm countersunk bolts 16mm long to mount the board in the case. The bolts are permanently fixed to the case and no worries about spacers getting out of place. Jim VK7JH MMedit MMBasic Help |
||||
| Turbo46 Guru Joined: 24/12/2017 Location: AustraliaPosts: 1590 |
Is this what you want? Bill Keep safe. Live long and prosper. |
||||
