
|
|
Forum Index : Microcontroller and PC projects : CMM2 in RETRO LIVERY
| Author | Message | ||||
OA47 Guru Joined: 11/04/2012 Location: AustraliaPosts: 982 |
I have a collection of NOS(New Old Stock) AT cases in the shed and decided to house my CMM2 in a baby AT desktop chassis to give it the classic retro feel. I chose the AT format case as it can provide the height needed to house the CMM2 board vertically. I wanted to keep all of the functionality and not modify the current format as much as possible. I was able to get access to the SD card and Nunchuk ports at the rear. I Have the SD led, PWR led and RESET button on the front panel and made a back plate to present the USBhost, Audio and VGA connectors.I have used the original AT power supply as I wanted to utilise the front power switch to also control power to the monitor. The Power/Console USB is connected to the 5V supply. 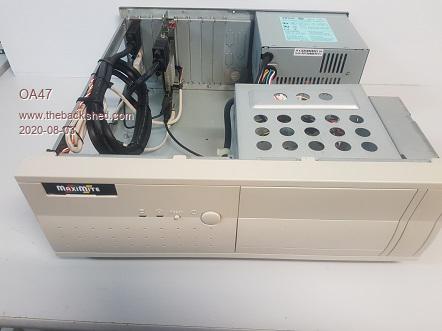 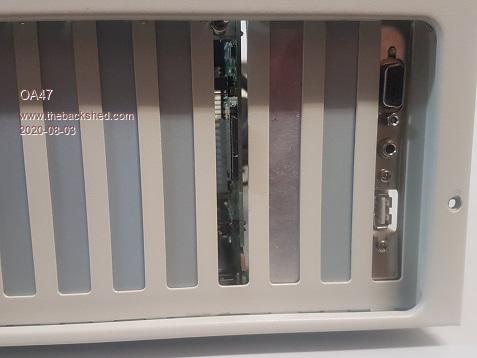  I found an appropriate beige monitor which had inbuilt amp and speakers as well as a beige USB keyboard to match the theme. 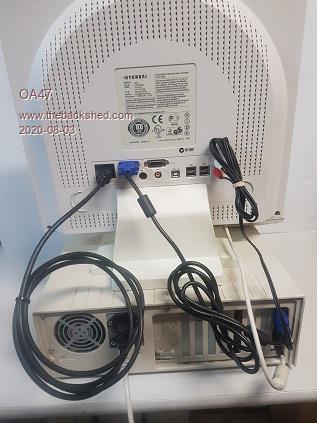 OA47 |
||||
| MauroXavier Guru Joined: 06/03/2016 Location: BrazilPosts: 303 |
I just loved it your idea! Here are some pictures of what I did with my first CMM about two years ago: 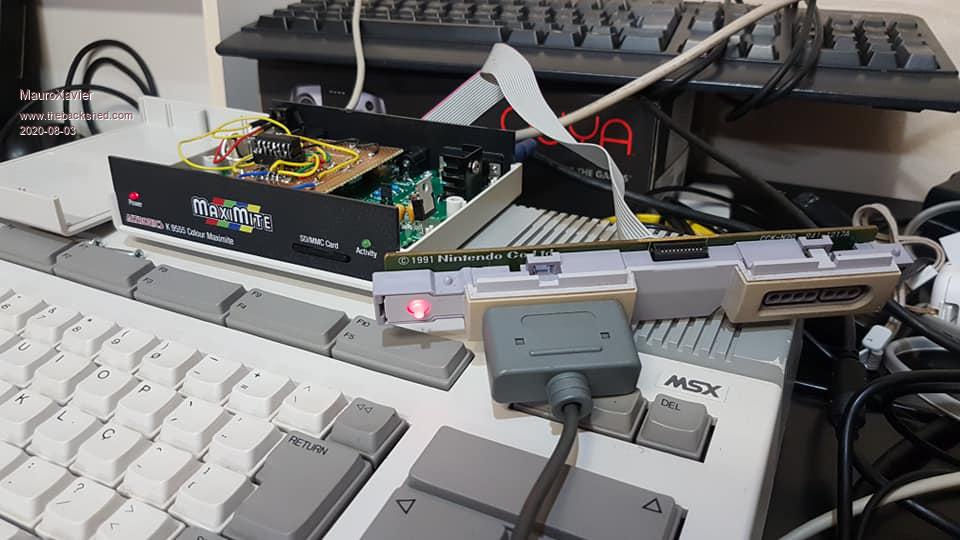 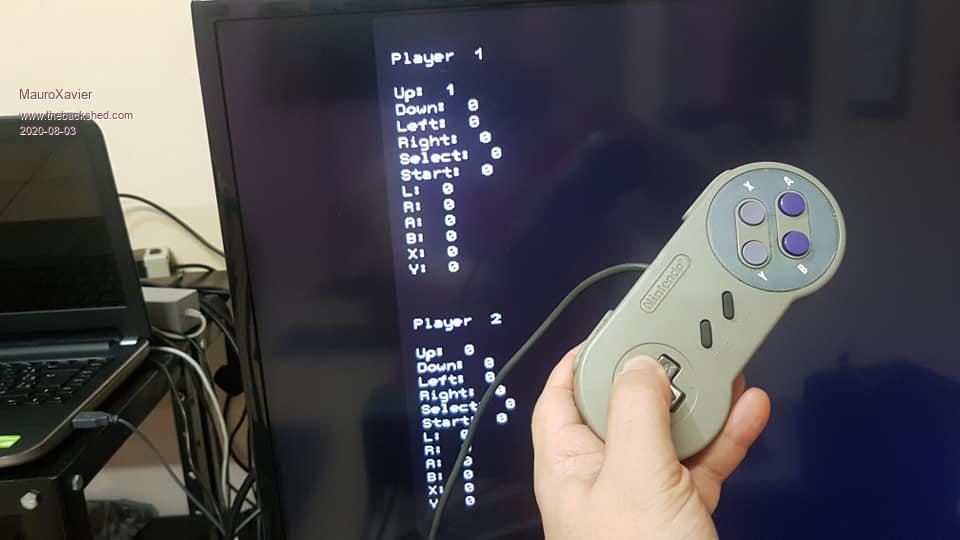 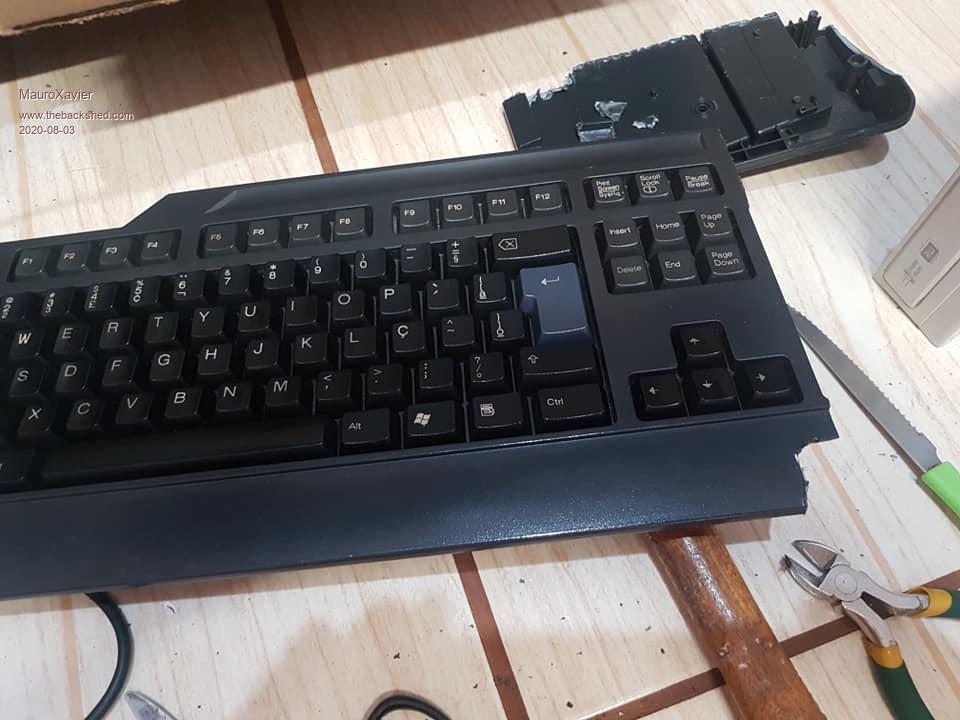 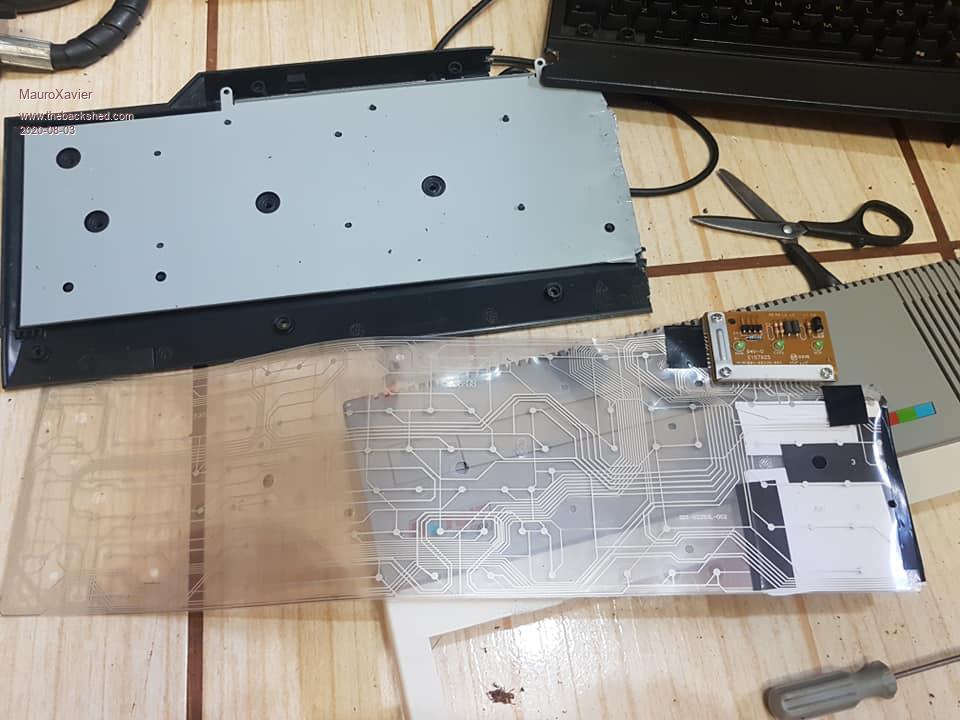 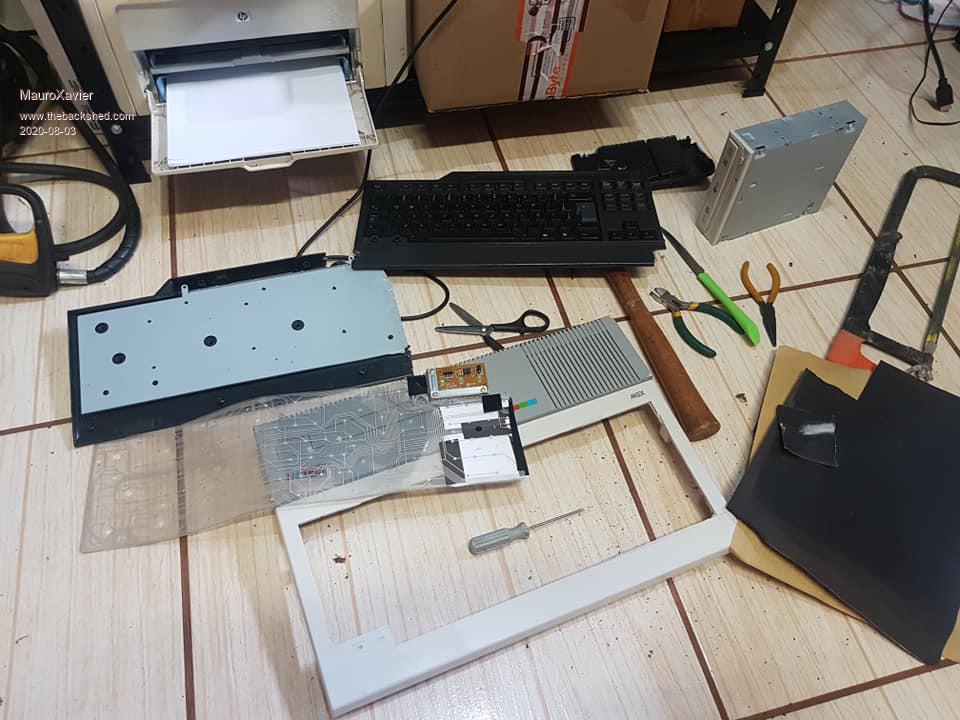 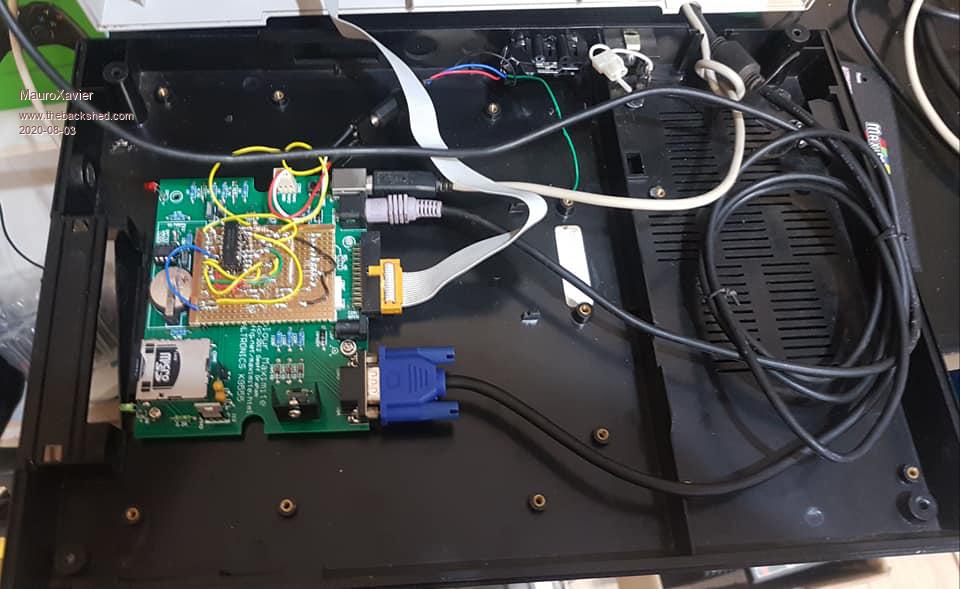 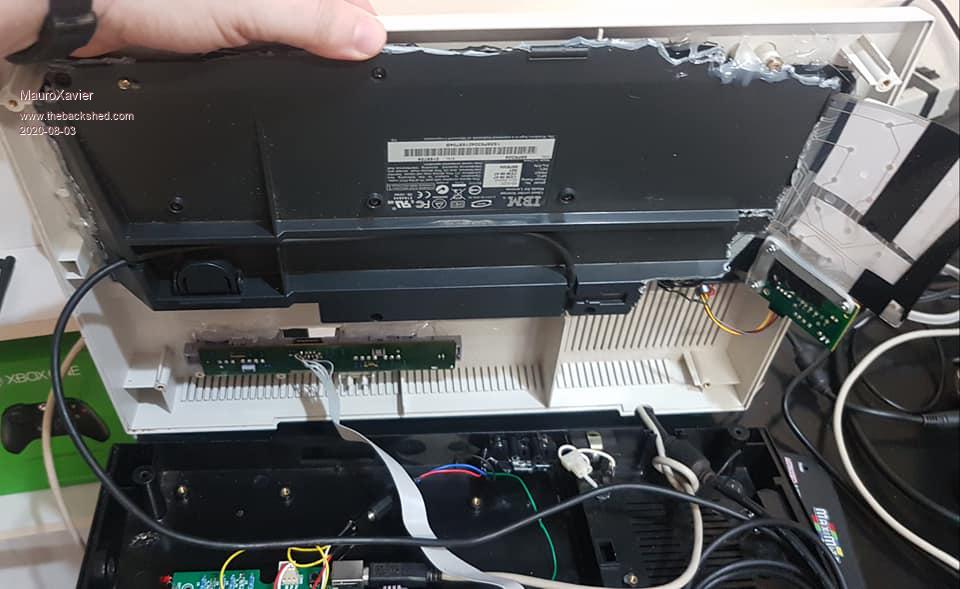 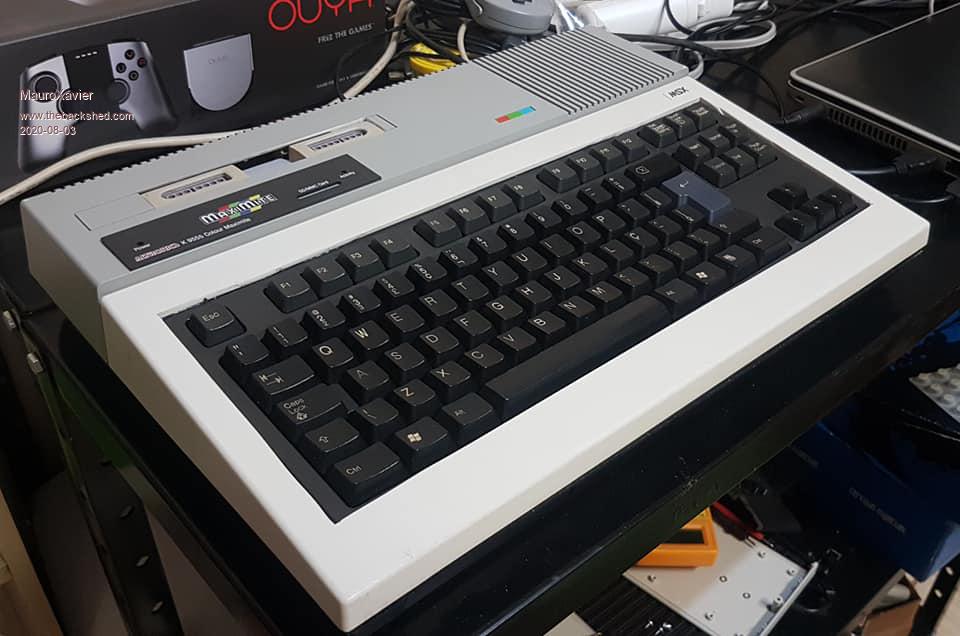 My original CMM have two SNES Control ports and one SN76489 sound chip, but today with our almighty CMM2 none of this is necessary anymore  |
||||
| Atomizer_Zero Senior Member Joined: 04/07/2020 Location: United KingdomPosts: 134 |
Very cool projects! I'm highly tempted to do something similar. If only I had the space for yet another computer xD |
||||
| Volhout Guru Joined: 05/03/2018 Location: NetherlandsPosts: 5066 |
Hi Mauro, From the outside it looks dandy .... inside is "functional". Nice you used the old front panel ... I am surprized to see that the hotglue holds the keyboard in place... After so many hours of programming. Volhout PicomiteVGA PETSCII ROBOTS |
||||
| lizby Guru Joined: 17/05/2016 Location: United StatesPosts: 3363 |
Labor of love. Too cool. PicoMite, Armmite F4, SensorKits, MMBasic Hardware, Games, etc. on fruitoftheshed |
||||
| Volhout Guru Joined: 05/03/2018 Location: NetherlandsPosts: 5066 |
My CMM1:  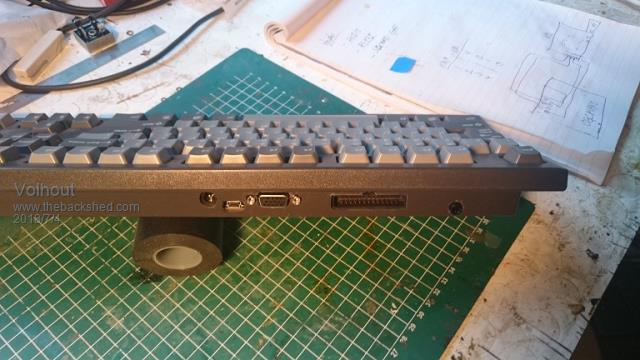 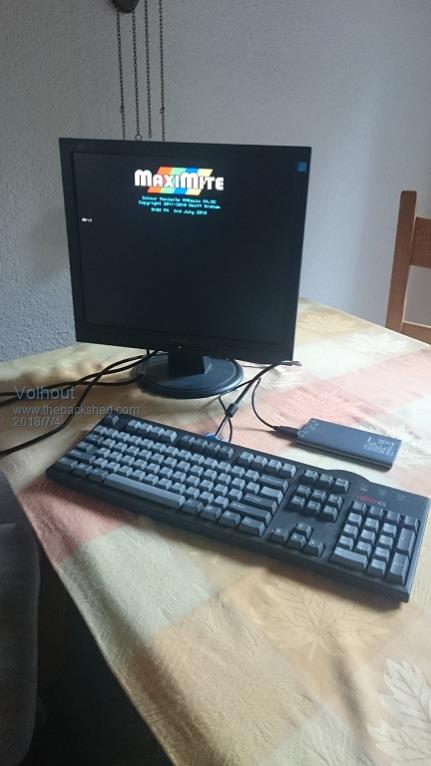 And.....In use by my grnddaughter, playing Mauro's Gauntlet  Edited 2020-08-03 23:06 by Volhout PicomiteVGA PETSCII ROBOTS |
||||
| abraxas Regular Member Joined: 16/06/2020 Location: CanadaPosts: 99 |
Volhout, this is very nice. What is the keyboard you used for this project? Do you have instructions posted somewhere on building this? |
||||
| Volhout Guru Joined: 05/03/2018 Location: NetherlandsPosts: 5066 |
hi abraxax, The keyboard is an old Fujitsu Siemens PS2 keyboard I bought for E0.50 on a flea market, and cleaned. The building instructions are simple: - buy a keyboard that is sufficiently high (a very flat keyboard cannot incorporate the VGA connector, the highest part of this version of my CMM1 board (a CGcolormax2). - Open it up, and plug it into the CMM1 to write down what color wire connects to what pin of the PS2 connector on the CMM1. Remove the cable from the keyboard. - Place the CMM1 at the best location in the keyboard (that depends where the PS2 microcontroller board resides, most cases it is below the capslock LED's). - start marking where the cutouts in the rear of the keyboard should come, and dremel the cutouts. - make a hole in the bottom, where you can insert the SDcard when the keyboard is closed. - connect the PS2 PCB to the CMM1 PCB with 4 wires, as written down above. - hotglue the CMM1 board in the case. - screw it together (or click). Done.... Volhout Edited 2020-08-04 00:10 by Volhout PicomiteVGA PETSCII ROBOTS |
||||
| mclout999 Guru Joined: 05/07/2020 Location: United StatesPosts: 489 |
This was a very nice project. I started a thread about this concept and here I see you have done a very good example of it. We will have to wire the USB directly on the CMM2 but that is very doable, except it will kill our ability to do fast firmware updates over that port to the PC. I wonder if there is a way to switch of the internal USB connection so the link cable will work! We could just shorten the USB cable on the KB and plug from the outside but that would look kind of jerry-rigged. This give me things to think about. |
||||
| MauroXavier Guru Joined: 06/03/2016 Location: BrazilPosts: 303 |
I used hot glue and screws too. |
||||
| Womble Senior Member Joined: 09/07/2020 Location: United KingdomPosts: 267 |
Very Cool  I like, keep up the good work guys. |
||||
| HellbentHorse Regular Member Joined: 08/07/2020 Location: AustraliaPosts: 55 |
What great projects, well done all! Can't wait to get my CMM2 on back order, then maybe see about a all in one housing with a mechanical keyboard.. one can dream. |
||||
| The Back Shed's forum code is written, and hosted, in Australia. | © JAQ Software 2025 |
