
|
|
Forum Index : Microcontroller and PC projects : CMM2: Waveshare reset button
| Author | Message | ||||
| thwill Guru Joined: 16/09/2019 Location: United KingdomPosts: 4367 |
Hi folks, My CMM2 has been "open top" since I got it, but with the imminent arrival of front and back panels I'm intending to case it up. However I've got used to using the Waveshare's reset button when I update the firmware and to clear it when it hangs, unlike the main power toggle it doesn't cause Putty to disconnect. Is there anything more elegant and mechanically less fragile that I can do as an alternative to soldering a couple of wires either side of the reset button and connecting them to a push button on the front panel? Is what I'm suggesting inadvisable? Why? Best wishes, Tom MMBasic for Linux, Game*Mite, CMM2 Welcome Tape, Creaky old text adventures |
||||
| matherp Guru Joined: 11/12/2012 Location: United KingdomPosts: 11215 |
Connect between the reset pin on the 80-pin header and GND 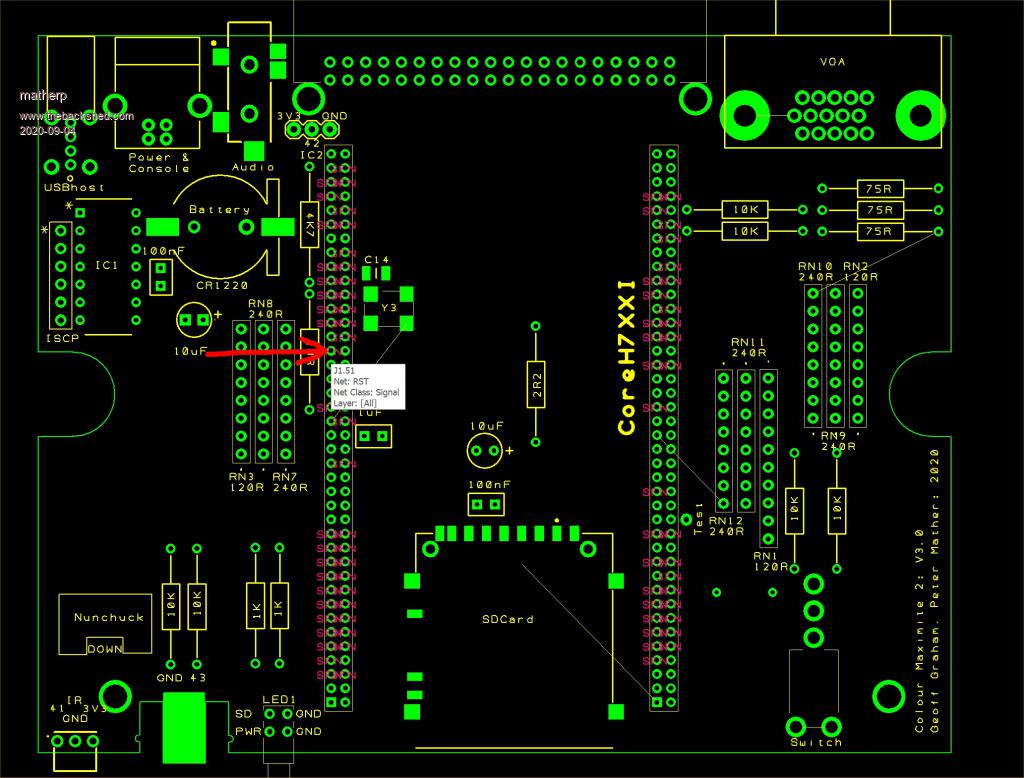 Edited 2020-09-04 18:03 by matherp |
||||
| thwill Guru Joined: 16/09/2019 Location: United KingdomPosts: 4367 |
Thank you Peter, looks like there is something a "bit" more substantial to solder onto there. Best wishes, Tom MMBasic for Linux, Game*Mite, CMM2 Welcome Tape, Creaky old text adventures |
||||
| robert.rozee Guru Joined: 31/12/2012 Location: New ZealandPosts: 2503 |
looks like you could also wire your reset switch between pins 15 (-RESET) and 16 (GND) of the JTAG connector on the waveshare module: 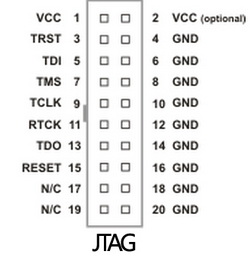 to avoid any soldering, you may be able to plug a 2-pin berg connector into here, provided there is enough clearance with the top of the case in place. cheers, rob Ā :-) Edited 2020-09-04 23:21 by robert.rozee |
||||
| thwill Guru Joined: 16/09/2019 Location: United KingdomPosts: 4367 |
Thanks Rob, There is no clearance to connect anything to the JTAG unless I solder a lead directly to it ... but there is a decent blob of solder on the underside of pin 15 so maybe I can attach to that ... don't really fancy trying to release those two 80-pin headers and remove the waveshare board though, I can be such a klutz. Best wishes, Tom MMBasic for Linux, Game*Mite, CMM2 Welcome Tape, Creaky old text adventures |
||||
| Andrew_G Guru Joined: 18/10/2016 Location: AustraliaPosts: 874 |
Tom, Sorry to be slow in responding but I have a low-tech solution on mine: I just drilled a 2.5mm hole directly above the push-button. An up-market wooden toothpick does the job for me. Cheers, Andrew |
||||
| thwill Guru Joined: 16/09/2019 Location: United KingdomPosts: 4367 |
Thanks Andrew. Sounds like a good way for me to end up with a case that looks like Swiss Cheese. My motto is "Measure three times, and then still cock it up." I've found the Waveshare is not as difficult to remove as I feared, so once I've checked that the reset works I'm just going to solder the leads to the underside of the JTAG. Best wishes, Tom MMBasic for Linux, Game*Mite, CMM2 Welcome Tape, Creaky old text adventures |
||||
| thwill Guru Joined: 16/09/2019 Location: United KingdomPosts: 4367 |
Despite my ample lack of talent I don't appear to have cocked it up, thanks for the advice folks. 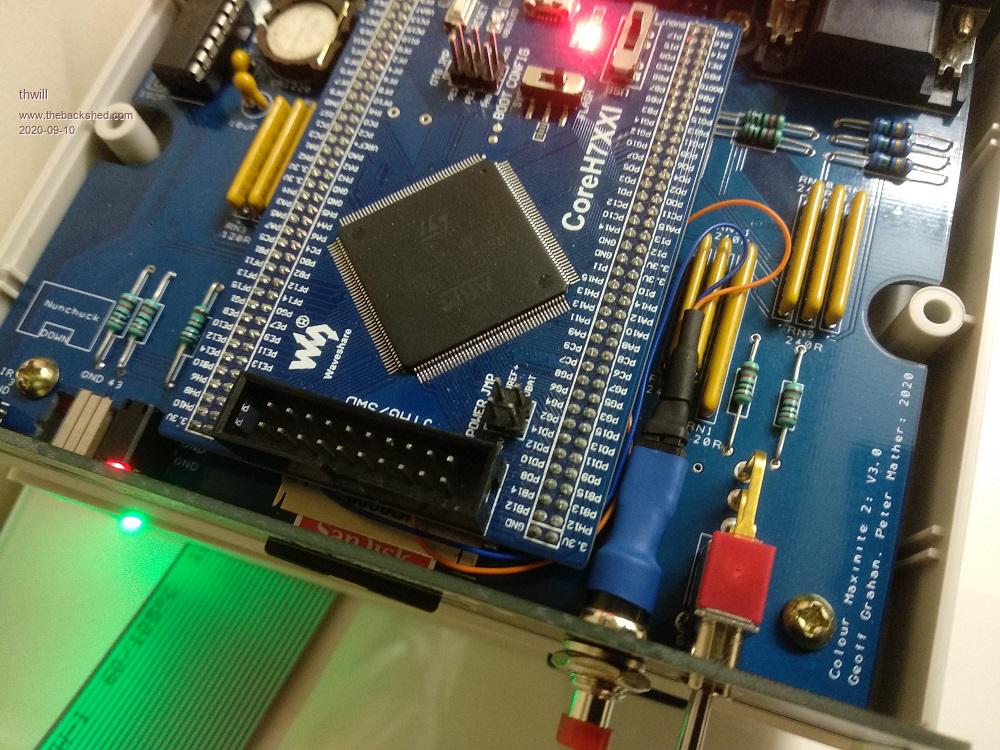 Note that the green glow from underneath is the far too bright ready LED of my original CMM that the CMM2 is sitting on. Best wishes, Tom MMBasic for Linux, Game*Mite, CMM2 Welcome Tape, Creaky old text adventures |
||||
| Womble Senior Member Joined: 09/07/2020 Location: United KingdomPosts: 267 |
Thanks for the info Peter and Rob Ā  This is one mod I'm definitely going to implement. ĀI have also been running my machine open to use the reset button. This will also be of great use for people building their CMM2 into a custom case. Edit:Cut Down an old PC Reset Switch 2pin DuPont housing, bent the cripmed ends, and insulated them with heatshrink tube. This will then fit into the JTAG connector on the Wavesharre board, without fouling on the case. Its a tight squeeze, and you may ruin a few crimps to get it right. Soldered on a small push to make switch from my parts box and fitted it in the IRX hole in the front panel. 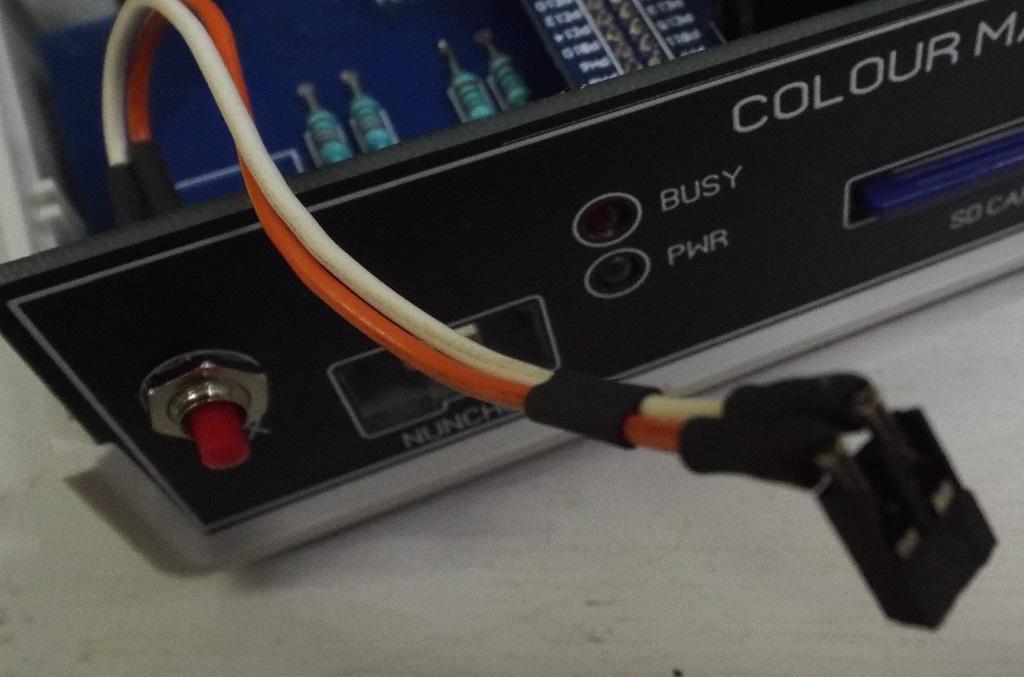 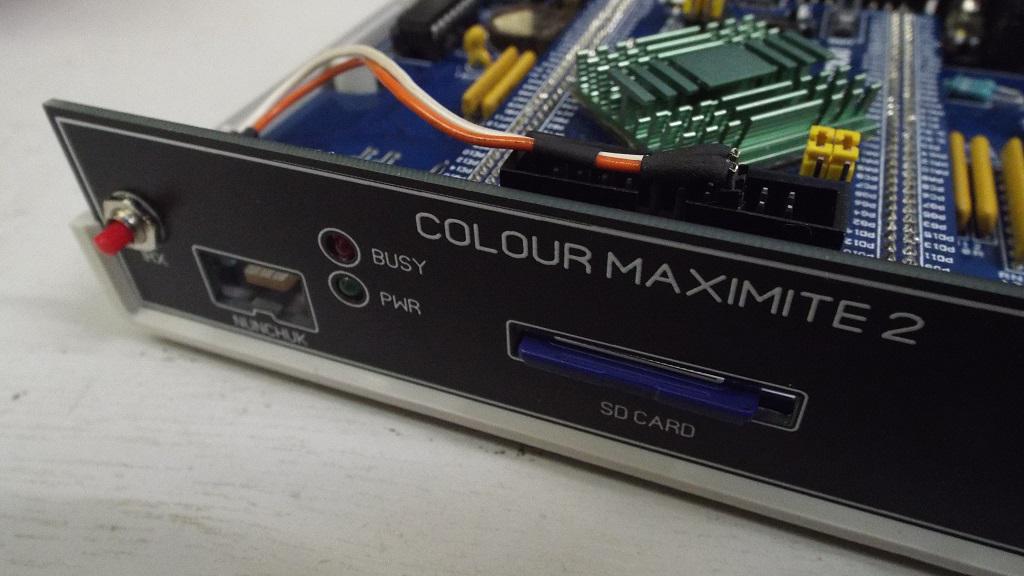 The Case Lid Fits - just Edited 2020-09-24 04:12 by Womble |
||||
| Womble Senior Member Joined: 09/07/2020 Location: United KingdomPosts: 267 |
Reset Mod complete, see post above. Managed to do this in an non-destructive way  Edited 2020-09-24 04:32 by Womble |
||||
mclout999 Guru Joined: 05/07/2020 Location: United StatesPosts: 506 |
Any Idea how to get a reset switch on a fully assembled NONE waveshare units? They call me Shai-Hulud (The maker) |
||||
| Womble Senior Member Joined: 09/07/2020 Location: United KingdomPosts: 267 |
Looking at the photographs on CircuitGizmos website there appears to be a surface mount reset switch near to the VGA connector. Not sure if the Micromite.org prebuilt CMM2 has this. I only have Waveshare based boards. If this is a reset button, you could drill a hole in the case above it and fabricate/3dprint a button to access this switch. Suggest you pop the lid off of your CMM2 and take a look. Hope that helps Womble |
||||
| mclout999 Guru Joined: 05/07/2020 Location: United StatesPosts: 506 |
Yes I know it is there. I was asking about a wiring option like they where showing for the waveshare version, so I can run a switch out the front. I would like a no solder version like that. They call me Shai-Hulud (The maker) |
||||
| matherp Guru Joined: 11/12/2012 Location: United KingdomPosts: 11215 |
RESET is pin 5 of the ST-LINK header, Gnd is pin 3, Pin 1 has a star next to it |
||||
| vegipete Guru Joined: 29/01/2013 Location: CanadaPosts: 1168 |
There's a reset line in that ST-LINK header, isn't there? Maybe pin 5? Plus a ground on pin 3? Switch between them should do the trick. Research more before letting the smoke out! Edit: someone very knowledgeable typed faster than I. :-) Edited 2020-09-24 17:39 by vegipete Visit Vegipete's *Mite Library for cool programs. |
||||
| mclout999 Guru Joined: 05/07/2020 Location: United StatesPosts: 506 |
I DON'T have the waveshare version. I have the fully assembled one that dose not have that header HENSE my request for an option for those that have the version I have. The previous post show the mod you are talking about witch I can not use. I do not want to solder to my board if I can avoid it. Maybe the next version of the fully assembled version should include a header pin addition for a reset switch extension right next to the reset button. That would be forward thinking don't you think. Power cycling is the least best way to reset an electrical system, thermal shock and surges being the main issues for long term wear. They call me Shai-Hulud (The maker) |
||||
| vegipete Guru Joined: 29/01/2013 Location: CanadaPosts: 1168 |
The fully assembled one has the ST-LINK header, which is different from the debug header on the Waveshare version. The ST-LINK header is on the left edge, just behind the IR receiver. Visit Vegipete's *Mite Library for cool programs. |
||||
| matherp Guru Joined: 11/12/2012 Location: United KingdomPosts: 11215 |
Which is why you were given advice for your version - try thinking and looking before posting otherwise help won't be forthcoming next time |
||||
| mclout999 Guru Joined: 05/07/2020 Location: United StatesPosts: 506 |
Sorry, you guys where talking about a header(I was thinking Pins) and mine does not have any pins anywhere and because I have some visual impairment I did not note the header holes on the bottom left of the board. I got out a magnifying glass and found them. I guess I will have to try to solder on some pin headers there. I was getting frustrated and I should not have vented that here. I beg you pardon. They call me Shai-Hulud (The maker) |
||||
| mclout999 Guru Joined: 05/07/2020 Location: United StatesPosts: 506 |
This was what I needed to understand what I was looking for. Thank you. They call me Shai-Hulud (The maker) |
||||
| The Back Shed's forum code is written, and hosted, in Australia. | © JAQ Software 2026 |
