
|
|
Forum Index : Microcontroller and PC projects : MM-PLC featuring picomite
| Author | Message | ||||
| Volhout Guru Joined: 05/03/2018 Location: NetherlandsPosts: 3525 |
In my job I often need to improvise a test setup, to quickly prove or debug new designs. Many of those test setups make use of an Arduino as either a controller, or a PC IO device. Switching relays, reading in signals, sometimes measuring. These arduino's run a version of tinybasic, limited to the RAM of the Arduino. I often wanted to switch to MMBasic, since it is so much more powerfull, but the mites need to connect to my peripherals. I tried to order a duinomite, so I could plug in my relay cards and opto inputs... But they where out of stack at that time. With the rise of the picomite, the idea using MMBasic in my test setups revived, and I decided make a plan. First I wrote down what I have common in most setups, and what is optional, and nice to have. Common was 1 or 2 relays that can switch 10A and 250V(ac or dc) Common was that I need minimal 2 sometimes 4 digital inputs (isolated). Logic level, or 24V or 250Vac. Optional where I2C expansions, incidental SPI, PWM's, or more logic inputs. The Common items are included in MM-PLC, the optional items can be added via a 20pin ribbon cable, and mounted in a similar box. The Common module fits in a DIN rail housing and consists of 4 boards 1/ The picomite 2/ The IO board (relays / optocouplers) 3/ The power supply (generate 5V from 7V....32V) 4/ The interface/LED board 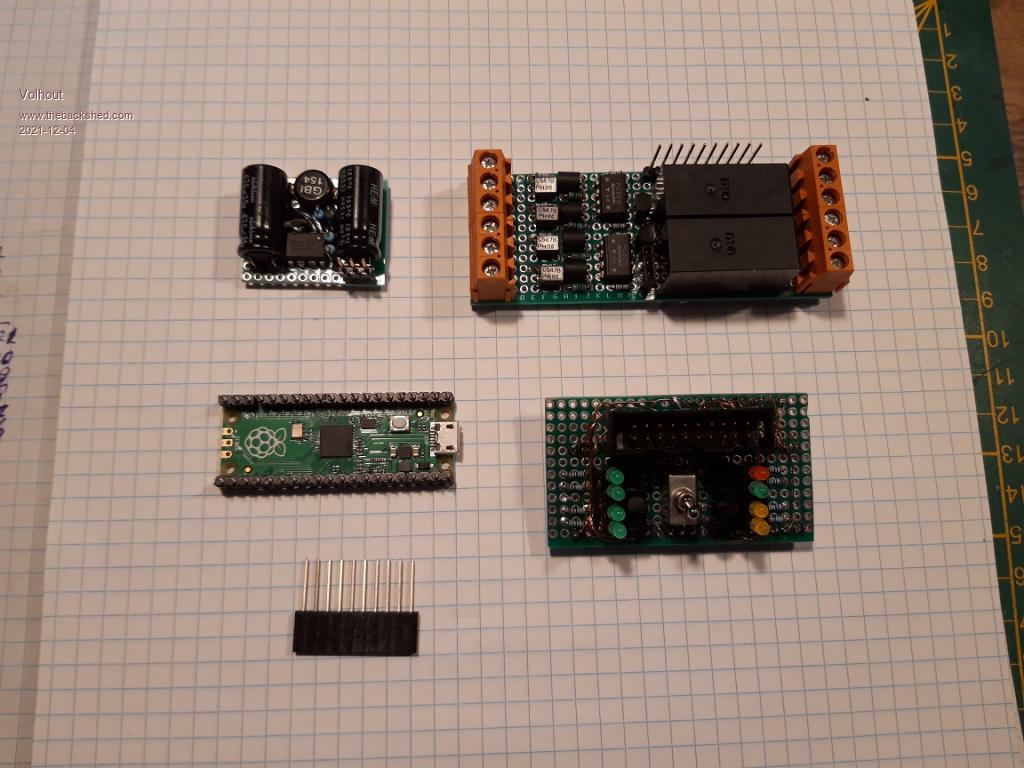 Following pictures show how the puzzle is put together, and the stack of boards fit's in a DIN rail housing. The housing still needs some holes drilled (USB for the picomite, LED's). When that is finished and labels are made I will post more pictures. This is the status today, everything has been checked and is working. 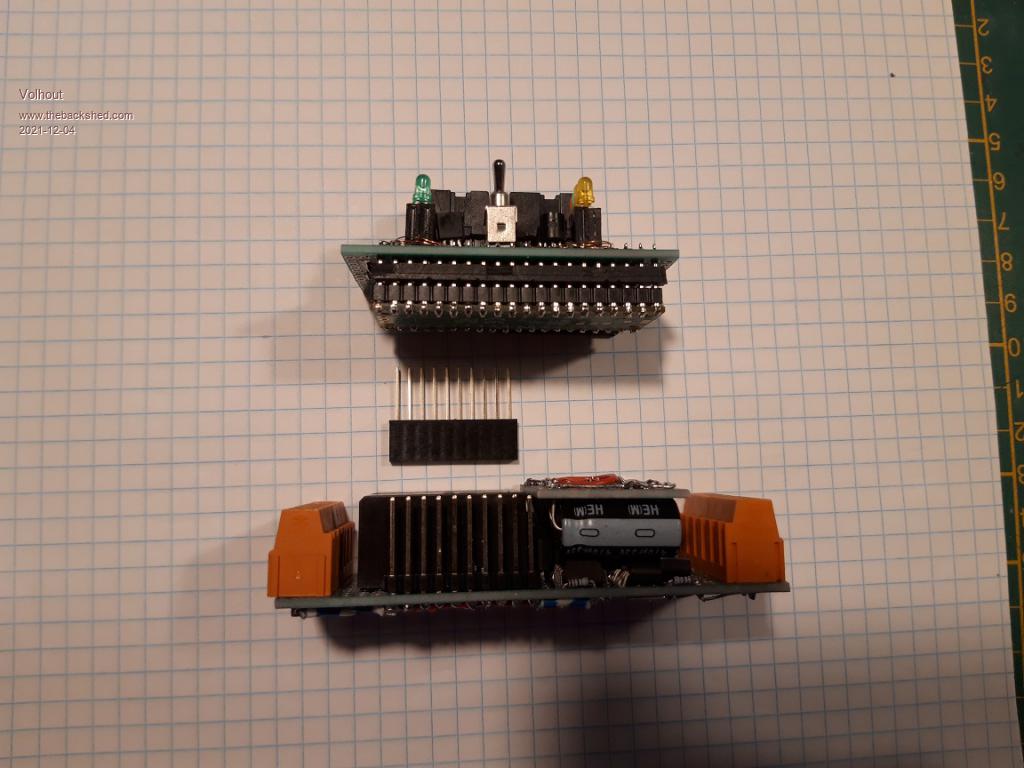 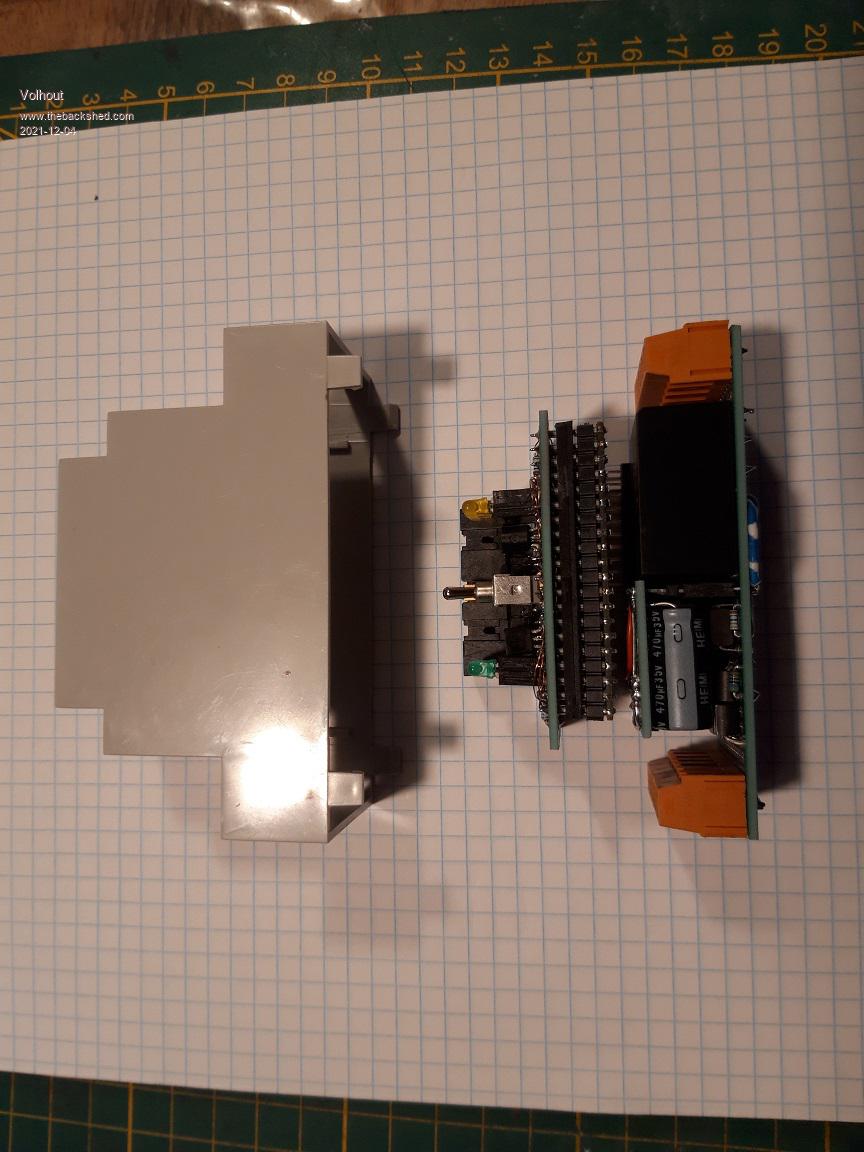 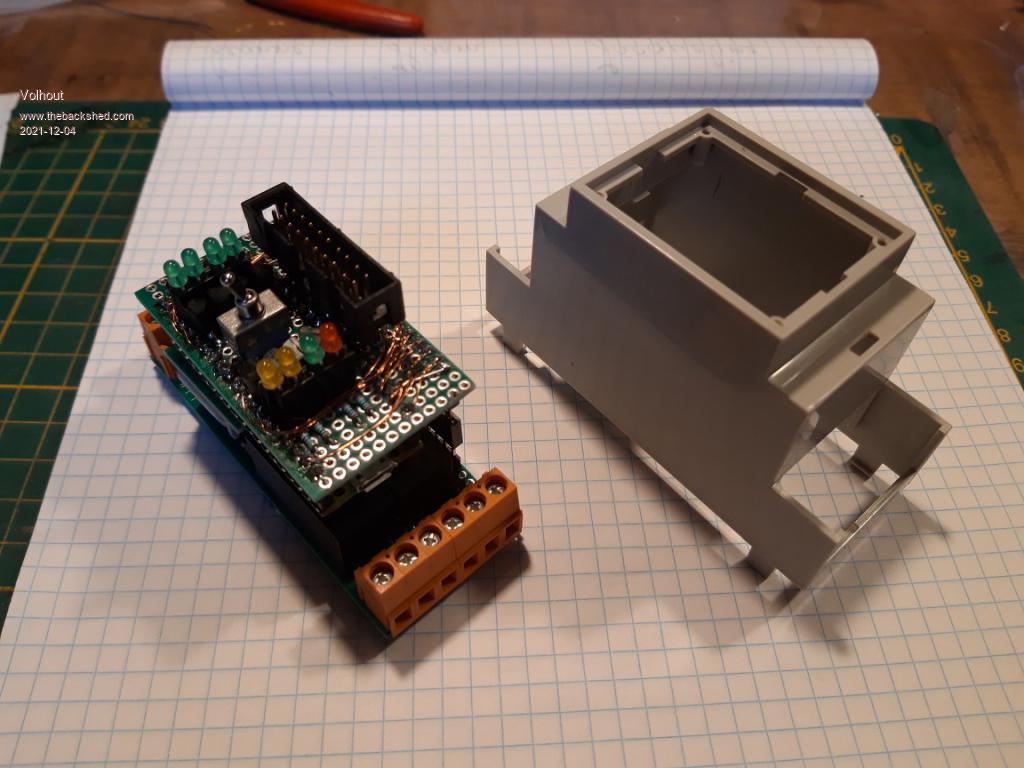 It took quite a lot of time to design (in my mind) the 3D puzzle to fit all in this small housing. That was the challenge I put myself. Would I do it again ? No, probably not. Once this is put together it is nice and compact, but hard to repair if something broke. Next time I would simply take a big (eurocard) board and put it all on that card. And use a bigger box..... PicomiteVGA PETSCII ROBOTS |
||||
| Mixtel90 Guru Joined: 05/10/2019 Location: United KingdomPosts: 5726 |
It's really neat though - and the assembly time would be a lot less with some custom PCBs. Having a spare board or two would speed up repair quite a bit too. Very nice work. :) Mick Zilog Inside! nascom.info for Nascom & Gemini Preliminary MMBasic docs & my PCB designs |
||||
| thwill Guru Joined: 16/09/2019 Location: United KingdomPosts: 3839 |
Nice looking work, Could you comment on your prototyping technique ? It looks like you are using wire with solderable insulation - I've tried that with at least two brands of nominally solderable wire and found it to be a right pain in the arse despite trying really hard to make it work. Are you using it with a wiring pencil ? Best wishes, Tom Game*Mite, CMM2 Welcome Tape, Creaky old text adventures |
||||
| Volhout Guru Joined: 05/03/2018 Location: NetherlandsPosts: 3525 |
I am using enamel wire taken from a disassembled small mains transformer, It is 0.2mm diameter. Heat it with the soldering iron and some solder for few seconds, and the enamel scorches away. Bit of fresh solder and you are good to go. Have been using this technique since my Acorn Atom for most of my one off's. PicomiteVGA PETSCII ROBOTS |
||||
vegipete Guru Joined: 29/01/2013 Location: CanadaPosts: 1082 |
I've never stopped to think about 'standard' DIN rail housings. Interesting... For example, here's a size 2 housing. Another with dimensions. 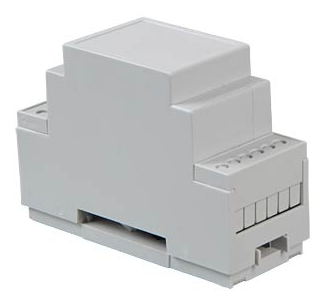 Edited 2021-12-04 02:54 by vegipete Visit Vegipete's *Mite Library for cool programs. |
||||
| Mixtel90 Guru Joined: 05/10/2019 Location: United KingdomPosts: 5726 |
The main problem with these housings (like most DIN stuff) is cost. :( They make up into nice little modules though. I once put a RPi into one to make a sort of IoT module. Mick Zilog Inside! nascom.info for Nascom & Gemini Preliminary MMBasic docs & my PCB designs |
||||
Quazee137 Guru Joined: 07/08/2016 Location: United StatesPosts: 522 |
Volhout nice to see you pack that in the smaller din rail box. I have one using the 170. I did a while back using a bigger din rail box. It has 4 relays, 4 optio inputs and 4 optio out puts, 1 4-20 in, 2 4-20 out. A 1.8" LCD with touch. I couldn't squeeze in the 120VAC to 5VDC and 3.3VDC they are in a thin din rail. 120VAC top the VDC's bottom and a switch on face. If the customer decides not to use this I'll post the details. right now its a prototype all hand wired. looking at chips other that the 170 that can run MMBasic. Edited 2021-12-04 07:51 by Quazee137 |
||||
| Volhout Guru Joined: 05/03/2018 Location: NetherlandsPosts: 3525 |
@vegipete That is the exact housing I use. It consists of 6 plastic parts, and clicks together tight. Costs 4 euro. Pretty cheap. I also have a 3U housing, that will connect to the 2U one via the 20 pin cable and have the other interfaces. PicomiteVGA PETSCII ROBOTS |
||||
Grogster Admin Group Joined: 31/12/2012 Location: New ZealandPosts: 9061 |
Very clever to use a DIN case!   Smoke makes things work. When the smoke gets out, it stops! |
||||
| Volhout Guru Joined: 05/03/2018 Location: NetherlandsPosts: 3525 |
Ready for heavy duty work.... 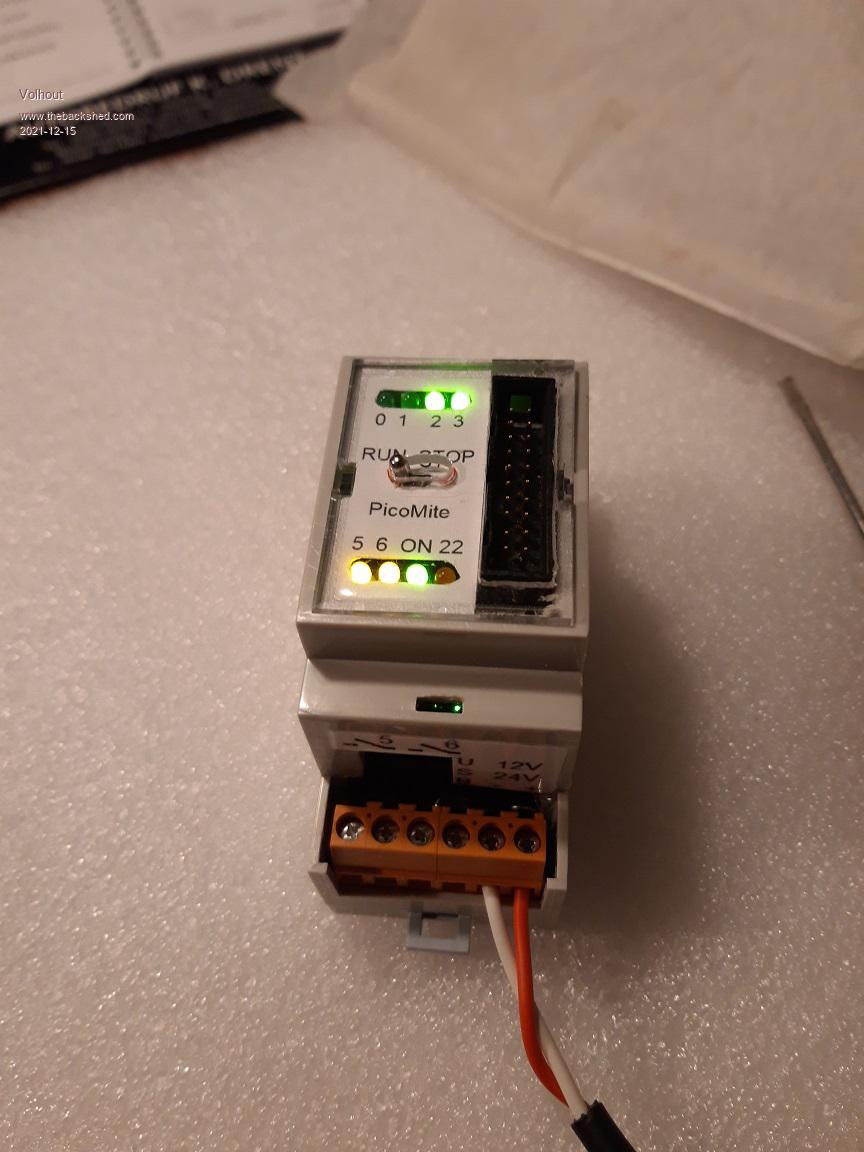 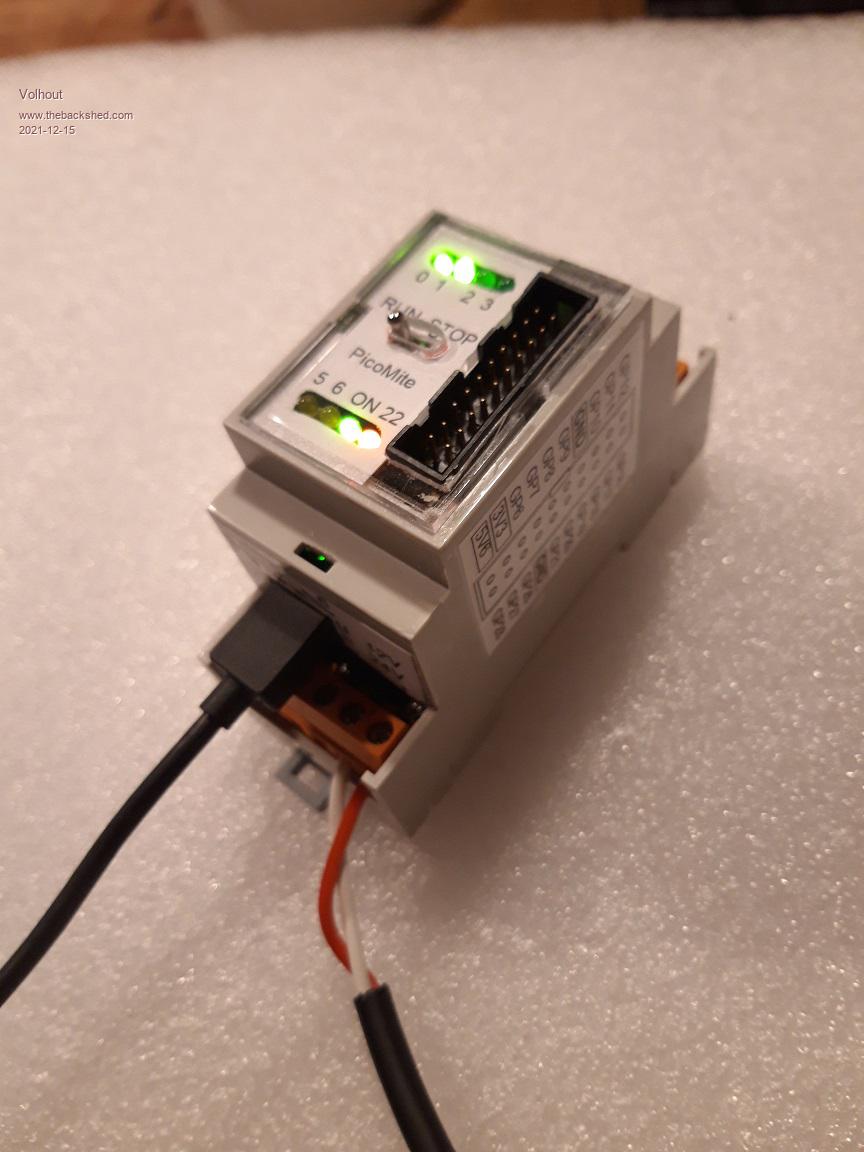 PicomiteVGA PETSCII ROBOTS |
||||
| Mixtel90 Guru Joined: 05/10/2019 Location: United KingdomPosts: 5726 |
Very nice! :) It really does deserve some nice little PCBs to make it quicker to assemble. . Mick Zilog Inside! nascom.info for Nascom & Gemini Preliminary MMBasic docs & my PCB designs |
||||
