
|
|
Forum Index : Microcontroller and PC projects : PicoMiteVGa V5.07.05b5 with added sprites
| Author | Message | ||||
| matherp Guru Joined: 11/12/2012 Location: United KingdomPosts: 11671 |
PicoMiteVGA.zip This version contains one small change and one big one EDIT [mode] This starts the editor in the mode specified (1 or 2) or the current mode if not specified NB: The font used in the editor will be the default font as follows: OPTION DEFAULT MODE 1 - Font 1 OPTION DEFAULT MODE 2 - Font 7 This can be overridden using OPTION LCDPANEL CONSOLE font e.g. OPTION LCDPANEL CONSOLE 8 will use the tiny 6x4 font allowing 160x80 editing in mode 1 and 80x40 editing in mode 2 albeit with a rather squished appearance SPRITE command and SPRITE Function. NB: the sprite command is a synonym for BLIT and BLIT commands will be converted to SPRITE by the MMBasic pre-processor. Sprites work in both mode 1 and mode 2 but obviously there a limitations on what you can do in mode 1 monochrome. The sprite commands and functions operate exactly like the CMM2 (see the CMM2 manual for details) with the following differences: Maximum number of sprites is 32 (1-32) Maximum number of layers 4 Maximum simultaneous collisions for one sprite 4 BLACK is the transparent colour SPRITE TRANSPARENCY not implemented SPRITE SCROLLR not implemented SPRITE LOADPNG not implemented The BLIT command (copy one part of the screen to another) works as previously and does not support the various CMM2 options Sprites are always drawn on the FRAMEBUFFER currently set for writing, normally the display screen but for flash free update see the example. Use SPRITE LOAD, SPRITE READ, SPRITE LOADBMP or SPRITE LOADARRAY to create a sprite SPRITE LOAD uses the Maximite format ascii file as updated in the CMM2 with the addition that all 16 colours can be specified using HEX characters in the file � � � � � � � � � ' ' = TRANSPARENT � � � � � � � � � '0' = TRANSPARENT � � � � � � � � � '1' = BLUE � � � � � � � � � '2' = GREEN � � � � � � � � � '3' = CYAN � � � � � � � � � '4' = RED � � � � � � � � � '5' = MAGENTA � � � � � � � � � '6' = YELLOW � � � � � � � � � '7' = WHITE � � � � � � � � � '8' = MYRTLE � � � � � � � � � '9' = COBALT � � � � � � � � � 'A' or 'a' = MIDGREEN � � � � � � � � � 'B' or 'b' = CERULEAN � � � � � � � � � 'C' or 'c' = RUST � � � � � � � � � 'D' or 'd' = FUCHSIA � � � � � � � � � 'E' or 'e' = BROWN � � � � � � � � � 'F 'or 'f' = LILAC Example sprite code Option explicit Option default none MODE 2 FRAMEBUFFER create FRAMEBUFFER write f CLS 'pseudo brownian motion demo using sprites Dim integer x(32),y(32),c(32) Dim float direction(32) Dim integer i,j,k, collision=0 Dim string q$ For i=1 To 32 direction(i)=Rnd*360 'establish the starting direction for each atom c(i)=RGB(Rnd*255,Rnd*255,Rnd*255) 'give each atom a colour Circle 9,9,9,1,,RGB(white),c(i) 'draw the atom Sprite read i,0,0,19,19 'read it in as a sprite Next i CLS RGB(myrtle) Box 1,1,MM.HRes-2,MM.VRes-2 k=1 For i=MM.HRes\9 To MM.HRes\9*8 Step MM.HRes\9 For j=MM.VRes\9 To MM.VRes\9*8 Step MM.VRes\5 � Sprite show k,i,j,1 � x(k)=i � y(k)=j � vector k,direction(k), 0, x(k), y(k) 'load up the vector move � k=k+1 Next j Next i ' Do For i=1 To 32 � vector i, direction(i), 1, x(i), y(i) � Sprite show i,x(i),y(i),1 � If sprite(S,i)<>-1 Then � � break_collision i � EndIf Next i FRAMEBUFFER copy f,n,b Loop ' Sub vector(myobj As integer, angle As float, distance As float, x_new As integer, y_new As integer) Static float y_move(32), x_move(32) Static float x_last(32), y_last(32) Static float last_angle(32) If distance=0 Then � x_last(myobj)=x_new � y_last(myobj)=y_new EndIf If angle<>last_angle(myobj) Then � y_move(myobj)=-Cos(Rad(angle)) � x_move(myobj)=Sin(Rad(angle)) � last_angle(myobj)=angle EndIf x_last(myobj) = x_last(myobj) + distance * x_move(myobj) y_last(myobj) = y_last(myobj) + distance * y_move(myobj) x_new=Cint(x_last(myobj)) y_new=Cint(y_last(myobj)) Return ' keep doing stuff until we break the collisions Sub break_collision(atom As integer) Local integer j=1 Local float current_angle=direction(atom) 'start by a simple bounce to break the collision If sprite(e,atom)=1 Then � 'collision with left of screen � current_angle=360-current_angle ElseIf sprite(e,atom)=2 Then � 'collision with top of screen � � current_angle=((540-current_angle) Mod 360) ElseIf sprite(e,atom)=4 Then � 'collision with right of screen � current_angle=360-current_angle ElseIf sprite(e,atom)=8 Then � 'collision with bottom of screen � current_angle=((540-current_angle) Mod 360) Else � 'collision with another sprite or with a corner � current_angle = current_angle+180 EndIf direction(atom)=current_angle vector atom,direction(atom),j,x(atom),y(atom) 'break the collision Sprite show atom,x(atom),y(atom),1 'if the simple bounce didn't work try a random bounce Do While (sprite(t,atom) Or sprite(e,atom)) And j<10 � Do � � direction(atom)= Rnd*360 � � vector atom,direction(atom),j,x(atom),y(atom) 'break the collision � � j=j+1 � Loop Until x(atom)>=0 And x(atom)<=MM.HRes-sprite(w,atom) And y(atom)>=0 And y(atom)<=MM.VRes-sprite(h,atom) � Sprite show atom,x(atom),y(atom),1 Loop ' if that didn't work then place the atom randomly Do While (sprite(t,atom) Or sprite(e,atom)) � direction(atom)= Rnd*360 � x(atom)=Rnd*(MM.HRes-sprite(w,atom)) � y(atom)=Rnd*(MM.VRes-sprite(h,atom)) � vector atom,direction(atom),0,x(atom),y(atom) 'break the collision � Sprite show atom,x(atom),y(atom),1 Loop End Sub Scroll demo MODE 2 FRAMEBUFFER create FRAMEBUFFER write f Sprite load "redmouse" Load image "julia" 'use any convenient 320x240 bmp image Sprite show 1,160,120,1 Do FRAMEBUFFER copy f,n,b Sprite scroll 1,1 Loop redmouse.spr 13,1,19 4 44 4 4 4 4 4 4 4 4 4 4 4 4 4 4 4 4 4 4 4 4 4 444444 4 4 4 4 44 4 4 4 4 4 44 4 4 4 4 4444 Edited 2022-06-05 00:41 by matherp |
||||
| Bleep Guru Joined: 09/01/2022 Location: United KingdomPosts: 820 |
Hi Peter, Thank you for this great update, I've been playing around with it this evening, so far all working well. I do appear to be getting tearing near the bottom of the screen when I run the scroll demo, if I turn off the framebuffer 'b' option that tearing goes away, but presumably there is potential for other tearing elsewhere, would you expect this demo to be tear free with the 'b' option on? Interestingly if I position a sprite or two over where the tearing occurs, the sprite does not tear. I also don't seem to be able to have both 'OPTION DEFAULT MODE 1' and 'OPTION LCDPANEL CONSOLE 7' set together, to automatically give me a small font in mode 1 when I edit, I'm assuming this is probably because with the VGA running you wouldn't be using the LCD display as well? or am I misunderstanding these options? I can set 'OPTION LCDPANEL CONSOLE 7' and then manually change to mode 1, that does give me the smaller font. Regards Kevin Edited 2022-06-05 23:21 by Bleep |
||||
| Volhout Guru Joined: 05/03/2018 Location: NetherlandsPosts: 5999 |
Hi Peter, Thank you for looking into the editor mode. I have tried OPTION EDIT 1, but that does not work. It seems you can only force the editor in mode 1 by typing "EDIT 1" every time you want to edit. It is not a default. It is not memorized. It is shorthand for "MODE 1:EDIT". Since I use the ESC/F2/F4 keys most of the time I wonder if I can change the text associated to function key F4 to "EDIT 1", or if I can assign EDIT 1 to F12 or so. Volhout EDIT: solved OPTION F5 "mode 1:edit"+chr$(13)+chr$(10) Edited 2022-06-05 23:37 by Volhout PicomiteVGA PETSCII ROBOTS |
||||
| jasonl Newbie Joined: 27/05/2022 Location: United KingdomPosts: 3 |
Hi Peter, Thanks for the great work you are doing with MMBasic and the PicomiteVGA! I have a quick question about the SPRITE WRITE command. I want to write a sprite to the display including the black (transparent) pixels in the image. The final option of SPRITE WRITE seems to suggest that this can be done by setting bit 3 (don't copy transparent pixels) to zero. However this does not seem to have any effect - the black pixels are treated as transparent regardless of this bit setting. Have I interpreted this bit setting correctly? If it doesn't do what I think it does - then what does it do?, and is there a way of writing a sprite to the display without treating the black pixels as transparent? Thanks, Jason |
||||
| matherp Guru Joined: 11/12/2012 Location: United KingdomPosts: 11671 |
Should do - will fix Don't think it is tearing but there is something there. I suspect some bus conflict between the copy and reading the framebuffer - will investigate OPTION DEFAULT MODE 1 is the default so doesn't show on the option list. You should though see the OPTION LCDPANEL CONSOLE set to 7 if you option list - certainly works for me. |
||||
| Bleep Guru Joined: 09/01/2022 Location: United KingdomPosts: 820 |
Hi Peter, Ok thanks for your reply, I now understand that 'OPTION DEFAULT MODE 1' will not be shown in OPTION LIST. However I'm still not understanding what this option does, I was expecting it to auto-magically change to MODE 1, if for example I have ctrl-C out of a MODE 2 program, when I go into EDIT, I usually use F4, but have also tried typing EDIT, I suspect I'm not understanding this option. These are my options:- > option list OPTION SYSTEM I2C GP22,GP15 OPTION KEYBOARD UK OPTION CPUSPEED (KHz) 252000 OPTION DISPLAY 60, 106 OPTION SDCARD GP5, GP2, GP3, GP4 OPTION RTC AUTO ENABLE OPTION DEFAULT FONT 7, 1 ' I'm also getting intermittently the following error:- Error : Maximum of 32 sprites I've tried the following, I'm only loading 2 sprites, I hope! > new > memory Program: � 0K ( 0%) Program (0 lines) 108K (100%) Free RAM: � 0K ( 0%) 0 Variables � 0K ( 0%) General 140K (100%) Free > flash load 4 > run [4] Sprite load "invader1",2 Error : Maximum of 32 sprites I did also try SPRITE CLOSE ALL, the only way I've found of getting out of this is to pull the power, then it works fine again? I have not yet worked out what triggers this. Image showing it working and the shearing at bottom of screen, as you can see, the two sprites are not being affected. 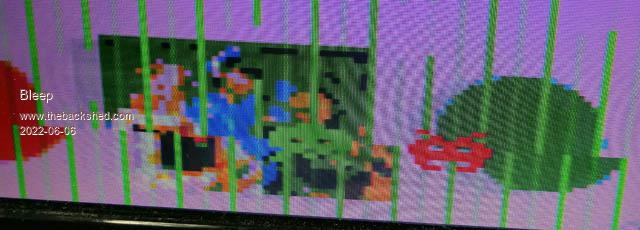 Regards, Kevin. Edited 2022-06-06 03:53 by Bleep |
||||
| matherp Guru Joined: 11/12/2012 Location: United KingdomPosts: 11671 |
if the screen is in mode 2 and you want to edit in mode 1 just type "EDIT 1" |
||||
| matherp Guru Joined: 11/12/2012 Location: United KingdomPosts: 11671 |
PicoMiteVGA.zip no version change but... Fixes the copy transparent function on sprite write Changes the timing of framebuffer copy ,,,b to avoid screen artefact Huge performance improvement in sprite scroll when x scroll is divisible by 2 |
||||
| jasonl Newbie Joined: 27/05/2022 Location: United KingdomPosts: 3 |
Hi Pete, Just confirming that the sprite write command is now working as expected. Thanks, Jason. |
||||
| Volhout Guru Joined: 05/03/2018 Location: NetherlandsPosts: 5999 |
I wonder if this definition can be made universal. When there are only 16 colours, numbering them 0....15 makes sense. And it is in line with CMM1. It should not make any difference for the "rgb()" since black will map on 0 anyway, and anything below 16 will not give any new color than black. So checking if colour is < 16 and then going through a lookup table makes it transparent. And if compatibility with CMM1 is possible, map the 8 primary colours on the numbers 0..7. And you remain compatible with CMM2 also. Edited 2022-06-08 06:01 by Volhout PicomiteVGA PETSCII ROBOTS |
||||
| Volhout Guru Joined: 05/03/2018 Location: NetherlandsPosts: 5999 |
Hi Peter, Am I correct in observing that the sprites collision is detected at the boundaries of the rectangle circumventing the sprite ? Not at the visible part of the sprite. In your spritedemo, the balls sometimes bounce when the transparent background collides with the transparent background of the other sprite (so they bounce without any obvious reason)...at least that is what it looks like. It is just an observation... Volhout PicomiteVGA PETSCII ROBOTS |
||||
| phil99 Guru Joined: 11/02/2018 Location: AustraliaPosts: 3325 |
Got the same result. Putting "electrons" at the corners of the "atom" squares does not change the diagonal bounce showing that it is the whole sprite square, not just the visible part, that bounces. |
||||
| led-bloon Senior Member Joined: 21/12/2014 Location: AustraliaPosts: 210 |
From the original post: "The sprite commands and functions operate exactly like the CMM2 (see the CMM2 manual for details) with the following differences" From the CMM2 manual Appendix E Page 140 very FIRST 'dot point': " Sprites are full colour and of any size. The collision boundary is the enclosing rectangle." led Miss you George |
||||
| Volhout Guru Joined: 05/03/2018 Location: NetherlandsPosts: 5999 |
Thanks. So my observation was correct. PicomiteVGA PETSCII ROBOTS |
||||
| The Back Shed's forum code is written, and hosted, in Australia. | © JAQ Software 2026 |
