
|
|
Forum Index : Microcontroller and PC projects : Driving stepper motors with the TMC2208/9 driver modules
| Author | Message | ||||
| matherp Guru Joined: 11/12/2012 Location: United KingdomPosts: 11304 |
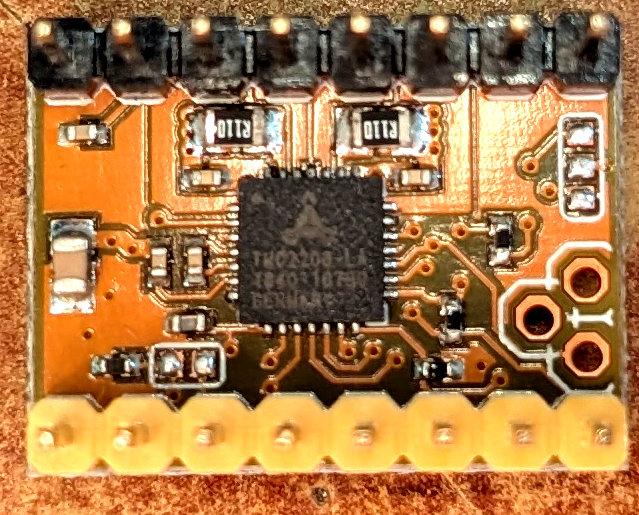 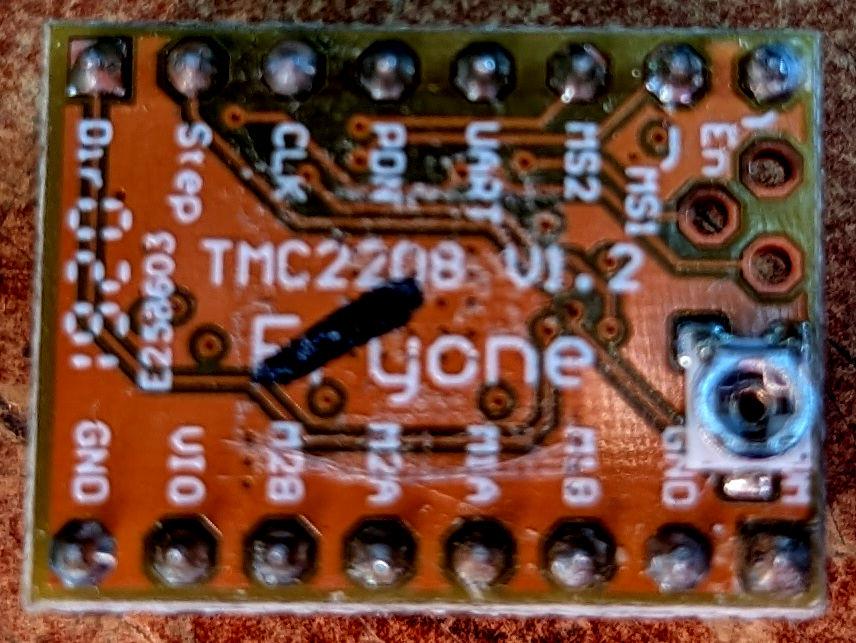 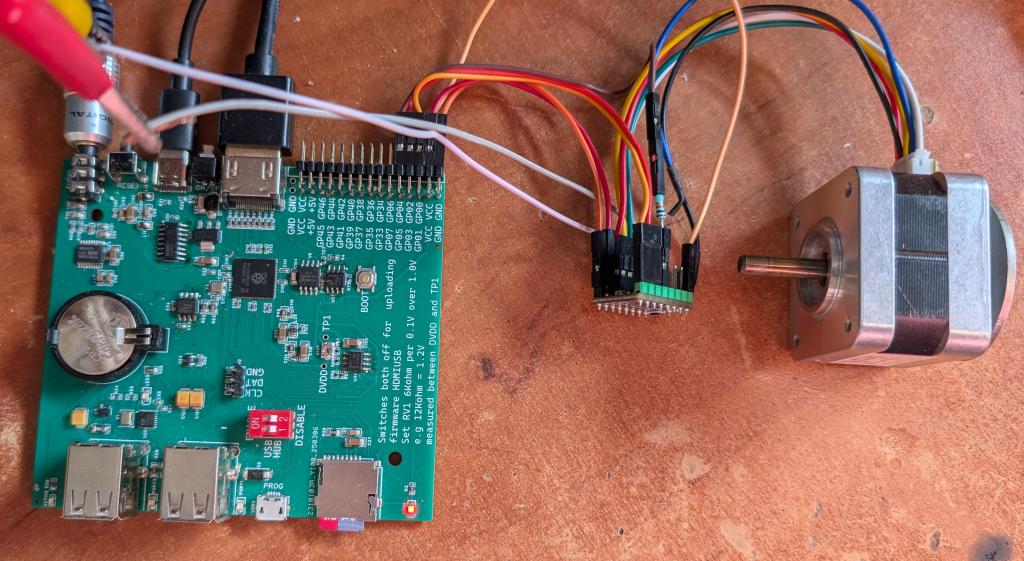 For years now the maker community has standardised on 16-pin modules to drive stepper motors. Originally, many of these were based on the A4988 stepper driver chip. More recently the TMC2208 and TMC2209 have come to dominate as "next generation" controllers. Compared to the A4988 they have numerous enhancements. 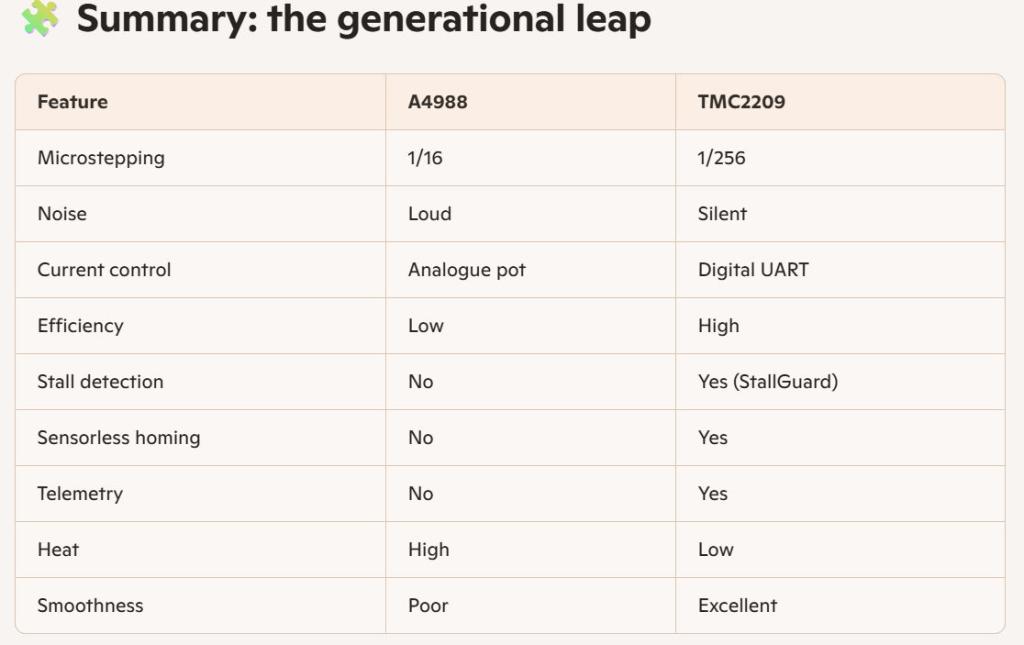 The A4988 modules were configured by setting jumpers on the PCB and the output power was set using the tiny potentiometer on the module although this was very much a black art. The TMC2208/9 can also be configured the same way to some extent but, much better, they have a uart I/F to allow all of the capabilities of the driver to be exploited. However, as ever, with the increased capability comes increased complexity. I have therefore included a new command in the RP2350 versions of MMBasic - TMC22xx that handles all that for you. This is covered in detail in the stepper manual Stepper_Reference.pdf Over and above the standard step,direction and enable pins, one extra pin is required and is connected to the driver's uart input via a 1K resistor. This can be any pin on the PicoMite as the serial TX is bitbanged using the same code as the DRIVER SerialTX command. Using this to control the driver, no other configuration is required and the normal config pins on the driver can be left unconnected (they have internal pulldowns). For the TMC2208, each driver needs its own UART connection. For the TMC2209 a sinle UART pin can be used as the config pins are then available to set an address 0-3. This is explained in the manual. So the complete wiring is as follows: PicoMite any pin : Driver step pin PicoMite any pin : Driver direction pin PicoMite any pin : Driver enable pin PicoMite any pin : Driver UART pin PicoMite GND : Driver GND pin next to VCC pin PicoMite 3.3V : Driver VDD pin 12V supply GND : Driver GND pin next to VIN 12V supply +ve : Driver VIN pin DRIVER MS1/MS2 pins: pull to 3.3V to change address (0-3) - TMC2209 only With this all wired you can move the stepper by setting the direction pin in MMbasic and then pulsing the step pin. Or, of course, you can use the stepper command framework to have full gcode control over up to 4 stepper motors. Const dir = "GP1" Const steppin = "GP3" Const enable = "GP0" Const uart = "GP5" s$="g0 a10" On error skip Stepper close TMC22xx uart,2209,0,1000,50,4,,0 Pause 100 initstepper Stepper gs s$ Stepper gc g0 a0 Do :Loop While Peek(stepper active) Sub InitStepper Stepper Init Stepper Axis a, steppin, dir, enable, 1, 1600, 400, 10 Stepper POSition a, 1 Stepper Run 1 End Sub |
||||
| Mixtel90 Guru Joined: 05/10/2019 Location: United KingdomPosts: 8815 |
This stepper project has inspired you, hasn't it? ;) Very nice! Mick Zilog Inside! nascom.info for Nascom & Gemini Preliminary MMBasic docs & my PCB designs |
||||
Bryan1 Guru Joined: 22/02/2006 Location: AustraliaPosts: 1921 |
One to ask as these small stepper chips are designed for 3D printers is MMBasic going that way as with the 4th axis it could be used to power the stepper for the line feed on the printer head and if so I can see a new project on the horizon. Edited 2026-05-08 21:49 by Bryan1 |
||||
| matherp Guru Joined: 11/12/2012 Location: United KingdomPosts: 11304 |
These drivers are much more powerful than they look. Pefectly capable of driving Nema 34 in many cases 2-phase stepper motors up to 2.8A coil current (peak), 2A RMS Low RDSon, Low Heat-Up LS 170mΩ & HS 170mΩ (typ. at 25°C) Voltage Range 4.75… 29V DC They can be used for many applications. I'm going to design a motherboard for 4 of them with a Pico2 and suitable connectors |
||||
| amiga Newbie Joined: 08/05/2025 Location: BelgiumPosts: 37 |
Hi, nice idea . If the pico2 control 4 Nema Stepper with MMBasic or a spécifique code , make it as an aplliance working with serial port and with command sent from another board , freeing the master board from all timing et check of the trajectory calculus .. But can we compete with sort of board ? https://nl.aliexpress.com/item/1005005548593599.html?spm=a2g0o.detail.pcDetailTopMoreOtherSeller.10.f0e7uxYtuxYt9a&gps-id=pcDetailTopMoreOtherSeller&scm=1007.40050.354490.0&scm_id=1007.40050.354490.0&scm-url=1007.40050.354490.0&pvid=9b4968ef-f07c-460e-89bf-1ab99ea97c85&_t=gps-id%3ApcDetailTopMoreOtherSeller%2Cscm-url%3A1007.40050.354490.0%2Cpvid%3A9b4968ef-f07c-460e-89bf-1ab99ea97c85%2Ctpp_buckets%3A668%232846%238113%231998&pdp_ext_f=%7B%22order%22%3A%2279%22%2C%22eval%22%3A%221%22%2C%22sceneId%22%3A%2230050%22%2C%22fromPage%22%3A%22recommend%22%7D&pdp_npi=6%40dis%21EUR%2139.07%2118.00%21%21%2144.78%2120.63%21%402103846917782479473994272e4737%2112000033495310411%21rec%21BE%21%21ABXZ%211%210%21n_tag%3A-29910%3Bd%3Aafd5daf8%3Bm03_new_user%3A-29895%3BpisId%3A5000000205238504&utparam-url=scene%3ApcDetailTopMoreOtherSeller%7Cquery_from%3A%7Cx_object_id%3A1005005548593599%7C_p_origin_prod%3A @+ alfamiga from a raining day .. |
||||
| The Back Shed's forum code is written, and hosted, in Australia. | © JAQ Software 2026 |
