
|
|
Forum Index : Microcontroller and PC projects : Preparing for manual SMD pick&place
| Page 1 of 2 |
|||||
| Author | Message | ||||
| MicroBlocks Guru Joined: 12/05/2012 Location: ThailandPosts: 2209 |
As my quest for PCB assembly is not going well i decided to start building some equipment to help me place SMD parts. The first thing i used is a X-Y stage i took out of one of my home made 3d printers. It is based on a CoreXY stage that is described here: http://corexy.com/ 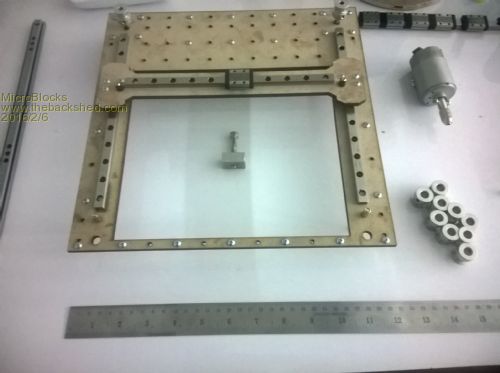
I am going to mount a small SMD tool that can be moved slightly up and down and connect a foot pedal to control a vacuum. Still have to find a good one that has good suction cups. Also a USB microscope so i can place the part accurately. The idea now is to mount this on a base plate that has holes drilled spaced 2.54mm apart so that it can be used to align pcb's that have pins on a 0.1" grid. To help with accuracy i use a stop that can be locked in 1mm increments. I designed my board with that in mind so that i can base all the coordinates from an origin. In this case i place a supervisory chip on coordinate 0.0 and it also has a silkscreen grid drawn so that all intersections where parts are place have a crosshair to help aligning. 
I looked at some tools that help with manual placement like this:http://eurocircuits.com/ec-equipment-ec-placer Unfortunately the price is to steep for my little shop, so i have to go DIY. :) Does anyone do some small pcb assembly? What kind of equipment/tools do you use? Microblocks. Build with logic. |
||||
| viscomjim Guru Joined: 08/01/2014 Location: United StatesPosts: 925 |
Hi MicroBlocks, I have two uMite boards that use surface mount components. These are the very first two boards I have ever had made and my first attempt in surface mount. I did a lot of reading on the web and wound up using an aquarium pump with the pump reversed so that it became a vacuum. Using a pen with a syringe needle, I can easily pick up the parts and place them by hand on the board. The pen has a small finger hole that I use to open and close the vacuum. HERE is a video of the vacuum pump idea. I have gotten quite good at this and am able to produce boards 5 or so at a time and then take them over to my reflow oven in the garage and bake them. I am using a cheap black and decker oven with the zallus reflow controller and have yet to have a board that didn't work. The board manufacturer, shenzhen2u, has a great deal on stainless steel solder stencils when you order your boards. For $18.00 this is a no brainer, and has worked flawlessly for me. I highly recommend. Here are what the boards look like... 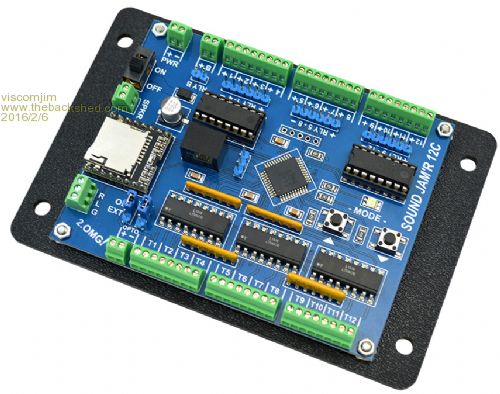
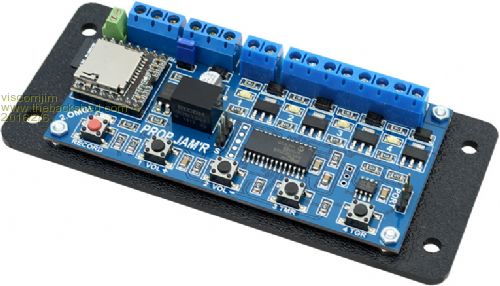
As you can see, on both boards there are thru hole components, especially the screw terminals. I just recently purchased a solder pot big enough to dunk the boards in and do all the soldering of the thru hole parts at one time. I haven't done this yet, but on my next boards, I will fire this up and hopefully it will work well. HERE is a video of what I plan on doing (with my fingers crossed and lots of ventilation). HERE is the solder pot I purchased. I will keep you posted on how well this works hopefully in the near future. By the way, I blame Geoff and The Back Shed for all of this! (At least thats what I tell my wife...) Please keep us posted on your setup, it looks quite interesting. HERE is another manual diy pick and place idea that I have been looking at. |
||||
| MicroBlocks Guru Joined: 12/05/2012 Location: ThailandPosts: 2209 |
Those look pretty clean. I have a vacuum pump available. I will use a small tank as my vacuum 'reserve', the rest is good to know. The syringe seems to work pretty good, i will try that. Currently i use a hotplate to preheat the pcb and solder the parts with a hot air soldering station. Good enough for a few, but if i need to do more then 5-6 it gets too time consuming. The hotplate also works good to warm the pcb a bit before applying the solderpaste. It seems to stick a bit better that way. And i agree the stencil for that price is absolutely a good deal. Plan is to upgrade to a reflow oven, i have the thermocouples, solid state relay etc already. Using a uMite for controlling it would be nice. That video of soldering through hole parts made me think back 30 years ago when i build a small wave soldering contraption. Almost the same as you see him using i only had a stainless steel rod in it that i pushed from one side to the other to create a wave. Worked pretty good after some practice. Microblocks. Build with logic. |
||||
| viscomjim Guru Joined: 08/01/2014 Location: United StatesPosts: 925 |
Hi MicroBlocks, if you decide to make the oven using the uMite (which would be a great project for the uMite), HERE is a pretty cool article on an oven based on pic basic, so maybe you can extract some code from there. Also there was a thread earlier on HERE that has some good info. |
||||
bigmik Guru Joined: 20/06/2011 Location: AustraliaPosts: 2981 |
Lads, Cool stuff, I have my toaster oven and thermo-couple sitting here waiting to be sent to do some real work... I have been soldering my boards by hand but the older I get the harder I am finding this to do, my eyes are not what they used to be and seem to be getting worse. I love the vacuum pump idea I am going to have to look into what is available locally in AUS that I can adapt for the task. @Jim, That manual PnP machine is a good idea but I wonder why he hasnt fitted steppers to drive it around, He could then very carefully place the parts (jog the X and Y till it was perfect) and `lock' it with a bit of pressure on the Z axis to hold the parts still whilst they were soldered in place.. If you solder stencilled (which I assume he did) then a fine tube hot air gun could be used to great effect (this could also be fitted to the movable head). Wow! I like the thought of that.. I am impressed with how he uses angle aluminium and bearings for his slides. There are some great ideas out there.. Regards, Mick Mick's uMite Stuff can be found >>> HERE (Kindly hosted by Dontronics) <<< |
||||
| viscomjim Guru Joined: 08/01/2014 Location: United StatesPosts: 925 |
Hey Mick, have you seen THIS Low cost automated machine minus the parts feeder. You just have to lay out parts on strips and the machine does the rest. I saw this at the last world maker faire in New York. Pretty cool for hobby stuff and very small production I guess. Surprisingly, it has vision... HERE is a cool video of the assembly of the kit. |
||||
| bigmik Guru Joined: 20/06/2011 Location: AustraliaPosts: 2981 |
Hey Jim, That is a pretty cool toy, sort of what I was getting at, but at 1200 Euro plus 172 euro shipping makes it just under $2200 Aus landed... Quite a bit outside my budget at this stage.. I can see a PCB prototyping business probably getting one though. Regards, Mick Mick's uMite Stuff can be found >>> HERE (Kindly hosted by Dontronics) <<< |
||||
| MicroBlocks Guru Joined: 12/05/2012 Location: ThailandPosts: 2209 |
If you only make small boards it can be a lot smaller and thus cheaper. Just counting the mechanical parts prices it would come to about 200US$. The extruded aluminum is nice but also expensive. I used slightly modified drawer slides and they are perfectly ok for this kind of lightweight work. Some steppers, pulleys and belts for positioning. I made a 3d printer that way for about 150US$ (including steppers and controller, not a hot end) and it work pretty good. The only thing that is difficult is vision. I will start manually, with visual aids like cameras, but without the software controlling it. if that functions good then i will add steppers and when that works good add vision. It will get me to use it for small production quickly and it will not be a huge project that takes lots of time. Iterating to the final product is i think the best way to do it. And i want to keep it under 500US$ when completed. Microblocks. Build with logic. |
||||
| viscomjim Guru Joined: 08/01/2014 Location: United StatesPosts: 925 |
Sounds like a kickstarter coming... I'd want one if around $500.00 and worked. Most of the cheaper chinese pnp machines don't have vision and seem to work decent. |
||||
| MicroBlocks Guru Joined: 12/05/2012 Location: ThailandPosts: 2209 |
With kickstarter taking 10% to put your project on a website and when successful you need employees to fulfill on time, the price will quickly rise to $1000 USD. When i ever make it into a product i will do it a bit more slowly. :) Microblocks. Build with logic. |
||||
| spanner888 Newbie Joined: 08/02/2016 Location: AustraliaPosts: 2 |
Here are a couple of very active groups you not have seen and may be interested in:- OpenPNP control software web site and pmailing list The OpenPNP software is being actively used in many projects, including Firepick. Firepick is mostly about a delta style, multihead/purpose approach, but several users are branching out with cartesian builds. Approaches and all the doco and source files are a bit fragmented, but the group is very active and working hard to improve. |
||||
Grogster Admin Group Joined: 31/12/2012 Location: New ZealandPosts: 9985 |
I must say, I love the idea of the fish-tank pump in reverse! 
I might just have to build one of these myself as the longest part is SMD placement and alignment. Even just having the vacuum-assisted placement would make my life that much easier, so I will have to look into this some more! I did have one of those SMD placement tools , but they are absoulute bovine excrement. 
I think it is simply cos they are so cheap and nasty, they can't maintain the vacuum, and parts fall off before you can release them where you want them. Jaycar also sell a variation of this tool, and it too is bovine excrement - with no disrespect to Jaycar. You can also buy mains-powered vacuum tools direct from eBay for only eighteen bucks or so plus freight, so I may well just get one of those and save myself some fish-tank pump hacking. Naturally, once landed, I would need to open it and check it for electrical compliance, as lots and lots of things out of China have really bad mains wiring, but there is not much in an air pump!  Smoke makes things work. When the smoke gets out, it stops! |
||||
| spanner888 Newbie Joined: 08/02/2016 Location: AustraliaPosts: 2 |
Just released from Linux conference, Jon Oxer talks about his design decisions and brief demo of machine and OpenPNP software and demo of machine placing Notes on his part list: chassis 3d tech xyz carve $650 including shipping http://3dtek.xyz/products/x-carve-prev-shapeoko-2-cnc-mill tinyg motion controller $160 drag chain $12 3x mema 17 0.9 degree steppers $80 nema 11 hollow shaft steppers $20 (per head!!!) 24V PSU $35 Endoscope camera $19 Arduino $29 N-shield $19 mini slide rails $8 (per head) vacuum pump & pen $29 rotation coupling $4 2x Air solenoids $20 hobby servo $70 <<<<<<<< because burnt out TWO, then went LOCAL hobby shop and got the "best"... Juki nozzle $40 (per head) misc hw $20 Total $1250 ... all above was just a quick costing last night..... |
||||
| MicroBlocks Guru Joined: 12/05/2012 Location: ThailandPosts: 2209 |
Yes, i was keeping my eye open for that one. It is a great achievement! About prces: 3x nema steppers are about 30US$, a tinyg controller about 50US$, the chassis when you do not need that big is about 100US$. My goal is to populate PCB's that are about 10x10cm, with the occasional 5x20cm. The chassis would then not have to be bigger then about 30x30cm. That is the single biggest cost safer. Microblocks. Build with logic. |
||||
Bryan1 Guru Joined: 22/02/2006 Location: AustraliaPosts: 2137 |
Hi Jean, Eh mate have a look on fleabay for 3axis cnc microsteppers and one can get them for under $40 AUD delivered. I got one for my cnc and although they do get warm (2 small fans fixed that) they are good valueand work well with Kcam and Mach3. |
||||
| isochronic Guru Joined: 21/01/2012 Location: AustraliaPosts: 689 |
Aldi are flogging a 3d printer for aus$500, looks like a cartesion type... don't know about precision etc. maybe the price will drop further !?? BTW about the use of solder paste... how thick is a solder stencil ? Is that the recommended thickness of the solder paste ? Is the paste supposed to squish out to a zero thickness when a component is placed ?? |
||||
| MicroBlocks Guru Joined: 12/05/2012 Location: ThailandPosts: 2209 |
I make my solder stencil out of kapton film which is about 2 mil thick. When placing a component it does go all the way to the pcb squishing out most, but as it is sticky it just clings to the copper and the part. Once it gets hot it 'magically' flows to the right place. :) Most of the stuff is not solder but paste/flux. Microblocks. Build with logic. |
||||
| isochronic Guru Joined: 21/01/2012 Location: AustraliaPosts: 689 |
It makes me wonder, if small blobs of solder paste could be applied using the 3d printer eg with a solenoid-driven microsyringe...it would be slow but ok. Probably would wear out the printer quickly though. |
||||
| MicroBlocks Guru Joined: 12/05/2012 Location: ThailandPosts: 2209 |
That would be perfectly doable. The 3d printer would not have a problem with that except for the Z axis. In a common 3d printer the z-axis is made to move mostly up and also slowly. The 'bed' is pretty heavy compared to a syringe. You would need to change the z-axis so that it moves the syringe up and down. Adding a stepper motor and wiring it in place of the original Z-axis motor should not give any problems. Maybe with a switch to switch the wiring between the two motors so that the 3d printing functionality is maintained. This is a example of solder dispensing. Although i feel it dispenses way to much. https://www.youtube.com/watch?v=XxTQgO9F7RY Microblocks. Build with logic. |
||||
| isochronic Guru Joined: 21/01/2012 Location: AustraliaPosts: 689 |
Fascinating stuff...I agree, the blob volumes look excessive. I am wondering if the Rotring/Staedtler pens would work - they had a weighted pin inside that metered out the ink, maybe the paste is fluid enough for that at higher temperatures. Then again, remembering the hassles with those pens, maybe not a good idea !! |
||||
| Page 1 of 2 |
|||||
| The Back Shed's forum code is written, and hosted, in Australia. | © JAQ Software 2026 |
