
|
|
Forum Index : Windmills : Dual Stator F&P Kits & PVC Blade Hubs
| Author | Message | ||||
fillm Guru Joined: 10/02/2007 Location: AustraliaPosts: 730 |
Hi All , Over the last couple of years of developing and constantly refining my dual stator , I have finnally put together a system that I think is good enough to offer to others if they do not want to go through a lot of the building process themselves .. I have always believed that if you are going to erect a tower to have a F&P wind generator then why put one stator on it when it is as simple to put a dual and double your output .. Anyway I'll get straight to all the pics and descriptions , The first picture is the basis of the dual stator , the bearing housing I designed and uses the origional bearing housing which is sized to and press fitted into steel pipe , this then allows you to weld directly to the pipe and allows a stator to be directly mounted each side with no modifications . 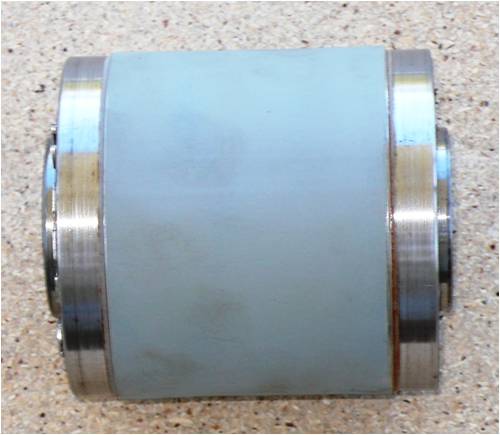
The next part that is integeral to this system is the front rotor mod and blade hub mount , the rotor is bored out to 25mm and is a interference fit and loctited , the blade hub then locks the whole assy to the shaft and sandwichs the rotor at the same time as the front collet is tightened . Some might say it is not keyed or splined , the rotor only has 300 to 400 watts of torque trying to make it slip , this hardly warrants a grub screw . the main force is the gyro of the blades on the shaft and keeping that at its biggest size is where the strength is required . 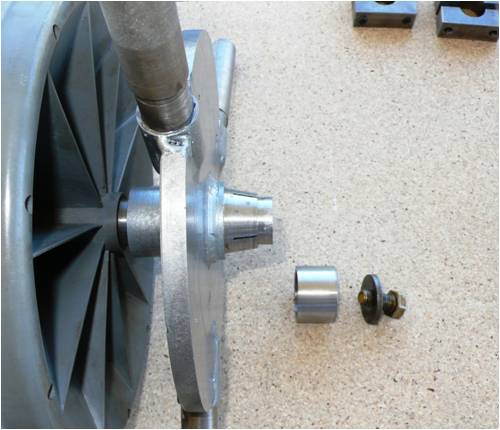
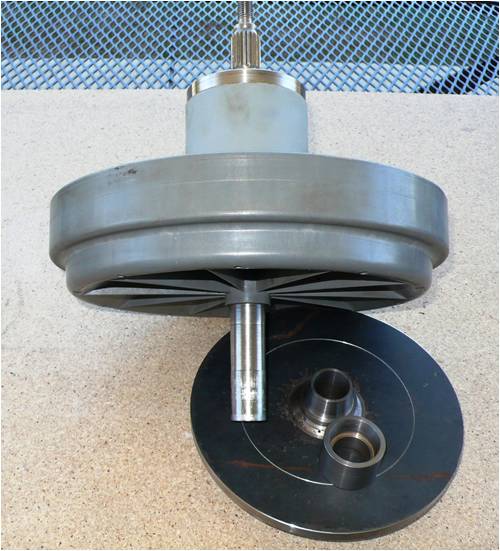
Over the next few pics is the the whole dual assy and blade hub system for mounting the S/S tubes for the PVC extruded blades . As you can see when all assembled it is quite a compact unit..The spline on the front of the shaft gets the chop and a 12mm thread taped into the shaft.. 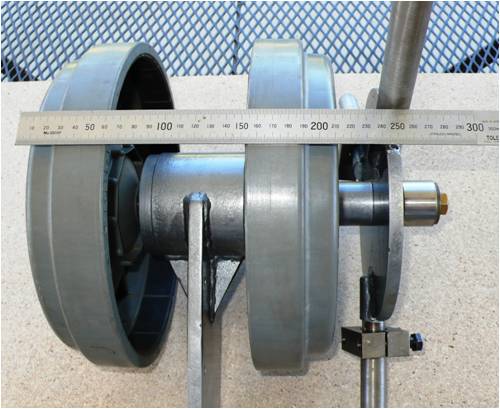
This is what I have designed and tested in a hydraulic press for mounting the S/S tubes to the hub spigots , these are some of the test pieces , the crimp clamp held at 5 Ton and was then sectioned to see the result. When the clamp is lossened blade angle can be adjusted and then re-tightened 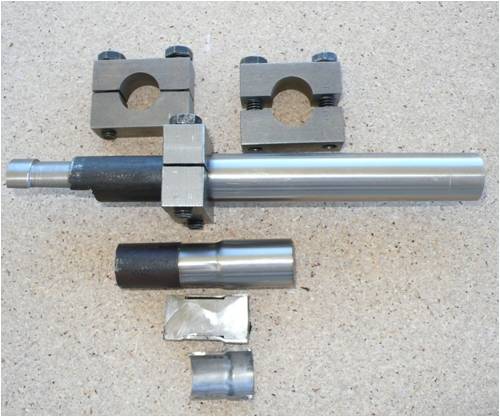
Front view of hub , When the 12mm bolt is torqued up and loctited there is absolutely no movement . 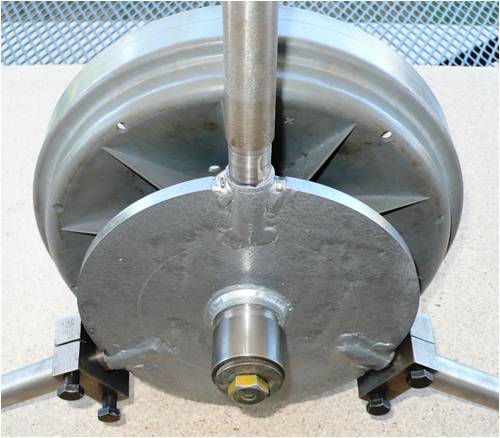
This is the tail and generator chassis / yaw assy . The yaw bearings are sealed 6008 bearings . The tail slipps into the tail pivot which has ball hinges and an adjustable stop for tail offset , there is a 24mm hole through the yaw shaft for wiring to come out the top of the housing .the bearing assy is held on to the shaft by a circlip and then slipps into the 75mm heavy walled tube , this can be welded to the tower or attached in a various number of ways.. The 1" unc mount on the front allows the generator head to be easily removed for maintenance or mods , it also allows blade offset to be easily adjusted for furling moment changes .. 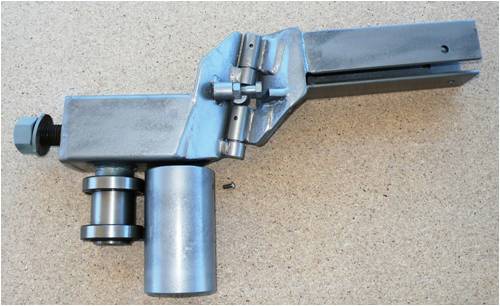
Showing the generator head assembled to the chassis.. 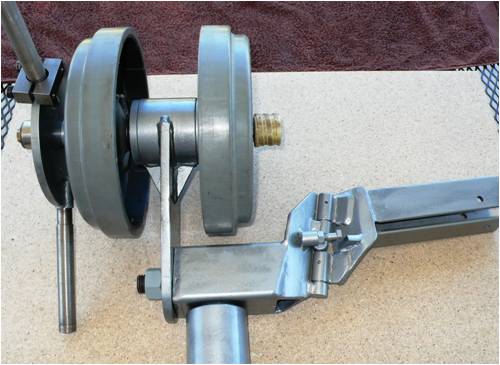
With 1m S/S tubes on and aluminum tail , the tail is 50mm aluminium box and 1.5mm aluminium sheet pop rivited together , I also recomend an extra trim tab on the tail to counteract the blade offset pressure in light to moderate wind as the PVC blades block a lot of wind to the tail .. 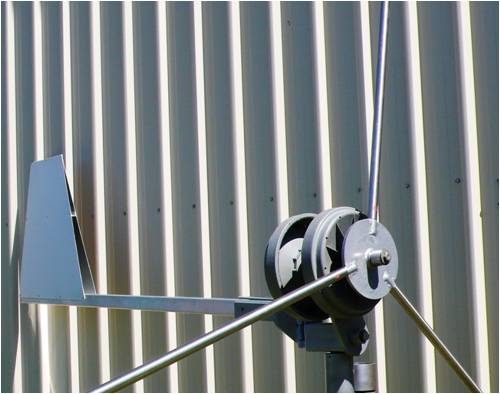
Add one of Trevs nose cones 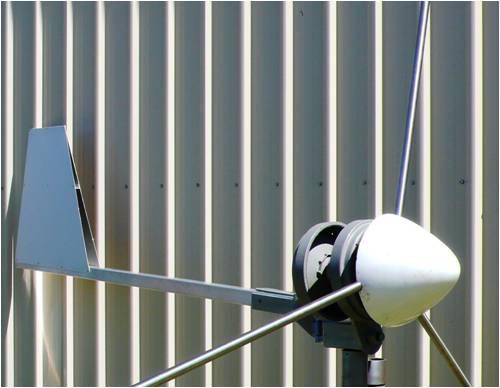
This one is complete and ready to be sold , it can be supplied with a set of 1.5m PVC blades , If I was to be charging by the hour for this the price would be out of this world , I am going to be realistic if anyone is interested and will offer the first one at a good price.. Below is some pics of the second it is not complete as some might want to do their own work or just want parts there of. 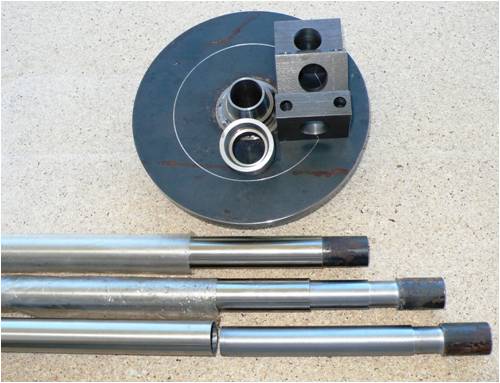
Contact phillm6@gmail.com for price and any more info .. PhillM ...Oz Wind Engineering..Wind Turbine Kits 500W - 5000W ~ F&P Dual Kits ~ GOE222Blades- Voltage Control Parts ------- Tower kits |
||||
Downwind Guru Joined: 09/09/2009 Location: AustraliaPosts: 2333 |
Hi Phill, Nice work. A lot of thought and carefull design work has gone into it. Hope you get a lot of interest for design. Downwind. Sometimes it just works |
||||
| Gizmo Admin Group Joined: 05/06/2004 Location: AustraliaPosts: 5187 |
Nice work Phill, does it come in other colours? 
Glenn The best time to plant a tree was twenty years ago, the second best time is right now. JAQ |
||||
| fillm Guru Joined: 10/02/2007 Location: AustraliaPosts: 730 |
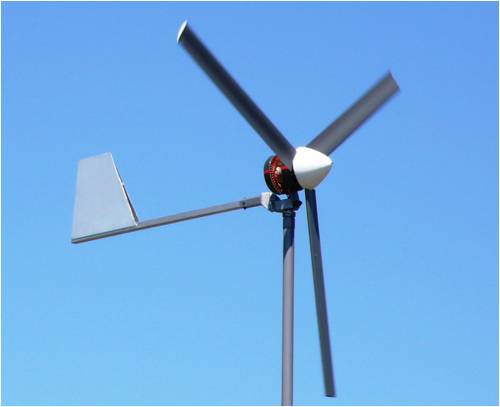
Couldn't help myself , as everything is modular with my dual stator F&Ps I threw a head on it and put it up to see what it looks like and how the new tail design worked .. What colour would you like Glenn ? Dark grey or Light grey ... 
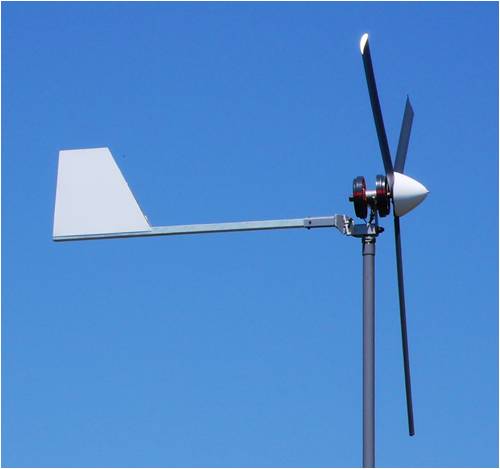
PhillM ...Oz Wind Engineering..Wind Turbine Kits 500W - 5000W ~ F&P Dual Kits ~ GOE222Blades- Voltage Control Parts ------- Tower kits |
||||
JimBo911 Senior Member Joined: 26/03/2009 Location: United StatesPosts: 262 |
Very nice Phill if I hadent built my own I would definitly be interestd. I really like your super strong blade crimp clamps. Very clean, strong and good looken.  Jim |
||||
| KiwiJohn Guru Joined: 01/12/2005 Location: New ZealandPosts: 691 |
Whenever you show anything on here Phill it always looks very nice and this is no exception! 
Great work. |
||||
| fillm Guru Joined: 10/02/2007 Location: AustraliaPosts: 730 |
Thanks Jim & John for your words of encouragement , I've allways tried to make my mills as pleasing to the eye as I can , but not at the cost of strength . With a little cowling arround the stators it would make it look a million $ and protect the stators and wiring , I'll have to go back to the drawing board .. PhillM ...Oz Wind Engineering..Wind Turbine Kits 500W - 5000W ~ F&P Dual Kits ~ GOE222Blades- Voltage Control Parts ------- Tower kits |
||||
gpalterpower Senior Member Joined: 19/07/2009 Location: AustraliaPosts: 177 |
Hey Phill, Really nice work there. I can see many, many, many hours of machining, cutting, welding, head scratching and finally painting here. would look good in any colour!!
Marcus if it aint broke dont fix it!! |
||||
| KarlJ Guru Joined: 19/05/2008 Location: AustraliaPosts: 1178 |
I bought one! I'm excited! managed to convince dad to grid connect it, objective here- learn from Phill's hard yards, not likely I'd be able to use 1KW-5KW /day every day without $$$ in batteries, in fact the price of batts make the PVE look cheap. Phill is easy to deal with and the most important aspect is happy to listen to my ramblings. On another interesting note, I have now sold F&P's to Hong Kong, USA and UK, this means they are building mills. We are not alone, others from all corners of the globe want to do their bit which is great Karl Luck favours the well prepared |
||||
| Downwind Guru Joined: 09/09/2009 Location: AustraliaPosts: 2333 |
What is the regulations on a grid connect of a windmill?? Pete. Sometimes it just works |
||||
| frepdx Newbie Joined: 16/11/2009 Location: Posts: 7 |
Beautiful piece of work Phill. |
||||
| fillm Guru Joined: 10/02/2007 Location: AustraliaPosts: 730 |
Hi All , Just a quick note to update the post . The blade hub in all the pictures above is the "crimp Clamp " that I spent a good deal of time on , I have now scrapped that idea due to the reasons that once the crimp is done to get the tube off it has to be cut off . I wanted something that was easily adjustable in all directions , it's very hard to keep the spigots in place when welding because the way welding pulls and moves . The new blade hub and clamp design is all outlined here PhillM ...Oz Wind Engineering..Wind Turbine Kits 500W - 5000W ~ F&P Dual Kits ~ GOE222Blades- Voltage Control Parts ------- Tower kits |
||||
| The Back Shed's forum code is written, and hosted, in Australia. | © JAQ Software 2026 |
