
|
|
Forum Index : Windmills : The LG Motor
| Author | Message | ||||
| brucedownunder2 Guru Joined: 14/09/2005 Location: AustraliaPosts: 1548 |
I bought an LG motor from smart drives ,thanks Cameron. I pulled it apart yesterday and it seems to be very much stronger and larger than the F&P . This is the top-end loaded washing machine ,,there are 2 types one is a front-loader (smaller than the F&P ) but this top-end loader washing machine motor is very rugged. The wiring is between the .6mm and 1mm wire ,,I think. the magnets are larger than the F&P and must be "slanted" within the magnetic material ,,as there is no cogging with this unit. The fingers on the stator are larger than the F&P . The bearings,the front bearing is larger ,fitting on to the 28mm shaft . The rear bearing looks like it's the same size as the F&P bearings. The shaft is larger and shorter than the F&P. Mounting would be very easy and strong as the body is pressed steel with lots of mounting holes. The magnet rotor housing is a strong pressed steel with a strong plastic spline hub bolted to it. I would like to get hold of another magnetic rotor so I could fit Neo's into it .. I'd reckon this modified unit with Neo's would be a very good performer.. search this forum for "LG" to look at some pic's .. Bruce Bushboy |
||||
| brucedownunder2 Guru Joined: 14/09/2005 Location: AustraliaPosts: 1548 |
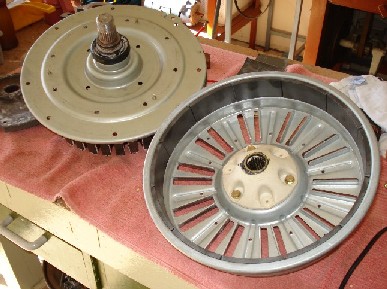
A pic of the larger size rotor and stator Bruce Bushboy |
||||
| Gizmo Admin Group Joined: 05/06/2004 Location: AustraliaPosts: 5187 |
Hey Bruce Its a neat looking unit, hopefuly we will start to see more of these popping up. I would try caps instead of Neo magents, caps a cheaper and a lot easier to use. Do you still have that test jig Bruce? Glenn The best time to plant a tree was twenty years ago, the second best time is right now. JAQ |
||||
| brucedownunder2 Guru Joined: 14/09/2005 Location: AustraliaPosts: 1548 |
Hello again,,, Just wondering if anybody out there would have an idea of what size spline the big LG rotor is?. maybe someone has been to a car wreckers and tried some splines off different cars ? It appears to be around 28 mm diameter. Is there some standard for ordering,measuring,whatever of splines ? Thanks Bruce Bushboy |
||||
Downwind Guru Joined: 09/09/2009 Location: AustraliaPosts: 2333 |
Hi Bruce, Not sure what you require to do. I run into a simular problem of how to mount the blade hub to a F&P splined shaft. I came up with a different approach to most but it worked for me. I cut a steel flat plate out round and drilled a hole for the threaded part of the shaft to fit through in the centre. The splines of the shaft was then blackened with soot from a acetylene flame on the oxy torch. The reason for this is to create a micro shim and a release layer. The shaft was then gently placed into the flat plate and a nut on the other side to secure the shaft in place. The shaft was then squared up to the plate and locked into position. (checked and double checked and checked again) I think I recoated the shaft with soot again here. A section of round pipe was cut in my case it was 40mm dia. And 50mm long by memory. I drilled some holes in the side walls of the pipe and welded some short pins in (old steel rivets I used) that protruded inside a short distance. The pipe section was carefully slide over the shaft and down onto the plate. It was located somewhere near centre and then welded to the plate. I then melted some aluminium in an gas fired forge I had built some time ago and filled the pipe section with the molten aluminium. When cooled I then pressed the shaft out of the hub, it was a tight fit and after several times of pressing the shaft in and out with a little WD40 it became free enough to fit and remove with a gentle even tapping with a hammer. You MUST blacken the shaft with soot or it will not come apart after. It is an old technique used many years ago when casting white metal bearings for water windmills. (when I was a teenager) If the splines have pits in them it could cause trouble on disassembly. Use this method at your own risk. I hope it helps. Pete. Sometimes it just works |
||||
| windman1000 Regular Member Joined: 21/06/2009 Location: United StatesPosts: 91 |
I knock out the center plastic and took a sproket and machine down hub to fit rotor hole and drill /tap for bolts to go into sproket 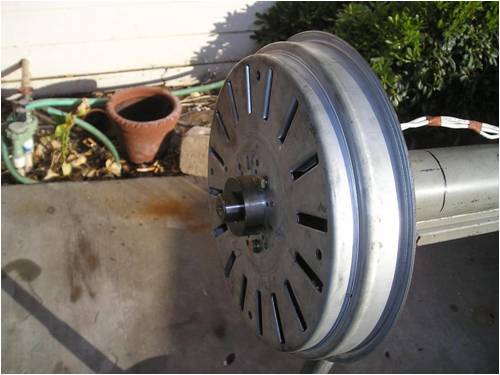
|
||||
| The Back Shed's forum code is written, and hosted, in Australia. | © JAQ Software 2026 |
