| |
  Page 5 of 5 |
| Author |
Message |
GleamBright
Regular Member

Joined: 21/04/2025
Location: AustraliaPosts: 44 |
| Posted: 01:13am 28 Jul 2026 |
 Copy link to clipboard |
 Print this post |
|
A couple of questions about Nanos and the overcurrent Hall sensor, before committing to purchase:
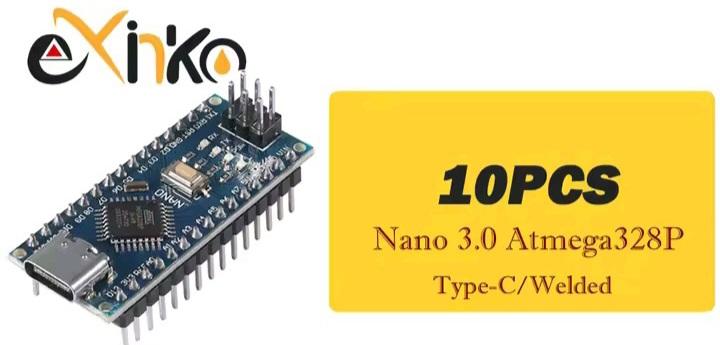
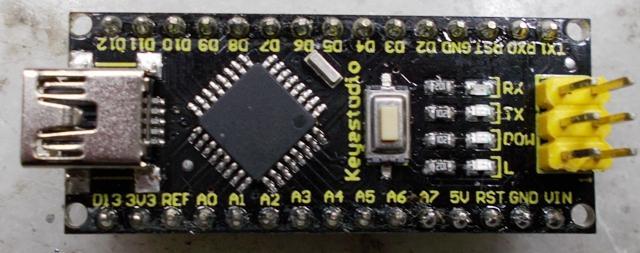
- are there any preferences for the type of Nano Chip. taking into account KeepIS' prior comments re: chip types to avoid, and uploaders? Am I better off paying extra for the Keye Studio type, go for the Chinese cheapie, or some other type?
- re: Hall sensor. KeepIS specified 12V 500A for his dual stage inverter. What Amp rating would suit a single stage system rated at 6 kW?
 |
| |
KeepIS

Guru

Joined: 13/10/2014
Location: AustraliaPosts: 2287 |
| Posted: 01:51am 28 Jul 2026 |
Copy link to clipboard |
Print this post |
|
A single stage Inverter can handle 600A Peak DC input. A dual inverter has TWO 500A units, one for each power stage. Make sure it's a DC (uni directional) Sensor like the ones I posted.
Most Nano boards are fine, I've been running some low coast units for a few years. Keep in mind that some come with the pins fitted, others supply the pins but you have to solder them in.
I've used these Nano V3 Core Electronics AU $6.55 EX GST.
.
Edited 2026-07-28 11:52 by KeepIS
NANO:Inverter V 8.4ks - Linux AvrDude GUI script V4.1 |
| |
KeepIS
Guru
Joined: 13/10/2014
Location: AustraliaPosts: 2287 |
| Posted: 08:35am 04 Aug 2026 |
Copy link to clipboard |
Print this post |
|
I just finished building one of the new WG power boards, this is the one with two very small vertical mounted gate drive PCBs. The power board is slightly shorter than the old board, and it allows the FET ferrite beads to be fitted without any gymnastics on the High side drains, really nice!
This new power board is the simplest and quickest board to build of all, however the SMD gate drives PCB's are time consuming, but they are easy to build with plenty of room between components. As usual, the trickiest parts are the resistors and caps, but that's coming from someone who dislikes soldering tiny SMD components anyway, and it took me longer as I was checking every component before and after it was soldered in.
This is my first build of the new board with its revised construction and layout, so I also noted the things that might trip up new builders, there will soon be some people building this inverter, likely some with little or no experience, I now feel confident that this is indeed the best version for them to build.
It's definitely the best version of all from a construction point of view, especially the revised FET layout and Isolated supply mounting, it's pretty close to fool proof now.
Anyway, before calling it a day, I fitted four FETs, the test Toroid and chokes, NO caps, powered it, it worked first go 
I'll make another tomorrow, should be a lot faster this time.
.
Edited 2026-08-05 08:43 by KeepIS
NANO:Inverter V 8.4ks - Linux AvrDude GUI script V4.1 |
| |
GleamBright
Regular Member
Joined: 21/04/2025
Location: AustraliaPosts: 44 |
| Posted: 10:25pm 08 Oct 2026 |
Copy link to clipboard |
Print this post |
|
We've had a bit of mucking about, but our component bulk order is now in transit to Aus. So, we will soon have the parts to populate the PCBs.
Currently preparing an alternate plan to place orders for PCBs, so posting here if any Aussies would like sets of PCBs for a Wiseguy inverter, Rogers' mppt controller, or Poidas' inductance tester. Feel free to PM me if interested. |
| |
KeepIS
Guru
Joined: 13/10/2014
Location: AustraliaPosts: 2287 |
| Posted: 04:17am 29 Oct 2026 |
Copy link to clipboard |
Print this post |
|
I wanted to clarify the I2C address issue with the LCD in the MPPT controller for the group build.
The group are building the MPPT board modified by Rogerdw, and it has both the Nano controller and LCD (I2C) Nano mounted on the MPPT power board.
There was the question of the I2C address:
Of course the default address can be changed on the I2C interface board, this board attaches to the LCD module, however there is no need to change the default address of the module for this build.
Depending on the I2C Chip the default address will be either 0x3F or 0x27.
If the chip is a PCF8574A, the default address will be 0x3F, otherwise it will be 0x27, this includes the PCF8574T, which is fitted to the unit that just arrived. The chip part is easily read with good eyes or in my case a small telescope 
For those builders who don't want to load, read, modify and recompile the code, and download and install the Arduino IDE to do so, I have supplied the files in HEX format, along with code files in a zip file.
I have supplied two hex files for the LCD Nano, one for 0x3F and one for 0x27.
This allows all Nano modules, Inverter, Sat Tester, MPPT controller and I2C Nano, to be programmed using Hex files and the tiny low cost programmer module.
I would have liked to included the official (supported by WG) Inverter Hex program in that file, but I have not seen the official code release or even a hex file on the forum, so hopefully if someone has it, and if allowed, could supply it to the WG build group so they all have the option of using that as well.
NANO:Inverter V 8.4ks - Linux AvrDude GUI script V4.1 |
| |
| |
Page 5 of 5 |

 Notice. New forum software under development. It's going to miss a few functions and look a bit ugly for a while, but I'm working on it full time now as the old forum was too unstable. Couple days, all good. If you notice any issues, please contact me.