
|
|
Forum Index : Electronics : Nano control board came in today
| Page 1 of 5 |
|||||
| Author | Message | ||||
| BenandAmber Guru Joined: 16/02/2019 Location: United StatesPosts: 961 |
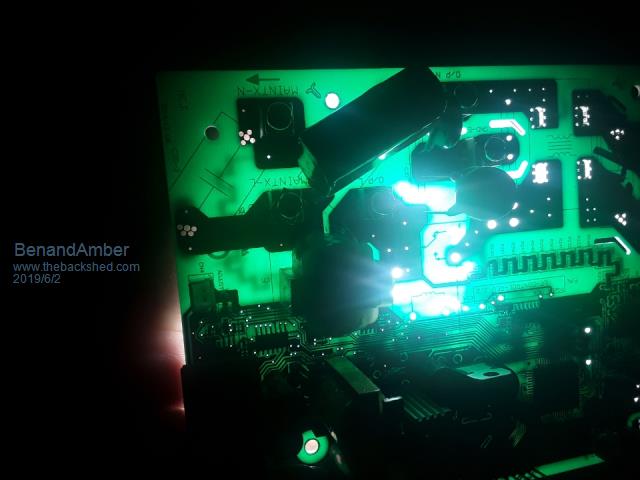
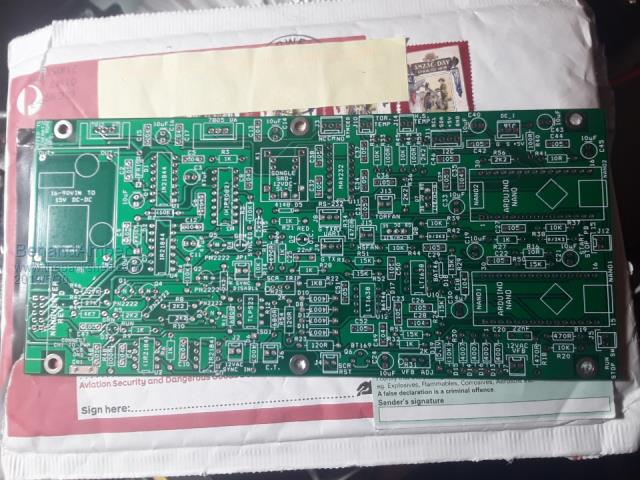 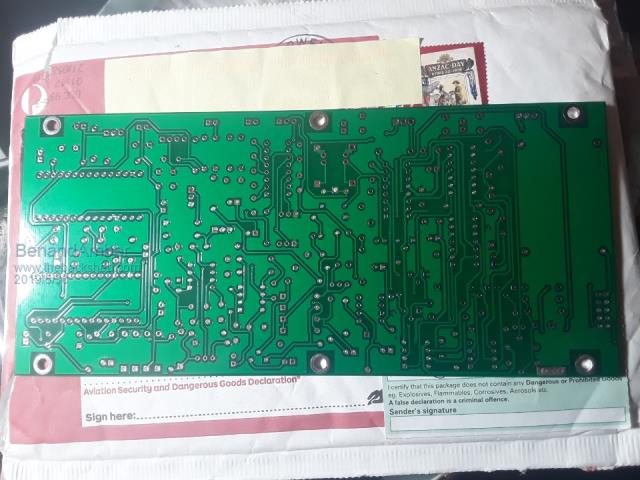 Got my Nano control boards in today thank you much poida the great They look absolutely perfect in every way As you can see every last bit of the board was used It looks like all the component values are on the board That should make it a lot easier for someone like me to put it together I'm so excited and overwhelmed at the same time I've never done anything like this before I do have a few questions Is there a list of all the components somewhere that I can copy to make sure that I don't forget anything And I've heard that there are a few different versions of the Nano is there a certain one I need to buy And will I need to buy something to program the Nanos I sure hope I'm not in over my head I got a lot of determination and I want this really bad Happy happy joy joy so excited be warned i am good parrot but Dumber than a box of rocks |
||||
| tinyt Guru Joined: 12/11/2017 Location: United StatesPosts: 561 |
The zip file posted here has a Bill of Materials. Make sure you read all the notes in the schematic. I think those who have running units are using the IR21844 driver chips. They might also help you pick the version of the nano module. |
||||
| BenandAmber Guru Joined: 16/02/2019 Location: United StatesPosts: 961 |
Thanks tiny T I really appreciate it be warned i am good parrot but Dumber than a box of rocks |
||||
renewableMark Guru Joined: 09/12/2017 Location: AustraliaPosts: 1679 |
Ben you load the sketches/programme onto the nano via a USB cable from your computer. The arduino software is a free download here The sketches are in the nano thread. BTW you don't need all the bits on the board if you don't plan to sync with another source etc. Cheers Caveman Mark Off grid eastern Melb |
||||
| BenandAmber Guru Joined: 16/02/2019 Location: United StatesPosts: 961 |
Thanks renewable mark I will never be syncing it to another source so how do I know the bits that don't need I didn't see a charging function but I won't ever be using that if it does have one either I want to order parts as soon as possible pretty excited about this be warned i am good parrot but Dumber than a box of rocks |
||||
| poida Guru Joined: 02/02/2017 Location: AustraliaPosts: 1480 |
B & A, a couple of things. Sockets for both nanos, and both IR21844 driver ICs. Buy good quality 7805 and 7812 regulators. RenewableMark has had problems with the regulators on his board. I would use the USA suppliers such as Fry's or Digikey or whatever for these parts. No need for the RS-232 support, nor mains sync. We can help with which parts need to be present for the board to work. putting the firmware into the nanos is not too hard. Sometimes there is a trick, just ask me here. Just about all you see on the board are resistors, capacitors and about 8 transistors. And the board was of a type that Mark and I agreed on how easy it was to solder. A fine tip on the soldering iron, some 0.5 or 0.7mm flux core 64/40 and you will be fine. wronger than a phone book full of wrong phone numbers |
||||
| BenandAmber Guru Joined: 16/02/2019 Location: United StatesPosts: 961 |
Thanks for the tips Poida the Great I'll probably be ordering everything from digi-key Already have an account with them I had a few things laying around and I am so excited to just get started haven't soldered anything on yet Does this board take a small transformer for the voltage feedback 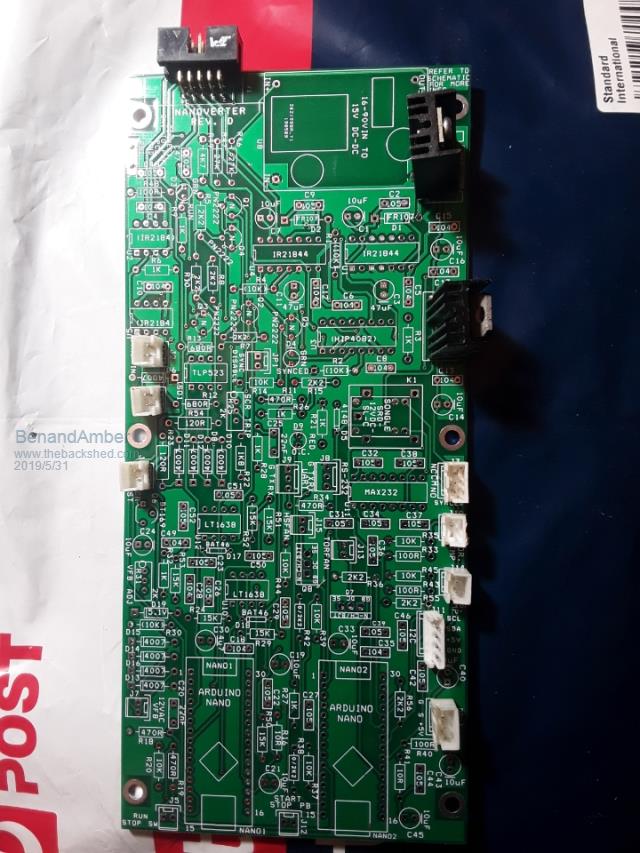 be warned i am good parrot but Dumber than a box of rocks |
||||
| renewableMark Guru Joined: 09/12/2017 Location: AustraliaPosts: 1679 |
You'll need an isolated transformer from your secondary output which will plug into the 2 pin socket VFB. Don't forget to fit and solder all the small parts first like resistors and diodes. It's a pretty tight layout so that makes it easier for access when assembling/soldering. Cheers Caveman Mark Off grid eastern Melb |
||||
| BenandAmber Guru Joined: 16/02/2019 Location: United StatesPosts: 961 |
Thanks renewablemark I see it now I hope I don't drive you guys nuts I'm going to order all the parts for both boards as soon as I can get the funds up I got my hands on a couple of nice size heat sinks a little bit bigger than what comes with a factory Power Jack Thinking of maybe trying to put together a mosfet board also I already have the mosfets also Hy 4008 I have lots and lots of scrap electronic boards that I might be able to get some of the parts off of be warned i am good parrot but Dumber than a box of rocks |
||||
LadyN Guru Joined: 26/01/2019 Location: United StatesPosts: 408 |
If you can buy the $10 component tester, that could help you a lot going through all the components involved. Programming the nanos is not too hard, you're way more skilled and have already done more complicated projects! It's just one new thing to get used to. Best of luck and keep posting pictures! |
||||
| BenandAmber Guru Joined: 16/02/2019 Location: United StatesPosts: 961 |
Thanks for the kind words ladyN I haven't forgot about the video upload yet When I can get my son down to the bus with me I'll have him video record and upload it so I can show it off a little bit be warned i am good parrot but Dumber than a box of rocks |
||||
| BenandAmber Guru Joined: 16/02/2019 Location: United StatesPosts: 961 |
 This is part of a air conditioner control board the little Transformer puts out 12 volts I was thinking about using it four voltage feedback I put a little 1 amp fuse in there just in case be warned i am good parrot but Dumber than a box of rocks |
||||
| BenandAmber Guru Joined: 16/02/2019 Location: United StatesPosts: 961 |
 This is the control board out of the Power Jack 8000 watt inverter I'm building this control board for It looks to me like one side of the AC output goes through that little Transformer If I'm not wrong about this then this is just nuts 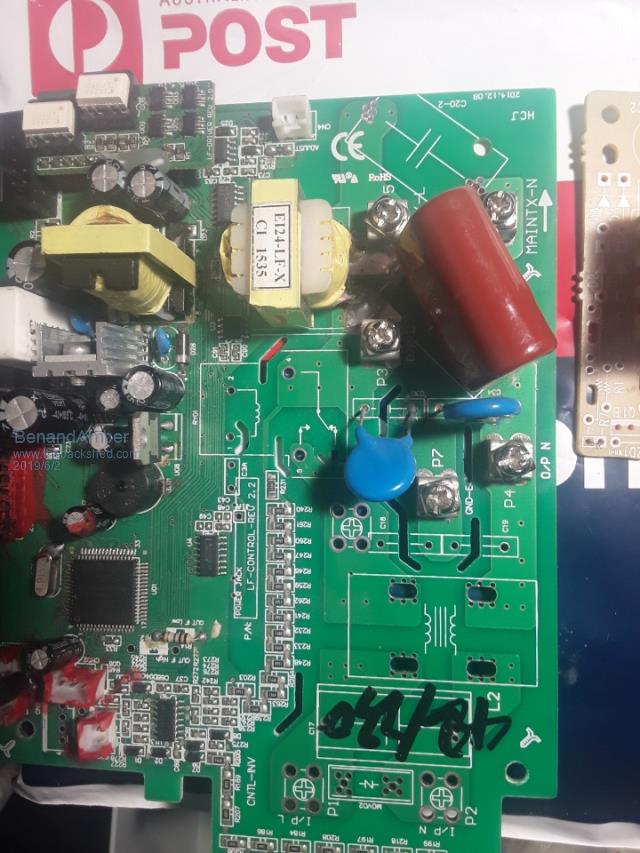  The only reason I was looking at it again was to maybe Rob the little heatsink off of it There's nothing wrong with this control board besides it being 230-volt and it being a power jack poor design be warned i am good parrot but Dumber than a box of rocks |
||||
| BenandAmber Guru Joined: 16/02/2019 Location: United StatesPosts: 961 |
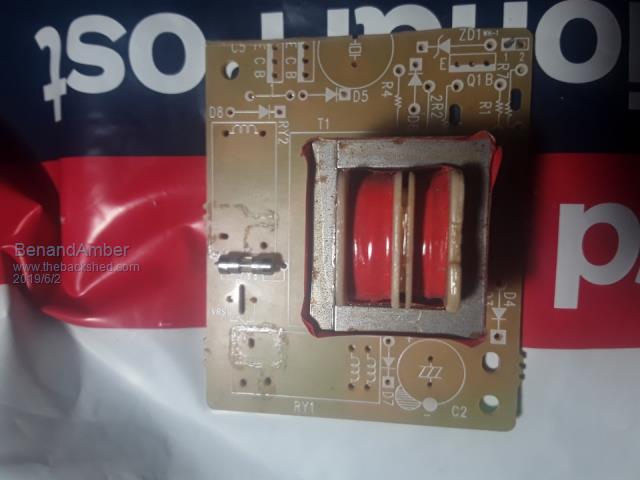
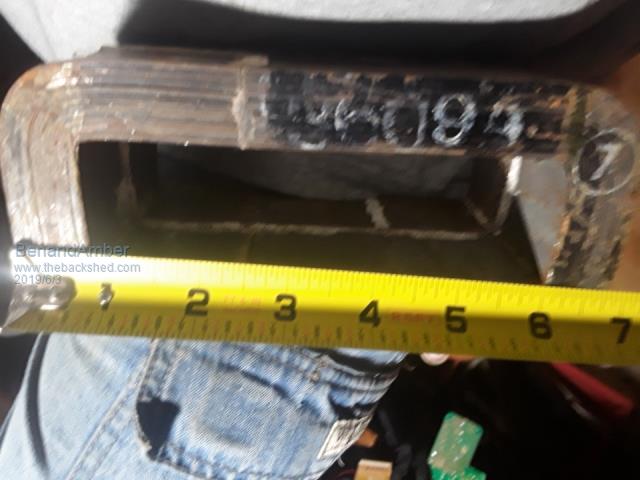 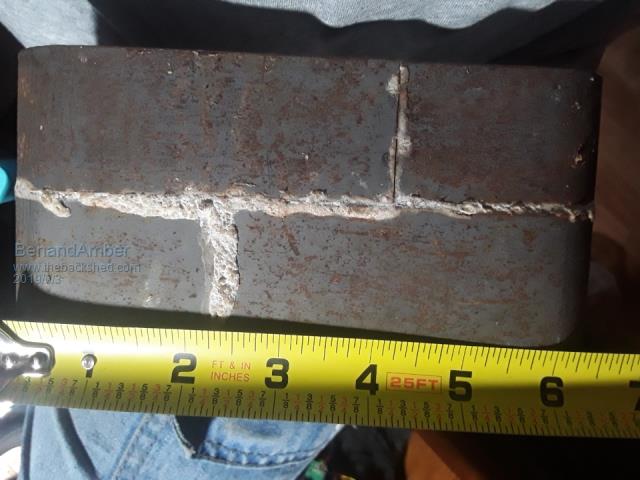 Does anybody have a idea on what to use this Transformer core four It is super glued with baking soda together I can get it back apart without damaging it the baking soda makes the super glue dry instantly It was originally two cores side by side with the windings going around the two Center legs It was in a container full of oil Several years ago I was thinking I was going to wind it like a toroid To experiment with but never got around to winding it be warned i am good parrot but Dumber than a box of rocks |
||||
| BenandAmber Guru Joined: 16/02/2019 Location: United StatesPosts: 961 |
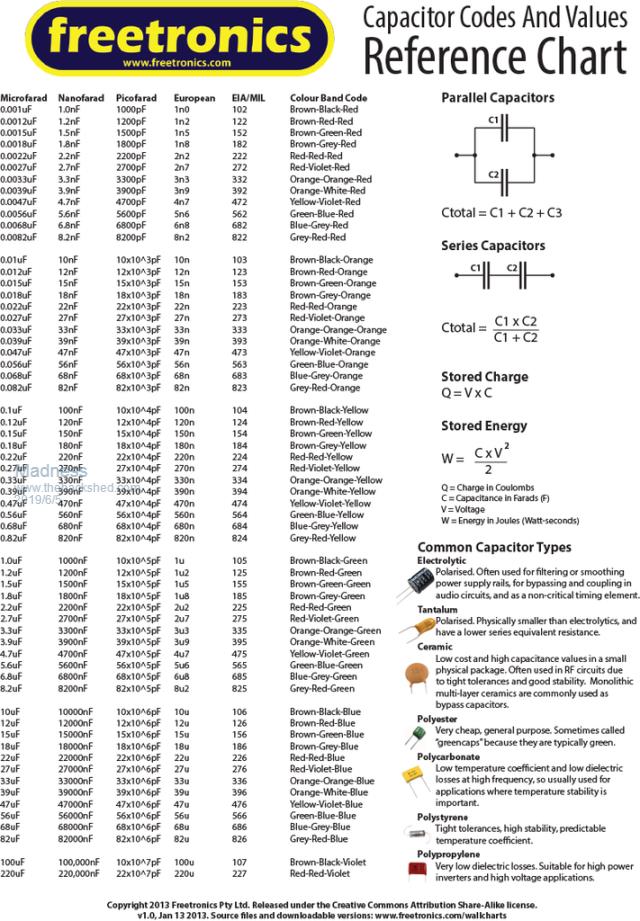
I ordered the little dc-to-dc converter module I asked the guy to make it 16 volt output like poida the great suggested I'm trying 2 get all the parts put in my shopping cart at digi-key the 105 ceramic capacitor monolithic 6.3 mm lead spacing Does it have to be 6.3 mm spacing Are all 105 ceramic capacitors 50 volt amd 1 UF RenewableMark told me what chips to get and dummy me didn't write it down right away and I can't find it again now Sorry renewablemark And is it all right to buy the cheapest parts ( except for the LM 7812 and the LM 7805) I will never be switching from Mains power is there a list of parts if you don't plan on ever uses that function I already have a lot of these parts but I'm afraid to use them because I've pulled them off other circuit boards I don't think the connectors would matter though be warned i am good parrot but Dumber than a box of rocks |
||||
| renewableMark Guru Joined: 09/12/2017 Location: AustraliaPosts: 1679 |
105 is the caps value (1uf) so yeal all 105 caps are 1uf. I don't know if they are all 50v, I would assume not though, just type in what you need and it should pop up. Monolithic and ceramic are different types BTW. Lead spacing probably doesn't matter much as long as it's not ridiculously different. With the nano you can use different driver chips. Either 2x 21844 OR 2x 2184 OR 1x HIP4002 Poida and myself are using the 2x 21844 chips, may as well go with the flow. Almost all my parts came from Ali and ebay, only thing that needs to be quality is the 7812,7805. BTW just call me Mark, must be a pain writing renewablemark all the time. Cheers Caveman Mark Off grid eastern Melb |
||||
| renewableMark Guru Joined: 09/12/2017 Location: AustraliaPosts: 1679 |
Bare essential parts to get it to run an inverter and that alone, hmm dunno. Maybe Poida or Tinyt could do a list and maybe highlight the parts needed on the schematic?? Cheers Caveman Mark Off grid eastern Melb |
||||
Madness Guru Joined: 08/10/2011 Location: AustraliaPosts: 2498 |
 There are only 10 types of people in the world: those who understand binary, and those who don't. |
||||
| BenandAmber Guru Joined: 16/02/2019 Location: United StatesPosts: 961 |
Awesome Madness thanks a big Thanks goes out to you to mark I appreciate you always being there for me be warned i am good parrot but Dumber than a box of rocks |
||||
| BenandAmber Guru Joined: 16/02/2019 Location: United StatesPosts: 961 |
On the Nano board parts list part 16 TLP 523 - 1 plus dip 8 socket the ones I look up online are four pens not 8 pin The TLP 523 - 2 is 8 pen but I don't know if that's the right part And does anyone have a parts list for someone that's never going to sink with the power grid off-grid only be warned i am good parrot but Dumber than a box of rocks |
||||
| Page 1 of 5 |
|||||
| The Back Shed's forum code is written, and hosted, in Australia. | © JAQ Software 2026 |
