
|
|
Forum Index : Microcontroller and PC projects : CNC Router?
| Page 1 of 2 |
|||||
| Author | Message | ||||
| lizby Guru Joined: 17/05/2016 Location: United StatesPosts: 3784 |
Does anyone have experience with this router for making PCBs:CNC Router $104USD from Banggood--unit with same photo (who knows what you'd get) is $319 on aliexpress. I know CaptainBoing makes PCBs with a CNC router (which one?). Anyone else? This one is down in my price range, if it would work. PicoMite, Armmite F4, SensorKits, MMBasic Hardware, Games, etc. on FOTS |
||||
| Mixtel90 Guru Joined: 05/10/2019 Location: United KingdomPosts: 8911 |
I like the look of it - but not the UK price. :( 154.83UKP + 27.76UKP carriage. It seems pretty rigid but you could put extra triangular support plates on each end without them getting in the way of anything. I'd like to see more about them too. Looks rather like an Arduino controller with three stepper driver boards. Edited 2021-07-09 22:15 by Mixtel90 Mick Zilog Inside! nascom.info for Nascom & Gemini Preliminary MMBasic docs & my PCB designs |
||||
| CaptainBoing Guru Joined: 07/09/2016 Location: United KingdomPosts: 2171 |
Not a router Lance, laser etcher. Copper clad board sprayed with black acrylic, lase, clean, traditional copper etch (yes, yes, I still use ferric), clean with actetone, chemical tinning, drill.. use. I can lase the outline of the lands/traces (gives a "routed style" board) or a raster (gives a traditional photo-exposed board). Depending on method and board size, I can go from image export to loadable board in 30 mins e.g. A tiddly 3-channel level shifter, so why break your back with vero board and all the bugs that creep in with its use? It does make for a very trustworthy method and everything gets laid up in Eagle and ultimately etched... I haven't touched strip/dot board in years now. I covered my process in this thread https://www.thebackshed.com/forum/ViewTopic.php?TID=12047&PID=145028#145028 . Edited 2021-07-09 22:25 by CaptainBoing |
||||
| lizby Guru Joined: 17/05/2016 Location: United StatesPosts: 3784 |
Ah, ferric acid. I decided 40 years ago that was not for me, and I don't think I'll change my mind now. Glad it works for you, though. I'd love a clean way to make little boards, and $100+ for gear would be just right. Drilling would drive me crazy, even if I survived the acid. Would require a change of mind-set, though, to make everything single-sided. PicoMite, Armmite F4, SensorKits, MMBasic Hardware, Games, etc. on FOTS |
||||
| Mixtel90 Guru Joined: 05/10/2019 Location: United KingdomPosts: 8911 |
I've been etching using sodium persulphate. Nowhere near as messy as ferric chloride but you have to use it pretty warm (45C). It's a lovely blue colour too when it's got some copper in it. :) Not a long shelf life though, probably only about 30 days once mixed. Gives a nice controllable etch - not as vicious as ferric chloride. Mick Zilog Inside! nascom.info for Nascom & Gemini Preliminary MMBasic docs & my PCB designs |
||||
| Plasmamac Guru Joined: 31/01/2019 Location: GermanyPosts: 620 |
I bought a CNC 1310 for creating Pcb. Plasma |
||||
| lizby Guru Joined: 17/05/2016 Location: United StatesPosts: 3784 |
How has it worked? Do you have pics of output--and of the machine? PicoMite, Armmite F4, SensorKits, MMBasic Hardware, Games, etc. on FOTS |
||||
| Pluto Guru Joined: 09/06/2017 Location: FinlandPosts: 411 |
I have the model shown i the first post. From Banggood in 2019 at USD 154 incl shipping, I think it was a special offer. I have made several PCBs for various Micromites. With the conical tools it is quite easy to make boards for components with 2.54mm leg spacing, but forget about putting in traces between 2.54mm spaced soldering pads. With the conical cutting tools, the cutting depth becomes quite critical. Too deep and the copper traces will become too narrow. Not enough deep and the copper will not be properly removed. Therefore it is very important to calibrate the PCB topography before the cutting can start. It is also important to fix the PCB properly to the table without creating unnecessary bending of the PCB. Before you start doing anything, please ensure that you have enough spare cutting tools available. If the tool hits any obstacle, like a PCB fixing clamp, it will break immediately. With too deep cutting in combination with too high cutting speed the result will be the same. Hole drilling has worked like a dream. Cutting a simplified "Micromite backpack" can take almost one hour with noise and some dust. (I have attached an old vacuum cleaner to collect the dust as close as possible to the source.) Once started I normally leave the room for coffee or lunch and return when the noise stops, change the cutting tool to a drill and quite rapidly the holes are ready. The (free) software I have used: 1. KiCAD for layout of the PCB and making the Gerber files for Bottom Cu, Edge cuts and drilling. 2. FlatCam for translating Gerber files into G-code. Here you have to set cutting depth, speed, tooltype etc. (G-code is the files that the CNC uses.) 3. CAMotics for simulating the cutting process. Better to find out the possible/probable mistakes here than to spoil a PCB or break a tool. 4. grblControl for driving the CNC machine. -first load the Edge cut for calibration of the PCB topology. -then load the Bottom Cu file and run the cutting. -load the drill file and change tool to drill -load Edge cut file and cut out the PCB. It is good to start with something very simple, just to see that you really get what you want. Many possibilities for mistakes: Mirror image of the PCB....etc, etc. The CNC can also be run in manual mode for e.g. cutting openings in plastic enclosures or panels. It is also quite nice for carving wood. I hope this encourages you to try the CNC. |
||||
| lizby Guru Joined: 17/05/2016 Location: United StatesPosts: 3784 |
Thank you very much for this informative post. Very encouraging indeed. Now I just have to figure out if I'm willing to pay an extra $48 to have it shipped to Canada. And there may be "customs handling" for another $25. From China, base price is double. PicoMite, Armmite F4, SensorKits, MMBasic Hardware, Games, etc. on FOTS |
||||
bigmik Guru Joined: 20/06/2011 Location: AustraliaPosts: 2981 |
Hi Libby, All, AndrewG and myself have both bought these and they arrived last week. The day after I ordered it a `1 day special' came out for $165AU posted.. Grrrrr. I dont think Andrew has built his yet but I have built mine and I must say it is not an easy build. I started life as a toolmaker and this was still a challenge, but then Hey, that is half of the fun isnt it? Despite my best efforts on making sure every thing was aligned as accurately as I could expect I still have a 0.7mm drop on the X axis over 200mm so I need to adjust the horizontal gantry on one side. I believe that the software can take this into account but I haven't got that far yet and I still want to get it as accurate as I can any way (it must be the Virgo in me) I have done a couple of the sample cuts and I must say I am very impressed so far with it. I will post a picture when I am back on my PC. OK what you get. A lousy instruction manual with incorrect measurements (i believe it was for a smaller model that they upsized but forgot to update, I will post that information later as well) The instructions show what I believe is a one piece table but it is in fact a two pice that has to be joined by two strips of aluminium (seems quite effective but are not mentioned in the manual) but once again the measurements for the bearing mounts are out (no doubt due to a different table to the drawing) you have to improvise I will try to add pictures. The mounting plates have holes drilled for the M3 screws but these are SUPER tight the screws have to be forcibly screwed into the plates and then screwed into the motors, they are tight but can be screwed in with some effort A proper collet chuck is supplied instead of the joiner shown in the photos (a real bonus IMHO) 5 bits are supplied but they are all the same very sharp angled (I guess a 10-15degree point) good for engraving. A cheap 24V 4A Power brick of dubious safety, I have a claim on Banggood for this read later An equally dubious US to AU plug adapter (the brick is fitted with a US plug) The 3 motor cables are all the same length with the one for the Y axis too short for use (it would have to run under the table to actually fit but then would limit the travel of the table, the X axis length is OK the Z is way too long, I cut about 20cm (8") out of the Z axis cable and extended the Y axis with it, Much happier now, I think all cables are OK after that fix. There are no limit switches fitted and YES I drove the unit beyond its travel range (Jams and stepper motor complains) This is a MUST to fit limit switches, I am still waiting for mine to arrive. The reason I drove the table to the ends was it is difficult to conceive (not being experienced with these things is is the direction the way the table is to move or the way the spindle is to move (It is the spindle direction) The supplied linear bearings are rough (Rough as guts is the Aussie technical term) these will need lubrication on a regular basis, I would prefer better bearings but I have no idea where to buy them from (without getting equally bad ones) however it doesn't seem to affect the steppers ability to drive the axis'. The software needs to be configured for direction of the axis, This is easy and I have a table I will upload later just enter a command like $3=x (where x=1-9) with inverting one or two of the axis directions. The Power brick.. Hmm for a 100w 24V 4A unit the first thing I noticed was its weight (or lack of it) is is very light, I plugged it in and it does deliver 24Vdc.. Ok but when used with the machine it drives the 3 axis perfectly fine but to start the motor on maximum (It says 1000 in the software but I suspect this is NOT RPM but some other figure) the motor starts to spin then stops then starts then stops continuously.. If I start at 700 then it spins fine and I can crank it up to 1000 and it will maintain the level. I made a cable from my bench power supply and it has no problems at starting at 1000 so it is the power brick that is at fault. I have made a claim on Banggood but as I dont want another suspect brick I have ordered a properly rated 24Vdc `caged' power supply from Mouser (costs about $24AU) it is also available from element14. OK later today I will try to add some pictures as promised, Despite my comments I still think this is a reasonable machine for the price and is good for what I want it to do. Kind Regards, Mick Edited 2021-07-10 10:56 by bigmik Mick's uMite Stuff can be found >>> HERE (Kindly hosted by Dontronics) <<< |
||||
| lizby Guru Joined: 17/05/2016 Location: United StatesPosts: 3784 |
Great, Mick, thanks very much. I'll sleep on it, but I think I'm sold. PicoMite, Armmite F4, SensorKits, MMBasic Hardware, Games, etc. on FOTS |
||||
| Plasmamac Guru Joined: 31/01/2019 Location: GermanyPosts: 620 |
 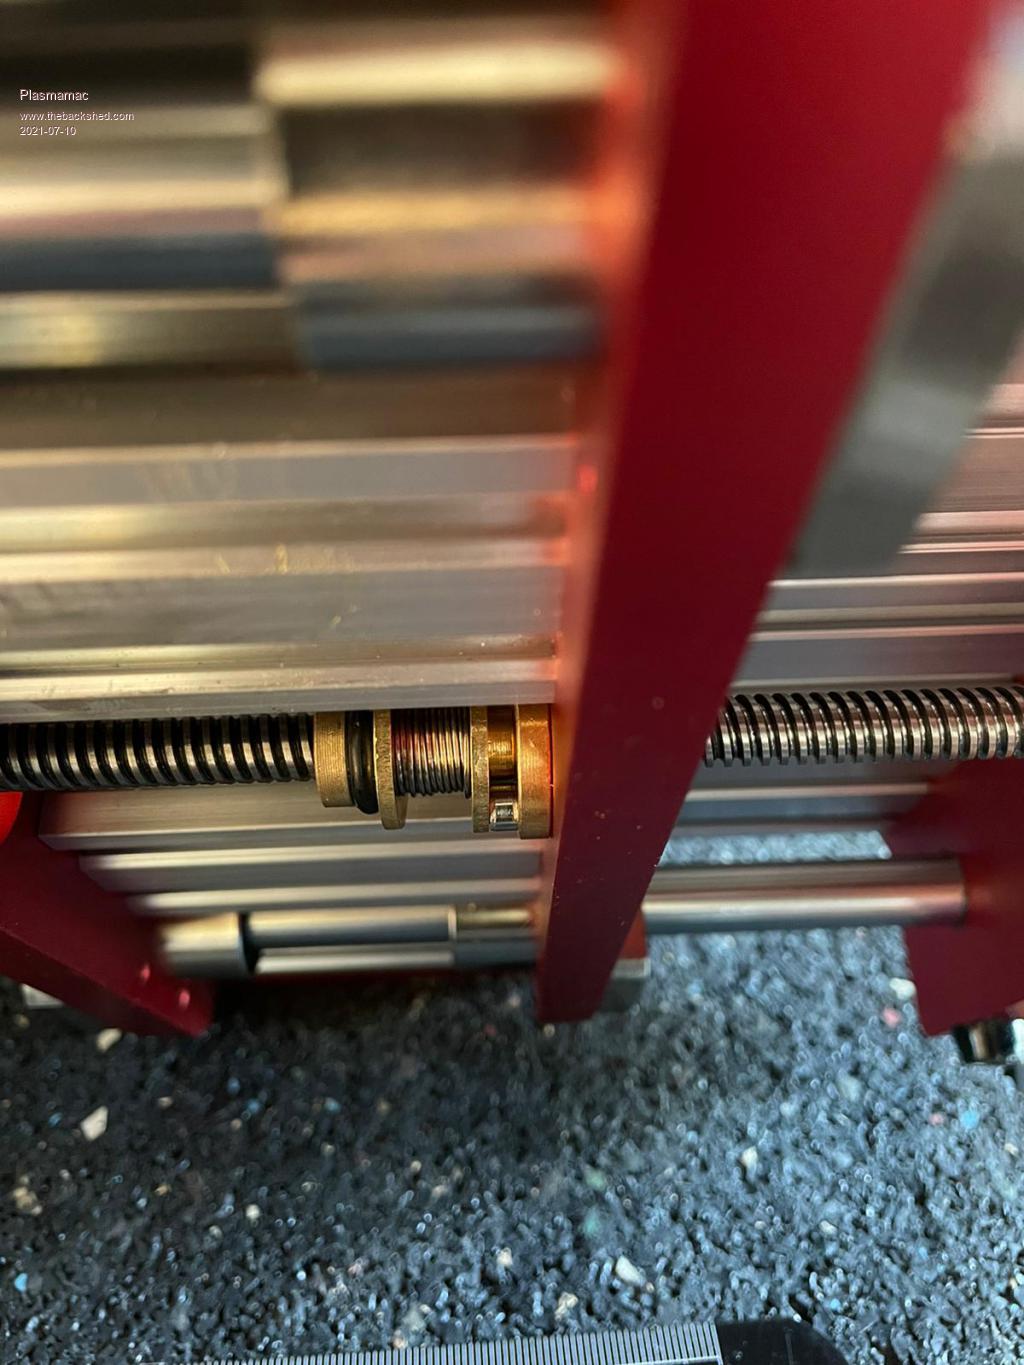 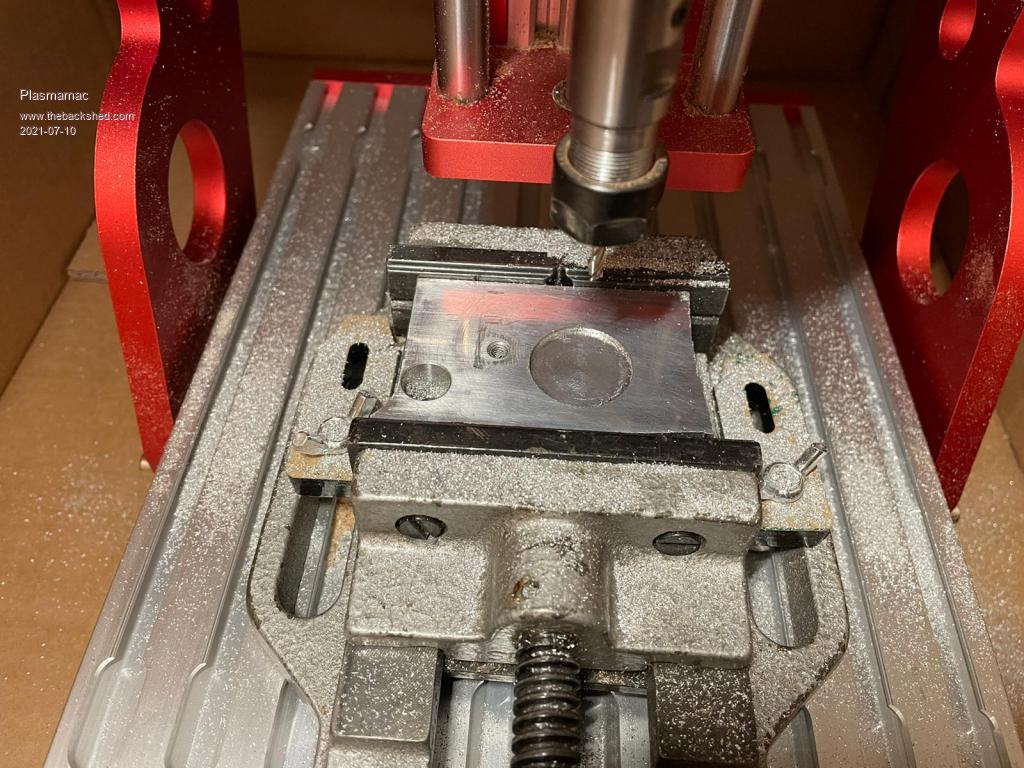 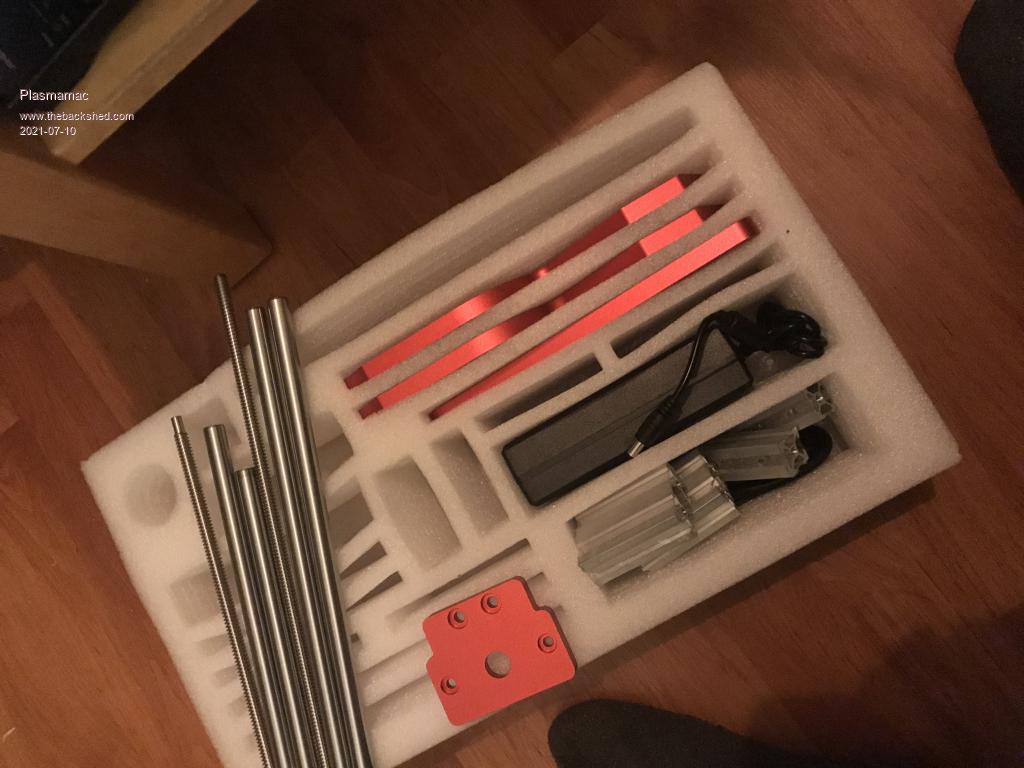 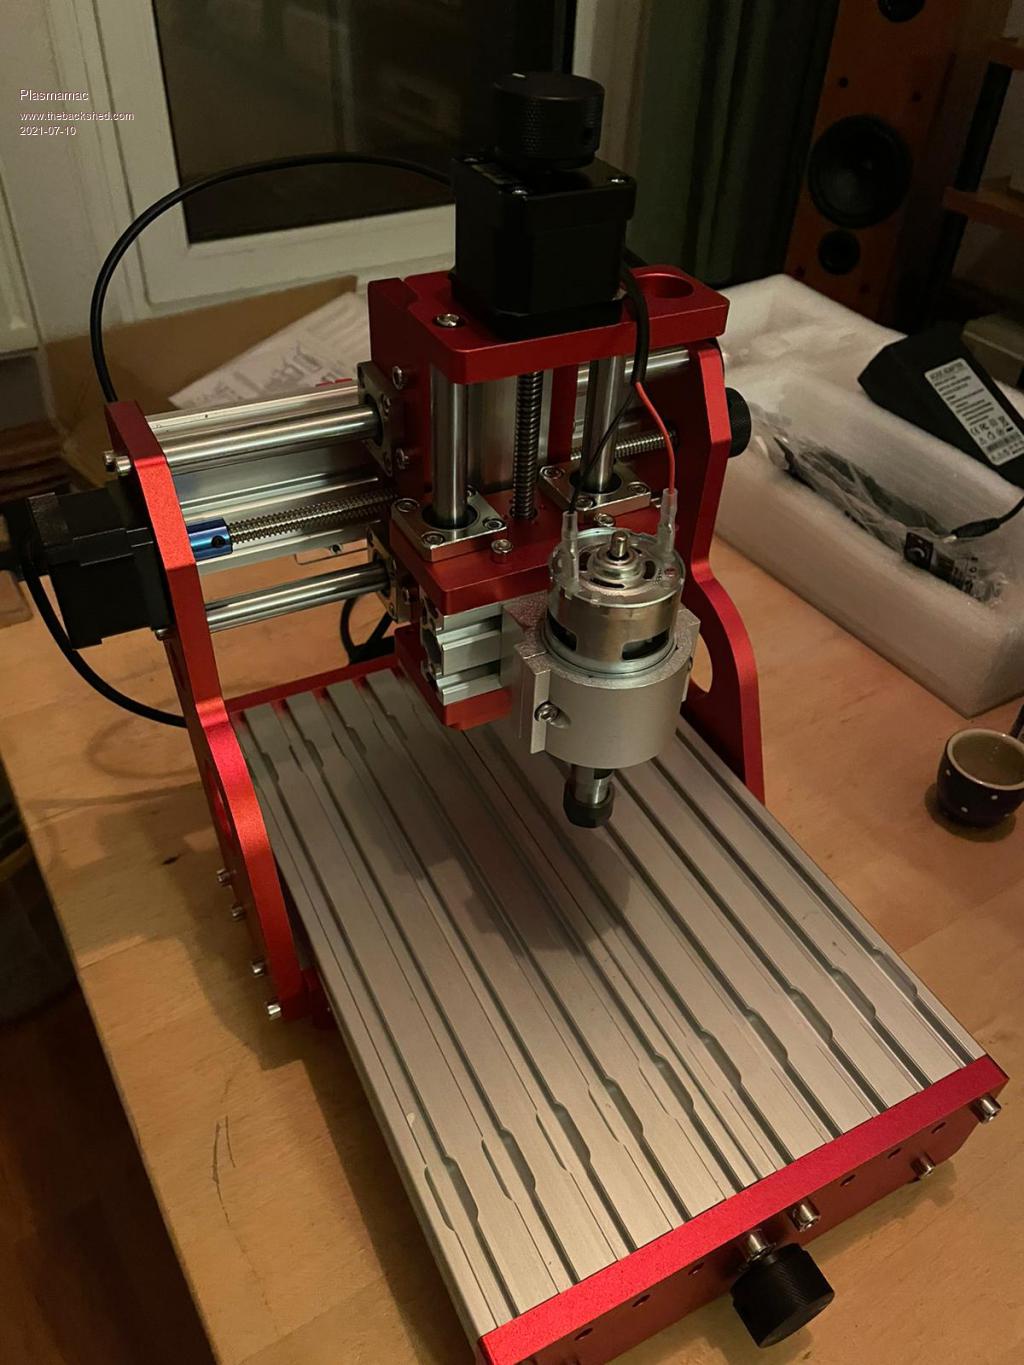 Plasma |
||||
| lizby Guru Joined: 17/05/2016 Location: United StatesPosts: 3784 |
Thanks for the pics. Looks sweet. PicoMite, Armmite F4, SensorKits, MMBasic Hardware, Games, etc. on FOTS |
||||
| lizby Guru Joined: 17/05/2016 Location: United StatesPosts: 3784 |
Ok, I pulled the trigger on the CNC router. Thanks for the hand-holding. PicoMite, Armmite F4, SensorKits, MMBasic Hardware, Games, etc. on FOTS |
||||
| jaybek Newbie Joined: 25/05/2020 Location: GreenlandPosts: 18 |
Hi All. I think you could benefit from having a look at https://www.grblgru.com/ And here is a long, still ongoing forum-thread about the program. You can get offline controller modules for the AtMega328 driven grbl-cnc boards. Banggood got one here , but have seen them cheaper on AliExpress. AFAIK they read one code-line from a G-Code file on a SD-Card and sends the line to the grbl board via the serial comport there would otherwise be connected to the computer via USB, - and gets an "OK" back. Regards Jens #MeTo ZX81 |
||||
| Tinine Guru Joined: 30/03/2016 Location: United KingdomPosts: 1646 |
Drifting slightly off-topic but for anyone looking to quieten their 3D printer steppers, I can highly recommend the Trinamic drivers. My buddy has 7 printers and the first thing he does is swap-out the supplied drivers  |
||||
| Plasmamac Guru Joined: 31/01/2019 Location: GermanyPosts: 620 |
@lizby : beware you cnc is full of cheap plastic. The red one is full alu! Plasma |
||||
CircuitGizmos Guru Joined: 08/09/2011 Location: United StatesPosts: 1427 |
If I had the time to write the program I would use a MicroMite or MaxiMite to do this. There are things I'd like to do that this module doesn't. Things like homing sequences and moving the platform to one extreme or another to load the material. Add extra buttons just for "macros" of G code. Micromites and Maximites! - Beginning Maximite |
||||
OA47 Guru Joined: 11/04/2012 Location: AustraliaPosts: 1050 |
Just my two cents worth. I purchased a 3018 router (300mmX180mm capacity) around three years ago and IIRC is cost around AU$350 at the time. My prime aim was to have a router for prototype boards and this unit did provide useful education with CNC & PCB prototyping. The controller was the first component to fail as one of the cpu io pins going to the servo driver died. I chose a replacement controller with a probe sense pin as the original did not have one and I had to direct solder a wire to the CPU to get access to the pin and the probe function is necessary for PCB etching. The second failure was that the unit developed too much backlash on the worm screws and movement of the plastic Z axis mechanism with flexing of the two horizontal guide bars. I purchased a 1610 size unit hoping that there would be less flex in the shorter guide and screw lengths but this unit like the previous was limited with the motor power and lack of rotation speed. I both cases I felt that these units are not substantial enough to be reliable at metal routing. My next resort was to build my own unit with more strength, larger capacity and more power. I started using a Dremel style router at 150W 240V with heavy duty guide rails and ball/screw drives from the servos to eliminate backlash error. I have recently upgraded the motor to a 500w 110V type and find I have more flexibility and power for metal routing. OA47 |
||||
| bigmik Guru Joined: 20/06/2011 Location: AustraliaPosts: 2981 |
At Plasmamac, That is a very decent looking CNC you have there. The 3018 is no where near that one. Here are some `corrections' I did to the so called manual. I suspect the document was originally for a smaller unit. 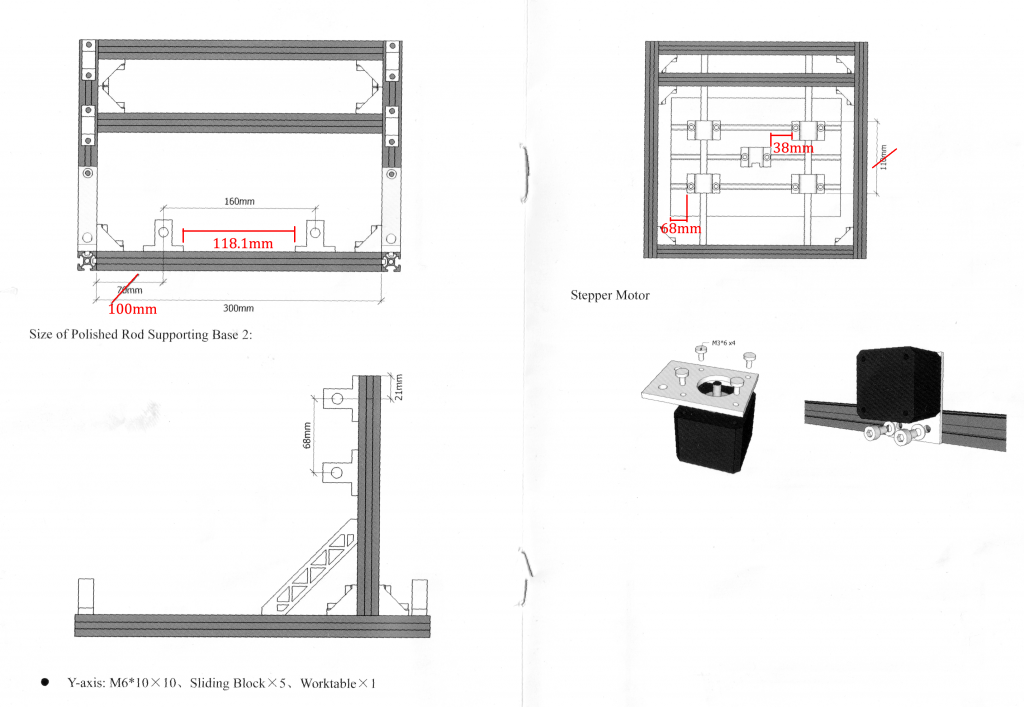 When I finished my unit one of the Axis (Y I think, I can't remember) were inverted direction. but here is a table to show the commands to adjust direction. It is fairly self explanatory. just enter at the prompt $3=x where x is the value from the table. This is a one off change but I think it adjusts the software NOT the cnc. 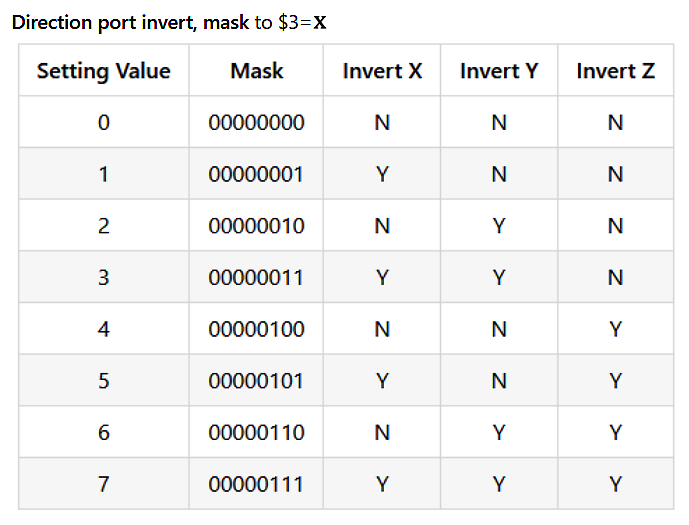 I cocked it up when I first did it so I did a $3=0 followed by the command I needed. Regards, Mick Edited 2021-07-11 15:31 by bigmik Mick's uMite Stuff can be found >>> HERE (Kindly hosted by Dontronics) <<< |
||||
| Page 1 of 2 |
|||||
| The Back Shed's forum code is written, and hosted, in Australia. | © JAQ Software 2026 |
