
|
|
Forum Index : Windmills : Chainsaws revisited pics and waffle.
| Page 1 of 2 |
|||||
| Author | Message | ||||
oztules Guru Joined: 26/07/2007 Location: AustraliaPosts: 1686 |
It's been some time since I did the original story on making your blades with a chainsaw. Since then I have had emails from people who did not quite understand how to do it step by step. Even though Imsmooth and Niall and others have video's on the web, it seems to not be enough... so I have decided to do a step by step story on these blades. It also gave me an excuse to see if better ways of doing things could be uncovered.... so here goes. I will preface this by saying that you can make a well twisted/tapered blade to whatever spec you can dream up with the blade calculators on the web, (see Nialls and Imsooth's video's) but my experience is different to what I had expected. The first set I twisted as much as the wood would allow (for 8x2"), and made the taper roughly follow the line of best fit... but similar to the blade calcs with an eye to the constraints imposed by the timbers dimensions. In short, a simple version of as close as I could easily get to the blade calc. I have since changed my mind after mindless hours of watching the mill.... I call it therapy... my wife calls it stupid... I am fortunate that my winds are so good and the exposure so good that it is still at ground level.. so easy to tinker with and watch endlessly.... and still easily do 3kw in mid winds... around the 30 mph range. I have decided to throw the calculator out the window, and design a woeful blade. I did not want a blade that was perfectly tuned to a specific TSR. It is rare to run at that TSR driving a battery bank anyway. I wanted a mongrel, that would perform well at any reasonable wind speed, especially lowish ones, and could not care about the high winds... not a thoroughbred.... I turn it off in high winds. I wanted it poorly tuned to any specific TSR, but able to operate with different parts of it at different wind speeds. So it was wider at the tips than the chart said, it was thicker in the chord than was correct, it had only slight twist, maybe only 10 degrees at the root, and 5 at the tips, and the taper straight from the tip to the hub area (about 400mm from the butt in my case). I was after more torque down low, more profile nearer the tips. and more chord.... and a soda to build. I can make a full set in about 2.5 hrs ready to sand I didn't sand them because they were too wet with resin... sand paper doesn't work then. But the design is so simple, the planer finished them near perfectly anyway. This will take up some of Gizmo's bandwidth.... sorry. 
Note, with regards to measurement.... not many people want 4m of blade, so you will have to work out the measurements for your blade size anyway, but you should get the gist of it. First.... we get the essentials. A saw, chainsaw, chunk of forest, the power planer and the grinder with flapdisk (this will sort of sand resin soaked wood) and other assorted knick knacs... like a tape measure perhaps.... 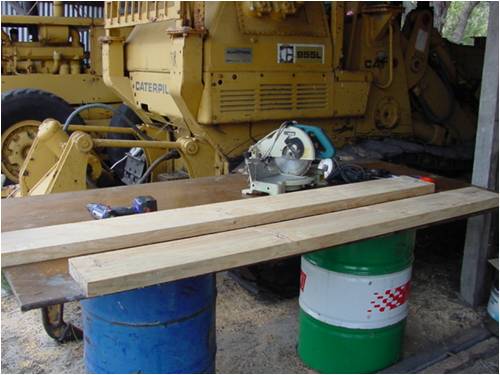
Most other folk will buy properly dried, dressed timber, and select the best at the shop without knots.... I got a chap on the other side of the island to hack some 8x2 pine with instructions to try and get reasonably seasoned knot free stuff.. you don't always get what you ask for over here, but it is wood.... the similarities end there. Any way, dock the end square: 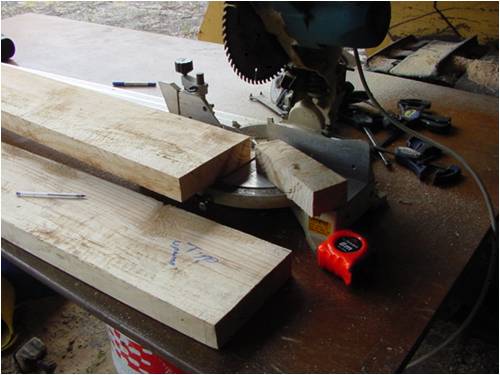
Make at least both of the edges clean and straight... we need to draw on them to make the jigs, and one side will be the leading edge.... so straight is nice. 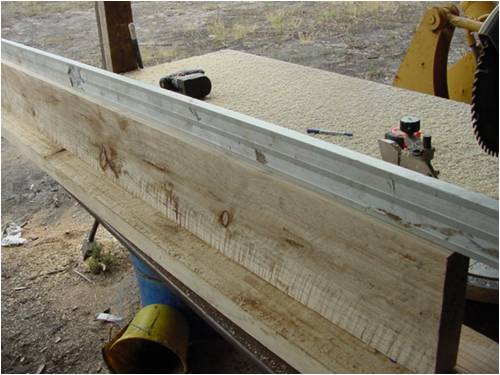
We need to have made our blade modifications by bolting on two slides to the blade like these: 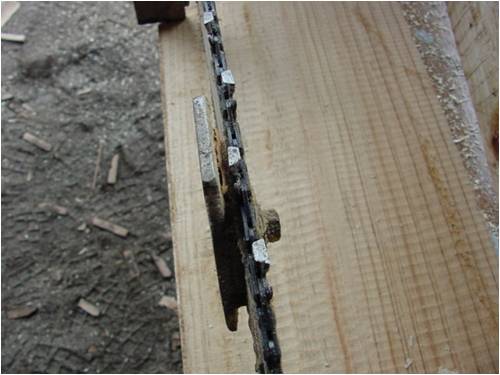
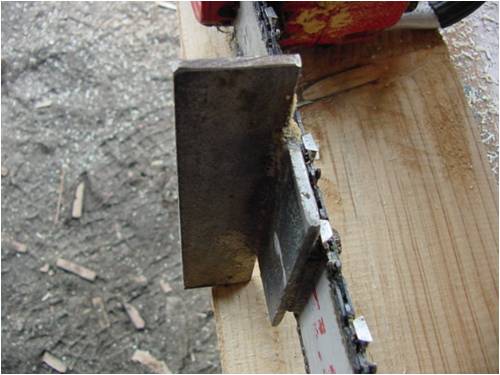
I use another 8x2 undressed... so it is slightly wider than the dressed one to use as a base plate to build the jig on. Grab some straight 3x1" ... mine was from an old packing crate, so I had to true it up first with the planer... it must be straight on the top. It will be screwed to the side of the base plate 8x2 such that it will leave a gap to the top of the blade blank 8x2 that is the equivalent to the cut depth you have made the slides on the blade for... plus how much meat you want to cut off.. It helps to do a dummy cut on some spare 8x2 to establish this measurement... Note the base board, the blade timber, and the side jig timber: 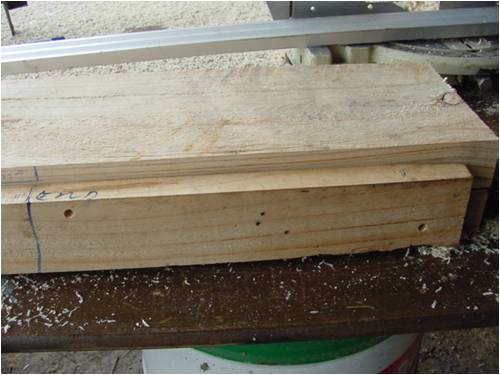
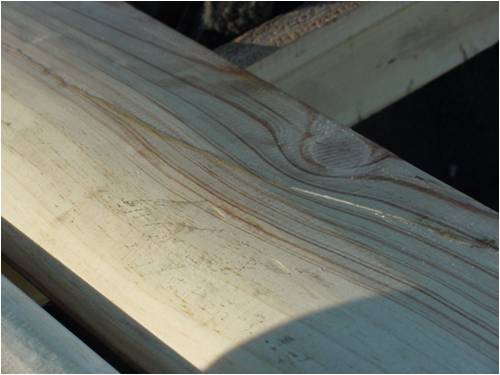
Mine was about 8mm. This means that where ever the side timber is, the blade will cut 8mm above this. IMPORTANT!.............................................. Your chainsaw may be a bit ratty like mine with an old cutter bar and chain. With this in mind, you may do well to leave 2-3mm more meat behind than the proper figures suggest....Mine ... well you can move the chain teeth about 3mm side to side.. so 8mm + 3mm safety=11mm above the cut line..... keep this in mind for the remainder of the story. It doesn't look it, but the line is the same all the way, so the blade will just graze the 8x2 on this side.. and yes it's raining yippee!!.... Hee hee... just graze... not really. In my case, the wood is rough cut and not straight... so I will be gnawing into the face a few extra mm to get a true straight /flat face... ie I can't rely on the wood to be true.... especially three times in a row. Some will be 52mm, some 48mm and some 50mm. So I will be removing more than is traditional for the face. Normally the leading edge will be the top corner edge of the timber. 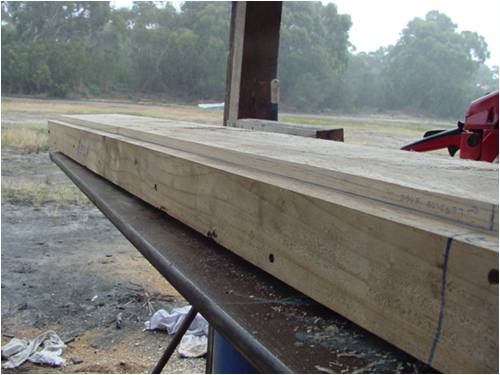
Now for the other sides timber to guide the slide on the chain saw. Here, we guess how much angle we want. I wanted the tip to drop across the 8" by about 10mm. I don't know how many degrees that is, nor do I care, but it felt about right. I hadn't really decided on the tip width yet 
That being the case, and pruning that extra bit we talked of, the easiest way to define the guide top is ... same as the other side, less 10mm.... whatever that turns out to be. (ignore the scribble on the wood) 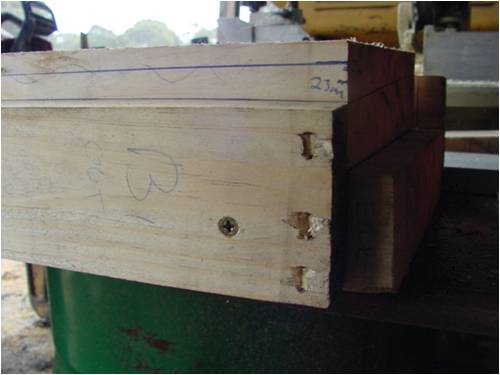
Now this line drops to twice the 10mm drop at the hub end. Note Hub end for me is 400mm out from the actual end of the blade. So I should say 400mm in from the hub end, we want the guide to be 20mm lower than the leading edge side. I start the profile about 400mm in from the hub end. This gives plenty of meat to mount the thing, and the power available.. despite the outlandish blade calculator sizes here.... is pitiful, and not worth chasing. Go for strength .. it pays bigger dividends. So, the blade profile part makes up only the outer 1.6m of the 2m length. It will look like tapered like this:... so you can now screw on the second side guide. (10 mm lower at the tip end than the leading edge side, and 20 mm lower at the 400mm in from the hub end. 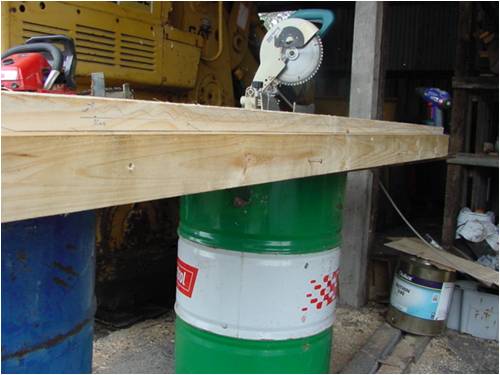
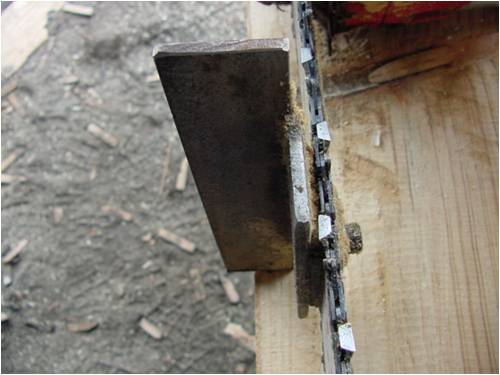
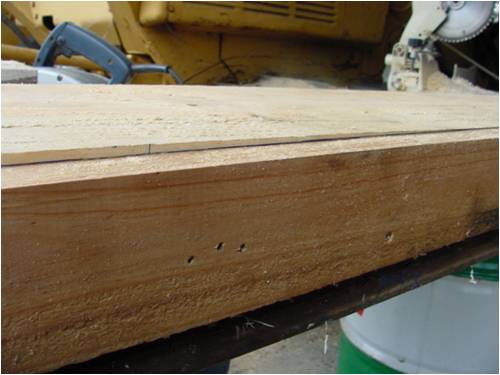
Now, we want to stabilise the blank in the jig. I just use some long wood screws, and screw the jig to the blade blank. I use 2 on the leading edge side (one each end) and one on the trailing edge (second guide we put on) in the center. This is better than clamping it down, as it holds it in space/suspension, rather than relying on the timber to be straight or the three blanks to be of equal thickness. After the first cut it won't matter as we will have effectively thickness-ed it anyway. Ok, were ready to fire up the chainsaw and go for it. It is simple, place the saw slides on the guides, and go. For these blades in radiata pine, it takes about 3 mins to do the whole 1.6m. Use sharp blades, well tensioned or they will wiggle around a bit and take out more than you expect. AGAIN: The chain links inners can wobble about in the cutter bar guides. A new cutter bar and blade would be nice. These have done 4 years of fire wood, so you may like to offset your calculations by a few mm of insurance to allow for poor blade performance. So 3 mins later we have made the leading face of the blade like this: 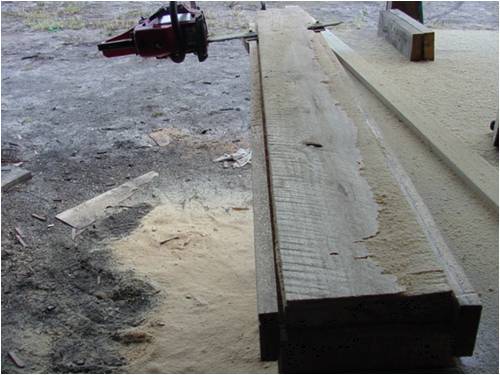
and this at the 400mm end point (hub end) 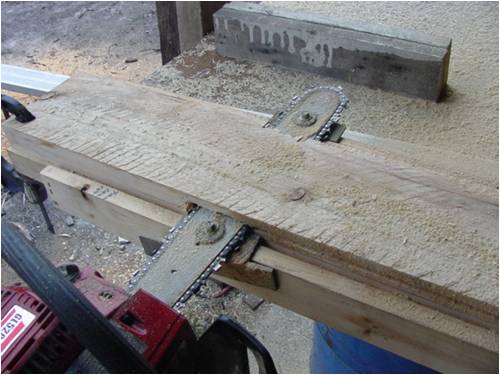
or looking at our work so far.... like this: 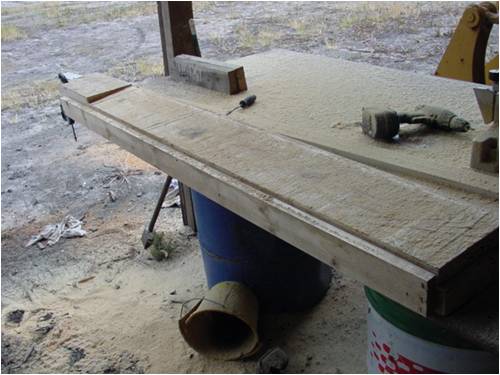
About 3 minutes with the planer and we can get this. It is quick because it is a flat face for our purposes. 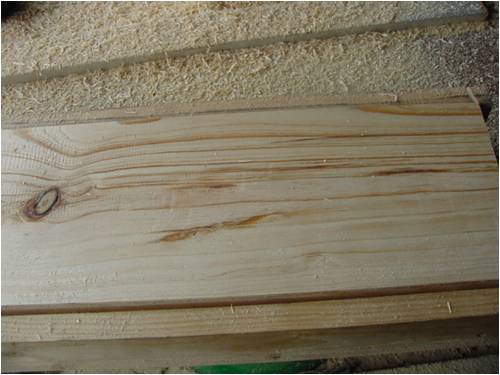
and the hub end will be like this: Notice the drop off is planed as well... by going across the grain.. tut tut. 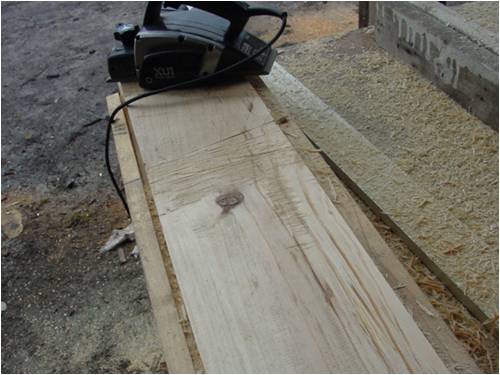
and a good 30 seconds with the flap disc grinder, and we are virtually there. You can see once you have the jig, it is only a ten minute job to do half a blade... not bad. 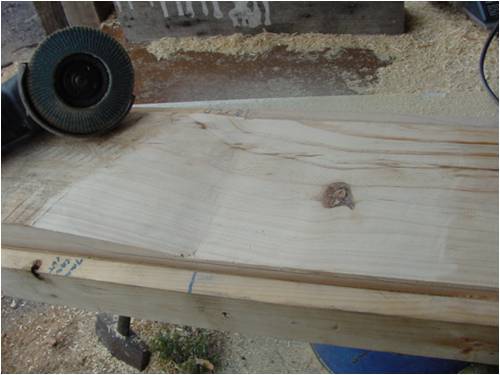
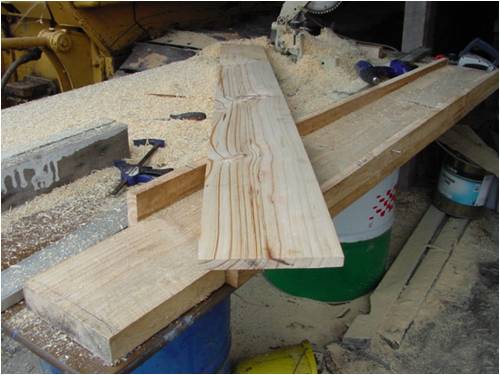
Now for the second jig. The final blade will really be a wedge for our purposes. Mine will be 15mm thick x 8" across at the tip. At the hub (400mm point), it will be about 35mm thick. It's that simple. This wedge is attached to our hub part at an angle. Thats the only reason we have to chainsaw or carve... the wedge is at a different angle than the blade mount. If we were to use constant pitch along the blade we could just mount the blades with a 5-10 degree packing spacer, and achieve the same kind of thing. So the second jig has to just achieve the second side of the wedge... within the confines of the blade material. So first we need to place the blade on a new jig bed of 8x2. We place the blank on it (newly planed face down), and the butt will sit ok, but the tip end will be askew. I use two screws to space the blade back up to the original height like this. 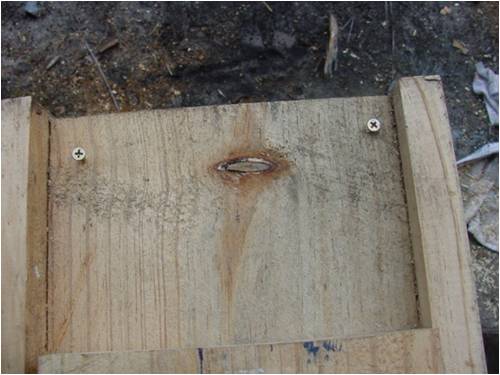
When the blade is place on them, they should sit square with the butt end, so it essentially sits flat as if we had not mangled the front side of the blade: 
Doing it this way, if the boards were different thickness as they are here, it does not matter, as we will have effectively thicknessed them with the first chainsaw cut. The picture looks wonky, but the blade is positioned correctly and pretty flat on the top. If you scribble the rough (mine was 15mm) blade thickness on the end, try and imagine at the hub end (400mm in) the same thing in the same plane at 35mm thick.... it's that simple. Using the offset you worked out with the chainsaw blades, just sketch it along the blades sides and place the guides to match.... remember to include the offset. The trailing edge will look something like these two pictures 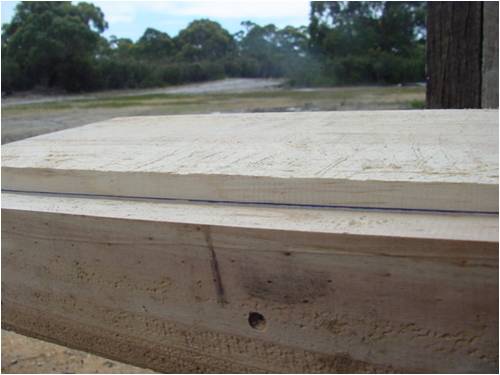
and the leading edge will look something like these two 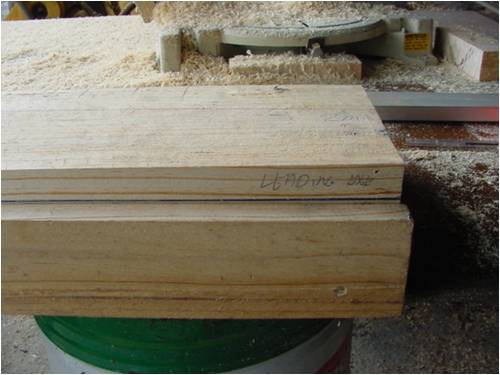
Don't forget to drive in the stabilising screws. We don't want to have a belly in the unsupported middle. 3 screws as before will be sufficient. You can see the end one ready to drive in. This is important so that the blank is held firmly.... clamps are not a good idea for this, as they may distort the blank in the second jig in particular.... unless you make a heap of spacers to stop them dragging it down..... too much like hard work for no gain at all. 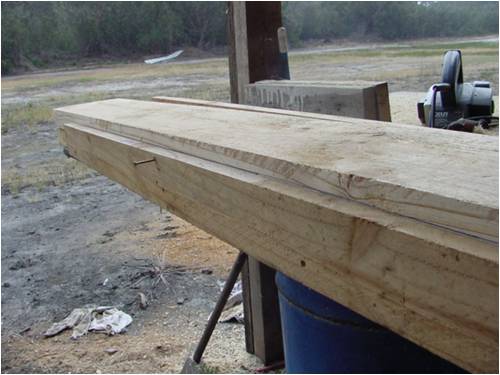
and after you hack away for about 3 minutes, it looks like this: 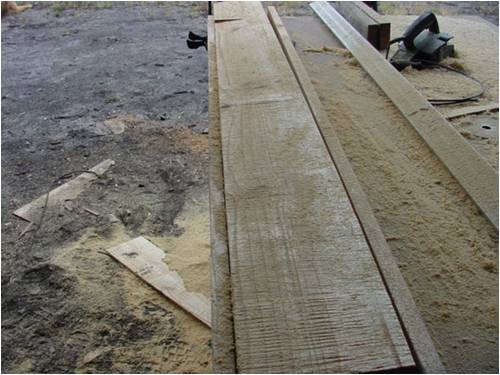
Tidy it up a bit with the planer.. should only take a minute or so ... including the drop off area at the hub end. 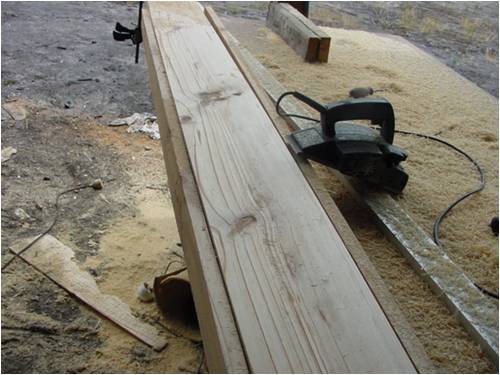
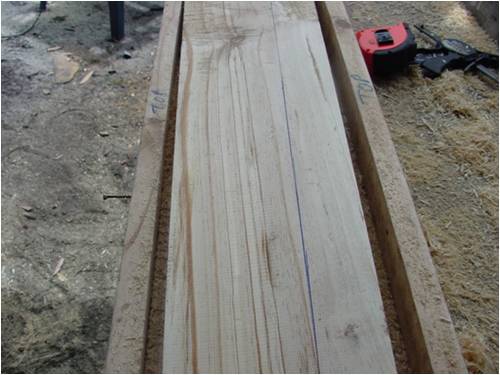
This side once the jig is built is only about 5 mins... damn quick way to make blades, however, the planing starts soon, and will burn up about 10 mins... so off we go. Notice, I did not cut the taper first . It would seem to be a good idea too do that, as it will be less to chainsaw...... wrong! The problem is that it is much easier to keep the blade pinned into the jig easily with the wood the full 8x2. If we had tapered it, it would be difficult to screw it to the jig. The chainsawing may be slightly slower, but the repeatability of the blade making is enhanced considerably, by being able to support it properly... Now it's time to taper. Sketch out the taper you want... I decided on 5" tip, straight back to the hub area. It looks like this: 
I'm a doddering old fool, so I leave a few mm to plane down 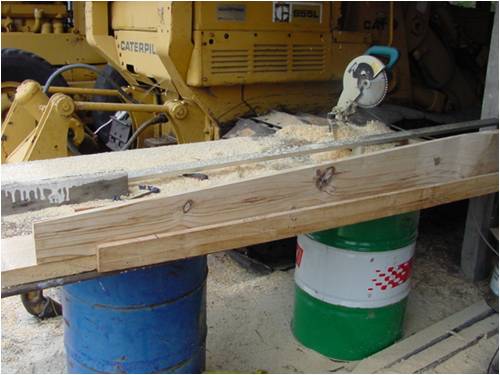
Now for the airfoil.... and it is simpler than it looks.... just plane work. I set mine pretty aggressively so it only takes about 10 mins to do the trailing edge, and 5 mins to do the leading edge. So draw a line 1/3rd in from the leading edge. This will be your reference line.... make sure you are using the down wind side of the blade... not the windward side!! In my case about going from 37mm in from the leading edge at the tip, and about 64mm in from the hub end. 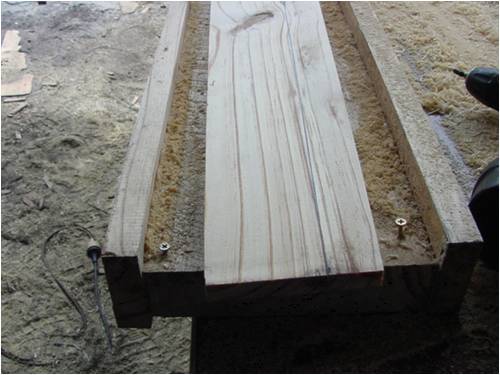
Draw a profile of what you expect it to look like on the end like this (I make the trailing edge thinner later on, or if I slip up a bit now..... 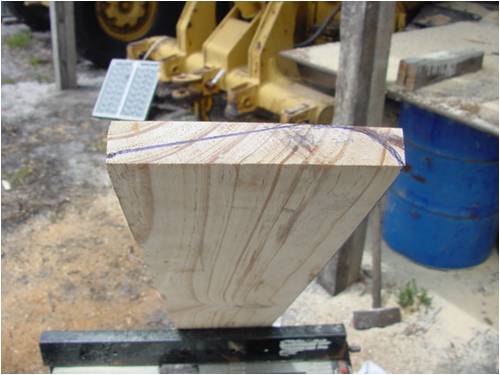
Ok now plane away. I set the planer for far too much (about 1mm cut) and the trailing edge is a 5 min job. Just start at the edge with a 45 bevel, and then flat plane with a pressure bias towards the edge, and it seems to work itself out in no time. There are no fancy angles or anything here, just flat planing. Blend it into the hub area, and I lose interest about 1/2 way down the edge, and start to thicken it back up towards the hub area. It will look like this: 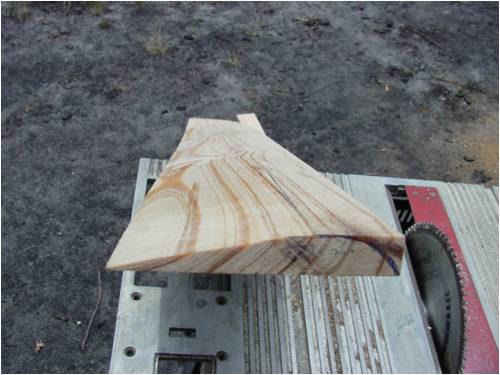
If you use some imagination, you may see that the trailing blade edge is thickening in the region above the tablesaw blade, the outer 1/2 of the trailing edge is only about 1.5mm thick/thin. 
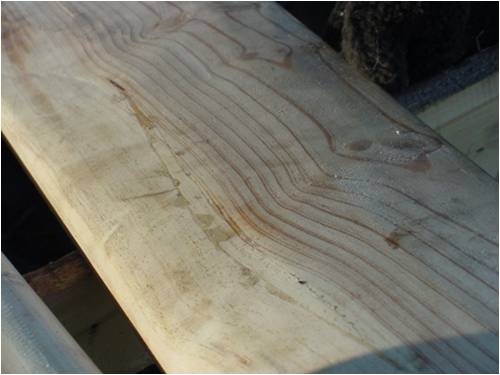
The leading edge is both quicker and faster. Just do a 45 degree bevel, and as Hugh Piggott rightly put it, just keep taking the edges off. It will round itself up in no time at all... 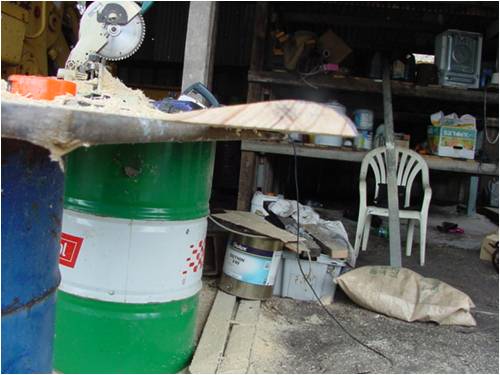
They are not sealed or painted as they are wet. They don't even remotely weigh the same at the moment, and it's not much point trying to match them either, They are too wet..... like this... oozing resin from their first spin drying session at 3kw or more. 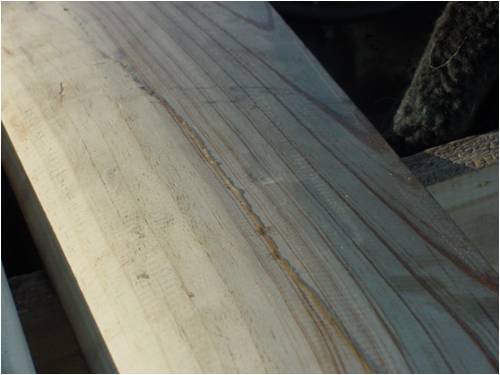
Once the jig was done.... the next 2 blades were done in about an hour... then the holes So, yes.. heathen that I am, I mounted them unsanded, and tested them out. They are a staggering improvement over the better designed ones I did last time.. and they were damn good 5kw ones). These have better low end power generation, and are dead quite. This I don't understand. The ends are still square cut, and yet almost silent.... go figure. They have done over 3kw on their maiden flight, and I didn't think it was very windy either.... must have been, but it didn't feel it. They come off at night so they don't take up moisture, rebalance them in the morning... and there off. I use Zubbles counter balance technique, so individual blade weights are immaterial. 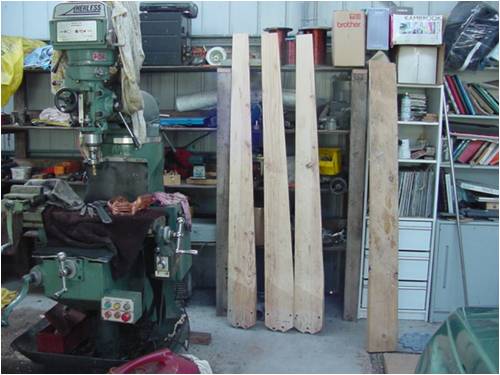
Why would you use plastic pipe??? these are 4m blades, and still only a couple of hours to build once the jig is sorted.. and once done once, is a soda next time up Have fun..... It's too long to proof read at the moment, I'm posting it as is until I get a chance to look it over a bit..... before I lose it all ..............oztules Village idiot...or... just another hack out of his depth |
||||
| Gizmo Admin Group Joined: 05/06/2004 Location: AustraliaPosts: 5187 |
As always Oz, excellent work. I'll wait for some comments and then I'll add this update to your existing chainasw blade page if thats OK with you. Glenn The best time to plant a tree was twenty years ago, the second best time is right now. JAQ |
||||
| Janne Senior Member Joined: 20/06/2008 Location: FinlandPosts: 121 |
Thanks for the post. If i will ever make a blade set like that again, i will be sure to use this method. Come to think about it, the same method should work also for blades that are mounted to the hub with a stub.. so that the carving would start with the blank already at an angle, to save the amount of wood required. It would only need a few additional pieces of wood underneath the blank to set it at the correct starting angle. If at first you don't succeed, try again. My projects |
||||
| oztules Guru Joined: 26/07/2007 Location: AustraliaPosts: 1686 |
it's your board Gizmo... your call. Janne.... true. ..........oztules Village idiot...or... just another hack out of his depth |
||||
| GWatPE Senior Member Joined: 01/09/2006 Location: AustraliaPosts: 2127 |
Hi oztules, Great effort. ... ... ... good read as well. Has to go to the pool room I am sure. The only thing missing from the inventry are ear plugs. Gordon. PS Like the battery charger for your heavy equipment. become more energy aware |
||||
JimBo911 Senior Member Joined: 26/03/2009 Location: United StatesPosts: 262 |
Great Job OZ. You definitely make it look easy. I to noticed the PV charger. I use the same type of charger for my machines.  Jim |
||||
Downwind Guru Joined: 09/09/2009 Location: AustraliaPosts: 2333 |
Bugger the pv, what about the serious equipment it is hooked to. Great effort Oz, makes me feel inclined to polish the tiger teeth up and give it a go. Have seen much ado about chainsaw sculpture of blades but you make it sound/look easy. I enjoyed the read and as Gordon said. 'The pool room' Pete. Sometimes it just works |
||||
Bryan1 Guru Joined: 22/02/2006 Location: AustraliaPosts: 2174 |
Bery nice write up there Oz I might have to employ this method for my 4kw conversion next year when it's finally finished. By the looks I'll have a few sets to make as this guy that came and dropped around a 4 cubic metre skip so we can cleanup some rubbish on the farm mentioned he used to live on King Island and knew this guy who was right into wind gennies etc. As soon as I mentioned your name he remembered and smiled. Bob is his name and he did mention he had a small property not far from my place. He couldn't take his eyes off my 1.5kw genny so naturally I asked if he wanted a hand building his own. It is a small world and mate your reputation is spreading far and wide so what ever happened to that quiet life in retirement on a small island in the Bass Strait???
Cheers Bryan  |
||||
| oztules Guru Joined: 26/07/2007 Location: AustraliaPosts: 1686 |
Hi Bryan, The quite life in retirement hasn't panned out quite as I had expected 
This jig system is very good for a single set, but an absolute dream for multiple sets. You only have to do the calculations/scribbles on the blanks once, and it's cookie cutter time
I look forward to your write up on your upcoming projects. Gordon and Jim...Yes the PV makes it possible for 27 tons of gear to spring into life when you want them. Good things I reckon., Downwind, it is mindlessly easy after the first one. Contrary to public opinion, it is not critical to get them all the same, but they come out remarkably close. The final static balance when they are on the mill papers over all the differences perfectly. I will never add weights or try to get them even as others seem keen to do. It makes no difference, you still have to static balance them when you attach them to the hub anyway. I will have to wait until these ones season up a bit just to sand them to a decent finish. The odd thing is how dead quite they are with square cut edges. It was totally unexpected..... darn things will probably whistle or something when I sand them neatly and round the edges 
...........oztules Village idiot...or... just another hack out of his depth |
||||
| Garry Newbie Joined: 05/12/2009 Location: United StatesPosts: 2 |
Nice page. The quietest blades I ever made were constant chord. The large tips really drag in high winds when you don't need the power and pull great in the low winds. |
||||
| oztules Guru Joined: 26/07/2007 Location: AustraliaPosts: 1686 |
Dammit Garry, now I will have to try that out. ...........oztules Village idiot...or... just another hack out of his depth |
||||
| Downwind Guru Joined: 09/09/2009 Location: AustraliaPosts: 2333 |
Pine has a nasty habit to warp and twist something shocking when drying. I would be inclined to clamp/screw them down to something solid as they dried out. Then i would be surprised if you have not already considered this and taken preventions, but thought worth a mention. Pete. Sometimes it just works |
||||
| Garry Newbie Joined: 05/12/2009 Location: United StatesPosts: 2 |
Oh yeah, the tips on mine were square front to back and the airfoil outline was slightly radiused . |
||||
| birdhouse Regular Member Joined: 27/01/2009 Location: United StatesPosts: 63 |
oztules- great write up! i used your technique and would do it again! i really dreaded the idea of making them any other way, which is quite a compliment from a guy who has every wood butchering power tool made. the flap wheel on the angle grinder is the key. i love those for shaping wood. 36 grit can shape quick! i think the only way my jigs were different from yours is i beveled the top edges of the side boards where the saw rides on them. i angled them approx to the blade angle. this way the saw jigs don't need a stop as they cut the same angle regardless if your saw moves a little (tip to handle motion) i hope this part makes sense. the one change i would have made if i do it over would be to put an auxilary handle near the tip of the saw for better control/safety. i for one am super stoked with your ingenuity for it saved me much time in making a beautiful set of spinners. thanks birdhouse i pee more than once before flushing, and don't have to flush at all up at the ranch! |
||||
niall1 Senior Member Joined: 20/11/2008 Location: IrelandPosts: 331 |
way..way to much fun ........down with that sort of thing ...
putting on a handle birdhouse is pretty straight forward, you already have the holes drilled on the outer skid 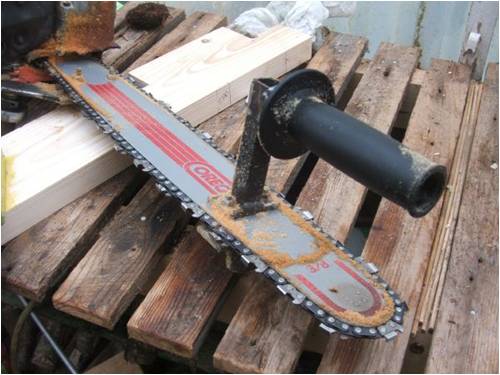
the camera distorts the outer bar , its not as long as that... the handle is from a new drill (the one you always wind up throwing away... ..) its a little off putting holding the saw like this but does give a lot of extra control
the saw is converted now to a 3/8 bar with ripping chain and is now a bit of a beast , .....but havent got around to trying it out properly yet ps ..its a bit risky doing this ,personally my heart rate jumps a fair bit when my hands so close to the chain..  ....i had a tip cover for the old bar which i,ll put back on when its used again.... ....i had a tip cover for the old bar which i,ll put back on when its used again....niall |
||||
| oztules Guru Joined: 26/07/2007 Location: AustraliaPosts: 1686 |
Some questions if I may Niall 1. Does the handle make a big difference. or not. 2. Do the ripping teeth make as much difference as I am hoping. I may get some too. .........oztules Village idiot...or... just another hack out of his depth |
||||
| Jarbar Senior Member Joined: 03/02/2008 Location: AustraliaPosts: 225 |
Handle might be better at right angle.Would have less tendency to roll bar of saw I think. "Creativity is detirmined by the way you hold your tounge".My Father "Your generation will have to correct the problems made by mine".My Grandfather. |
||||
| Downwind Guru Joined: 09/09/2009 Location: AustraliaPosts: 2333 |
The thought that keeps coming to mind with the chainsaws sculpture is why not put a blade guard full length, you have the bolts through the blade for the guides. Extend them some more with a spacer and then the guard. It could be a piece of timber or metal. That way you can lean over it and apply pressure any where on the blade length and have some protection that if you slip you cant fall onto the chain. Its a fine line of, do we respect the danger we can see, or disrespect the danger we cant see. Do you guys use a rotary diamond sharpener for the chain. Its easy to wear the chain out with them only because they work so well and we over sharpen. ( i dont mean how often ) If you have not tried them yet, it is well worth the cost. I use mine in the dremel tool but they can be used in a electric drill or the DC tool available. For twice the price of a file i get over 10 times the life out a diamond sharpener and its quick and easy. Pete. Sometimes it just works |
||||
| niall1 Senior Member Joined: 20/11/2008 Location: IrelandPosts: 331 |
hi Oz had to think about this .....actually its more to do with the roller bearing at the base of the bar when the saw cuts it tries to pull away from me , if i was holding the saw normally i,d have the leverage to steady it ...usual chainsaw cutting ...using a handle you kind of lose this control the bearing though takes this load on so the saw is more stable , butted up to jig as it cuts ....i suppose this is really what allows the use of a handle .....(you dont have to concentrate on holding the saw steady when you get into the thicker root)... just push down and foreward now that i,m thinking about it ,the handle and bearing work together ...well at least on mine the difference i suppose is .. when i tried the chainsawing first i was never sure if the outer skid was tight on the jig or going for a little sponsored walk if i hit a knot (this was down to my saw handling ).....this way i,m sure , big difference for me the ripping chain does leave a better finish Oz ,it seems better suited to the cut but isn't necessarily any faster than regular chain (this is a bit immaterial as the cut only takes a minute or two anyway) ..the big difference on my saw was moving up to a 3/8 chain , it seems more stable during cutting (even with the chain slackened a little)..this could be due to the ripping chain also being more stable during the cut , ps...jarbar putting the handle on at a right angle is more natural to hold so probabely safer , either way you have a lot of control on the foreward skid ..it should also be easy to incorporate a proper guard around this area ...i like the ideas for protection putting a slip guard around the handle is essential which i,ll do before i use it again Pete i,m still using a file to sharpen but find the only way i can sharpen best with it is to take of the chain altogether and hold the teeth in a small vice ..the file seems to bite better for me this way...the diamond sharpener sounds interesting niall |
||||
| Dinges Senior Member Joined: 04/01/2008 Location: AlbaniaPosts: 510 |
Looks like Oztules' infamous idea of using a chainsaw and jig to carve windturbine blades is spreading all over the internet... http://4hv.org/news.php Looks like it's now being posted on the forum where people build other 'interesting' stuff..... Tesla coils, linear accelerators, X-ray equipment...and now chainsaw-cut windturbine blades too! Peter. (<-- wonders how many dismembered fingers all over the world Oztules will be indirectly responsible for.) |
||||
| Page 1 of 2 |
|||||
| The Back Shed's forum code is written, and hosted, in Australia. | © JAQ Software 2026 |
