
|
|
Forum Index : Microcontroller and PC projects : PicoMiteVGA DEMO
| Author | Message | ||||
| Volhout Guru Joined: 05/03/2018 Location: NetherlandsPosts: 5994 |
Hi javavi, Wauw. This is beautifull. I did not have VGA system at hand, so I converted it to Game*Mite (any color LCD would do). But this is amazing. It feels like we could convert the whole of the universe into a few lines of MMBasic. Thank you. Between your demo's there are some real gems, pure diamond, and this is one of them. dim cmap(15)'MODE 2 cMap(1)=RGB(Red) cMap(2)=RGB(Yellow) cMap(3)=RGB(White) 'Map set For N=0 To 239 For M=0 To 319 X=0:Y=-.1:Z=3 U=(M-159.5)/160:V=(N-117.5)/160 W=1/Sqr(U*U+V*V+1):U=U*W:V=V*W I=Sgn(U):G=1 Do E=X-I:F=Y-I:P=U*E+V*F-W*Z D=P*P-E*E-F*F-Z*Z+1 If D>0 Then T=-P-Sqr(D) If T>0 Then X=X+T*U:Y=Y+T*V:Z=Z-T*W:E=X-I:F=Y-I:G=Z P=2*(U*E+V*F-W*G):U=U-P*E:V=V-P*F:W=W+P*G:I=-I Loop EndIf EndIf If V<0 Then P=(Y+2)/V:V=-V*((Int(X-U*P)+Int(Z-W*P)And 1)/2+.3)+.2 EndIf Color cMap(3-(48*Sqr(V)+(7*(M+4*N))Mod 16)\16) Pixel M,240-N Next Next Volhout PicomiteVGA PETSCII ROBOTS |
||||
| Martin H. Guru Joined: 04/06/2022 Location: GermanyPosts: 1485 |
Fascinating. I have no idea how the programme works, but Harms version also runs smoothly in mode 7 under mmbasic for Windows. Here in 640x480 Picomite HDMI Mode 3 or CMM2/MMBASIC4Windows Mode 1 cls:Mode 1' Mode 3 PICO HDMI dim cmap(15) cMap(1)=RGB(Red) cMap(2)=RGB(Yellow) cMap(3)=RGB(White) For N=0 To 479 For M=0 To 639 X=0:Y=-.1:Z=3 U=(M-319.5)/320 : V=(N-237.5)/320 W=1/Sqr(U*U+V*V+1):U=U*W:V=V*W I=Sgn(U):G=1 Do E=X-I:F=Y-I:P=U*E+V*F-W*Z D=P*P-E*E-F*F-Z*Z+1 If D>0 Then T=-P-Sqr(D) If T>0 Then X=X+T*U:Y=Y+T*V:Z=Z-T*W:E=X-I:F=Y-I:G=Z P=2*(U*E+V*F-W*G):U=U-P*E:V=V-P*F:W=W+P*G:I=-I Loop End If End If If V<0 Then P=(Y+2)/V:V=-V*((Int(X-U*P)+Int(Z-W*P)And 1)/2+.3)+.2 EndIf Color cMap(3-(48*Sqr(V)+(7*(M+4*N))Mod 16)\16) Pixel M,480-N Next Next 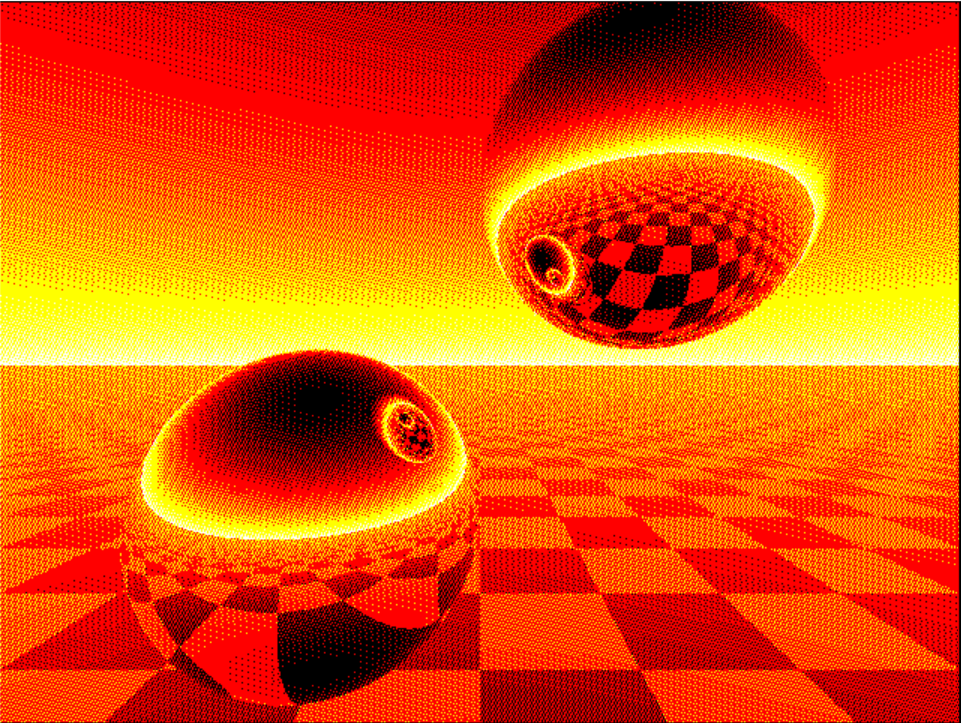 Cheers Martin Edited 2026-02-22 20:45 by Martin H. 'no comment |
||||
| JanVolk Guru Joined: 28/01/2023 Location: NetherlandsPosts: 386 |
And also on the RP2040-GEEK. ' - RP2040-GEEK - 'MODE 2 Dim cmap(15) cMap(1)=RGB(Red) cMap(2)=RGB(Yellow) cMap(3)=RGB(White) 'Map set For N=0 To 134 '239->134 'ILI9341=320x240 ST7789_135=240x135 For M=0 To 239 '319->239 X=0:Y=-.1:Z=3 U=(M-119.5)/120:V=(N-67)/120 '159.5->119.5 117.5->67 160->120 W=1/Sqr(U*U+V*V+1):U=U*W:V=V*W I=Sgn(U):G=1 Do E=X-I:F=Y-I:P=U*E+V*F-W*Z D=P*P-E*E-F*F-Z*Z+1 If D>0 Then T=-P-Sqr(D) If T>0 Then X=X+T*U:Y=Y+T*V:Z=Z-T*W:E=X-I:F=Y-I:G=Z P=2*(U*E+V*F-W*G):U=U-P*E:V=V-P*F:W=W+P*G:I=-I Loop EndIf EndIf If V<0 Then P=(Y+2)/V:V=-V*((Int(X-U*P)+Int(Z-W*P)And 1)/2+.3)+.2 EndIf Color cMap(3-(48*Sqr(V)+(7*(M+4*N))Mod 16)\16) Pixel M,135-N '240->135 Next Next Jan. |
||||
| twofingers Guru Joined: 02/06/2014 Location: GermanyPosts: 1767 |
Hi Martin(/Harm/Vadim), I hope you don't mind that I modified your code. I was playing around with it a bit (along with AI, since I don't really understand the code ;-)). My goal was to explore the possibilities for speed optimization in pure BASIC. For a faster speed (now 44 seconds on 640x480 display), I halved the resolution (using double pixels)! MODE 3:CLS :Map RESET:Timer =0 Dim Float x,y,z,u,v,w,e,f,p,d,t,uo,vo,tp,v2,xi,zi,i3=1/320 Dim Integer m,n,k,o,c,uc=320,vc=240 Dim Integer G(15)=(0,1,2,3,4,5,6,7,8,9,10,11,12,13,14,15) Colour Map G(),G() For n=0 To 479:vo=(n-vc)*i3:v2=vo*vo+1:o=28*n For m=1 To 640 Step 2 x=0:y=-.1:z=3.8:uo=(m-uc)*i3:w=1/Sqr(uo*uo+v2):u=uo*w:v=vo*w:i=Sgn(u) Do e=x-i:f=y-i:p=u*e+v*f-w*z:d=p*p-e*e-f*f-z*z+1:If d<=0 Then Exit Do t=-p-Sqr(d):If t<0 Then Exit Do Inc x,t*u:Inc y,t*v:Inc z,-t*w:e=x-i p=2*(u*e+v*(y-i)-w*z):Inc u,-p*e:Inc v,-p*(y-i):Inc w,p*z:i=-i Loop If v<0 Then tp=(y+2)/v:xi=x-u*tp:zi=z-w*tp k=((xi+4096)+Int(zi+4096))And 1 c=10-k*10 Else c=Int(14-v*25+((7*m+o)Mod 16)\2) EndIf c=c*(c>0 And c<15)+15*(c>=15) Line m,480-n,m+1,480-n,,G(c):Next Next Print Timer Variable ListVariable List +----------+---------+-------------------------------------------------------------+ | Variable | Type | Description | +----------+---------+-------------------------------------------------------------+ | x, y, z | Float | Current position of the ray in 3D world space. | | u, v, w | Float | Direction components (X, Y, Z) of the ray, normalized to 1. | | e, f | Float | Distance vectors from current ray position to sphere center.| | p | Float | Auxiliary variable for dot product and reflection math. | | d | Float | Discriminant to check for sphere hits (d > 0). | | t | Float | Calculated distance to the sphere surface hit point. | | uo, vo | Float | Screen coordinates mapped to the normalized viewport plane. | | tp | Float | Distance from current ray position to the floor (y = -2). | | v2 | Float | Pre-calculated vo^2 + 1 for faster ray normalization. | | xi, zi | Float | Exact X and Z coordinates of the hit point on the floor. | | i3 | Float | Pre-calculated constant 1/320 to avoid divisions. | | m, n | Integer | Loop counters for horizontal pixels and vertical lines. | | k | Integer | Grid state (0 or 1) from the checkerboard formula. | | o | Integer | Offset used for the pseudo-dithered sky pattern. | | c | Integer | Final color index (0-15) after logic and clamping. | | uc, vc | Integer | Screen center constants (320, 240). | | G() | Array | Palette array for mapping to MMBasic color indices. | | i | Float | Sign factor to switch between sphere positions (1 or -1). | +----------+---------+-------------------------------------------------------------+ Functional Block Description 1. Initialization & Setup (Lines 1-8) The code sets the display MODE 3 and resets the color Map. It initializes all necessary variables and the G() array, which maps indices 0-15 to the system's color palette. 2. Ray Normalization & Viewport Mapping (Lines 9-11) Inside the nested loops, the code converts screen pixels (m, n) into 3D ray slopes (uo, vo). Line 11 is critical: it calculates the unit vector components (u, v, w) using the Pythagorean normalization formula to prepare for accurate physical reflections. 3. Reflection Loop (Lines 12-17) The Do...Loop handles the ray-sphere intersections. Lines 13-14: Calculate the discriminant 'd' and distance 't' to check if a sphere is hit. Lines 15-16: If hit, the position is updated (Inc x, y, z) and the ray's direction (u, v, w) is mathematically reflected. Line 17: Toggles 'i' to check the other sphere in the next iteration. 4. Floor and Horizon Logic (Lines 18-23) Floor (Lines 19-21): If the ray points down (v < 0), the floor intersection (tp) and checkerboard coordinates (xi, zi) are calculated. Your optimized '10-k*10' logic assigns colors without 'If' branches. Sky (Lines 22-23): If the ray points up, a dithered gradient color is calculated based on the vertical slope. 5. Boolean Clamping & Output (Lines 25-26) Line 25: The high-performance Boolean expression clamps 'c' between 0 and 15 without using the slower 'If' or 'Min/Max' commands. Line 26: The 'Line' command outputs a 2-pixel segment to the screen. 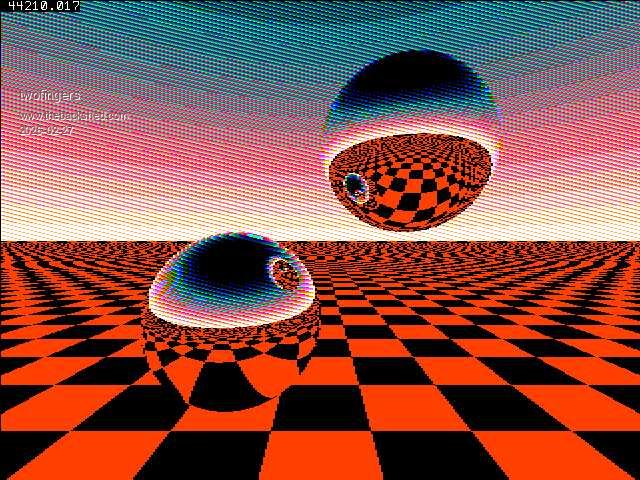 Regards Michael causality ≠ correlation ≠ coincidence |
||||
| tritonium Newbie Joined: 16/06/2018 Location: United KingdomPosts: 24 |
Hi Javavi I love this vga imagery but I cant get anything to work properly with map in it. I have a pico 2530A with vga adapter and options as follows PicoMiteVGA MMBasic RP2350A Edition V6.01.00 OPTION FLASH SIZE 4194304 OPTION COLOURCODE ON OPTION KEYBOARD US OPTION RESOLUTION 640x480 @ 252000KHz All those not using MAP work just fine should I be using HDMI ? Dave |
||||
| Bleep Guru Joined: 09/01/2022 Location: United KingdomPosts: 817 |
Hi Dave, The answer is yes, the VGA colours are fixed in hardware to 16 fixed colours, fixed resitor values, so cannot be changed, whereas the HDMI can be mapped to give any colour, depending on mode there may still only be 16 colours, but they can be mapped to any 16 colours. |
||||
| stanleyella Guru Joined: 25/06/2022 Location: United KingdomPosts: 2807 |
I never thought about that. I've been using pico usb hdmi for a while and assumed as it was in vga demo it worked on pico vga. doh. |
||||
| javavi Guru Joined: 01/10/2023 Location: UkrainePosts: 568 |
SinePoly 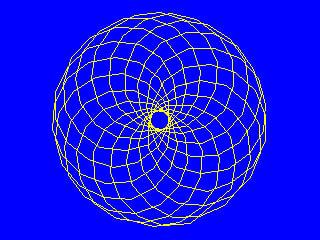 MODE 2 Dim integer xp(255),yp(255) Dim integer s(255),c(255) r0=63:a0=0:b0=0 di=217:db=1:da=1 For i=0 To 255 s(i)=Int(r0*Sin(i*Pi/128)) c(i)=Int(r0*Cos(i*Pi/128)) Next Do si=220 Inc di:Inc si,-di If di=220 Then di=0 If di=0 Then db=(db+1)And 255:si=(si+1)And 65535:Inc di,2 Do : fc=Int(Rnd*16):bc=Int(Rnd*16): Loop While fc=bc EndIf a0=(a0+2)And 255:b0=(b0+2)And 255 a=a0:b=b0 For i=0 To 255 x=(si*c(a)+c(b)*di):y=(si*s(a)+S(b)*di) a=(a+da)And 255:b=(b+db)And 255 xp(i)=160+x\128:yp(i)=120+y\128 Next CLS Map(bc):Color Map(fc) Polygon 256,xp(),yp() Pause 20 Loop While Inkey$="" Edited 2026-03-09 06:24 by javavi |
||||
| Martin H. Guru Joined: 04/06/2022 Location: GermanyPosts: 1485 |
A small old demo that I wrote about 35 years ago in GFA Basic on the Atari ST, converted here for PICOMITE VGA/HDMI.  ' Vectorball by Martin H. 1991-2026 Dim x1(20),y1(20),y(20),coor%(20,4) FRAMEBUFFER create FRAMEBUFFER layer create init FRAMEBUFFER write f Do co%=0 For f=0 To 359 Step 10 CLS p=f+4 p1=f+8 p2=f+160 For n=1 To 20 x1(n)=160+coor%(n,2)*Sin(((f+coor%(n,3))/180)*Pi) y1(n)=(coor%(n,2))*Cos((f+coor%(n,3))/180*Pi) Next n For w=25 To -25 Step -1 For n=1 To 20 If Int(y1(n))=w Then Sprite write 1,x1(n) , 100+coor%(n,1) EndIf Next n Next w schatten Inc co% FRAMEBUFFER write n Sprite scroll -1,0 FRAMEBUFFER write f ' page copy 1,0 FRAMEBUFFER copy f,l Next f Loop Sub schatten 'water reflection (kind of) For fx=0 To 23 l0=7*Sin(((fx+co%)/3.5)*Pi) Blit 130,164-fx*3,130+l0,177+fx,64,1 Next fx End Sub Sub init CLS For l= 1 To 70 Pixel Rnd*320,Rnd*180,RGB(white) Next l Restore coords For f=1 To 20 For n=1 To 3 Read coor%(f,n) Next n Next f Restore BLL Open "ball.spr" For output As #1 For f=1 To 17 Read a$:Print #1,a$ Next Close #1 Sprite load "ball.spr" End Sub coords: ' coord y, x, degree: The figure ' Y is logical ' X is the radius from the centre point ' Degree is the deviation from zero degrees in a circle (cf. Z). Data 0,12,45 Data 8,8,45 Data 8, 4,180 Data 8, 4,200 Data 10,18,22 Data 16,4,45 Data 16, 9,170 Data 19,23,10 Data 24, 4,45 Data 24, 15,160 Data 28,24,20 Data 32, 4,0 Data 40,12,-10 Data 40,4,175 Data 48,20,-20 Data 48,10,170 Data 56,24,-25 Data 56,12,160 Data 64,24,-30 Data 64,12,160 End Sub BLL: Data "16,1,16" Data "0000011111100000" Data "0001111111111000" Data "0011111991111100" Data "0111199999911110" Data "0111999B99991110" Data "111193773B991111" Data "1119B7777B999111" Data "1119B7777BB99111" Data "1111B3773B991111" Data "11119BBBBB991111" Data "1111199B99911111" Data "0111111991111110" Data "0111111111111110" Data "0011111111111100" Data "0001111111111000" Data "0000011111100000" Back then, I had to cache all the frames, but today, on the Pico, it runs in real time. Have Fun Martin Edited 2026-03-10 20:54 by Martin H. 'no comment |
||||
| Volhout Guru Joined: 05/03/2018 Location: NetherlandsPosts: 5994 |
Nice !! Volhout PicomiteVGA PETSCII ROBOTS |
||||
| stanleyella Guru Joined: 25/06/2022 Location: United KingdomPosts: 2807 |
I got [39] Blit 130,164-fx*3,130+l0,177+fx,64,1 Error : Not enough Heap memory PicoMiteHDMI MMBasic USB RP2350A Edition V6.01.00b11 OPTION SERIAL CONSOLE COM2,GP20,GP21 OPTION FLASH SIZE 4194304 OPTION COLOURCODE ON OPTION KEYBOARD UK, 0, 0, 600, 150 OPTION RESOLUTION 640x480 @ 315000KHz OPTION DISPLAY 20, 40 OPTION SDCARD GP2, GP6, GP7, GP4 OPTION AUDIO GP0,GP1', ON PWM CHANNEL 0 OPTION DEFAULT FONT 3, 1 > stan |
||||
| Martin H. Guru Joined: 04/06/2022 Location: GermanyPosts: 1485 |
Sure, the program uses all 3 screens, but the difference between our systems doesn't seem that big. I can only guess, since it doesn't cause any problems for me. Make sure that you are in Mode 2 in mode 1 I get the same message so simply add a MODE 2 at the start of the Programm Edited 2026-03-11 03:27 by Martin H. 'no comment |
||||
| javavi Guru Joined: 01/10/2023 Location: UkrainePosts: 568 |
The Sphere of the Question 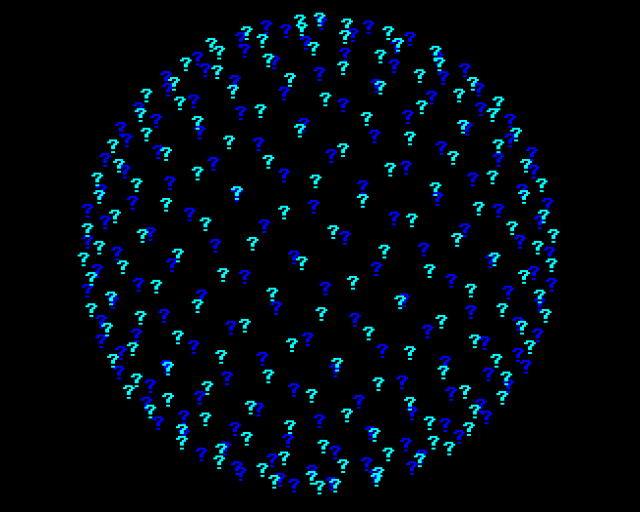 MODE 2 CX=MM.HRES\2 CY=MM.VRES\2 N=314:F=1 FRAMEBUFFER CREATE FRAMEBUFFER WRITE F Do CLS For P=0 To N Y=1-2*P/N R=Sqr(1-Y*Y) T=F*P X=R*Cos(T) Z=R*Sin(T) If Z<0 Then Color RGB(Blue) Else Color RGB(Cyan) Print @(CX+X*CY,CY+Y*CY) "?"; Next FRAMEBUFFER COPY F,N,B Pause 50 Inc F,0.001 Loop While Inkey$="" |
||||
| stanleyella Guru Joined: 25/06/2022 Location: United KingdomPosts: 2807 |
Looks nice! Thanks. |
||||
| stanleyella Guru Joined: 25/06/2022 Location: United KingdomPosts: 2807 |
@Martin H. yes, add mode 2 and it works. impressive. |
||||
| javavi Guru Joined: 01/10/2023 Location: UkrainePosts: 568 |
SinePrint 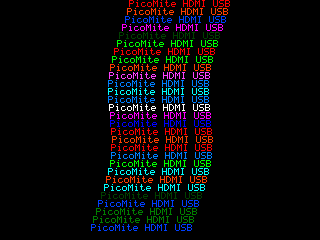 MODE 2 T$="PicoMite HDMI USB" LT=Len(T$)*MM.FONTWIDTH YB=MM.VRES-MM.FONTHEIGHT XRL=MM.HRES-LT-MM.FONTWIDTH XLL=MM.FONTWIDTH XS=YLL DIR=0 P=0 Do X=XS+Sin(P)*MM.FONTWIDTH Color Map(1+Int(Rnd*15)) Print @(X,YB)T$ If XS<=XLL Then DIR=1 If XS>=XRL Then DIR=-1 Inc XS,DIR Inc P,.3 Pause 60 Loop While Inkey$="" |
||||
| twofingers Guru Joined: 02/06/2014 Location: GermanyPosts: 1767 |
Windows for Picomites ' ***************************************************************************** ' MMBasic Window or Popup Demo - Virtual Screen Buffer (80x40) ' For VGA/HDMI MMBasic v6.01, Mode 3 ' Originally developed for FM ' ***************************************************************************** Option Console Screen Option default integer MODE 3:CLS Dim c_max=MM.WIDTH-1,r_max=MM.HEIGHT -1 Dim FW=MM.FONTWIDTH,FH=MM.FONTHEIGHT ' ONE GLOBAL ARRAY (Full Screen 80x40) Memory: ~6.4 KB Dim sc$(c_max,r_max,1) Length 1 Dim q(15) = (0,1,2,3,4,5,6,7,8,9,10,11,12,13,14,15) Colour Map q(), q() Array Set Chr$(32), sc$()'clear Array (Not entirely clean!) For j = 0 To r_max Step 2 PrAt 0,j,"Line "+Str$(j)+": "+String$(70, "."),(j Mod 14)+1,0 Next PrAt 10,2," > POPUP (SINGLE ARRAY) DEMO < - PRESS any KEY to START",0,15 Do :Loop Until Inkey$ <>"" Do OpenWin(10,10,40,8,"Dialog 1",15,1) Text 12*FW, 14*FH,"Only sc$() array is active.", "L", 1,1,q(15),q(1) Do :Loop Until Inkey$ <> "" CloseWin(10,10,40,8) OpenWin(10+10,10+10,40,8,"Dialog 2",15,3) Text (12+10)*FW,(14+10)*FH,"Only sc$() array is active.","L",1,1,q(15),q(3) Do :Loop Until Inkey$ <> "" CloseWin(10+10,10+10,40,8) OpenWin(10+15,10+15,40,8,"Dialog 3",15,2) Text (12+15)*FW,(14+15)*FH,"Only sc$() array is active.","L",1,1,q(15),q(2) Do :Loop Until Inkey$ <> "" CloseWin(10+15,10+15,40,8) Loop While LCase$(DlgBox$(1,1,40,8," Continue? ",15,1))="y" PrAt 10,2," > DEMO COMPLETED ! < ",0,15 End '********************** Subroutines: *********************** 'All screen outputs are written synchronously into an array 'For popups, use the text command! Sub PrAt(c,r,t$,f,b) Local i,p,idx=c-1 p=(f<<4) Or (b And &H0F) Text c*FW,r*FH,t$,"L",1,1,q(f),q(b) For i=1 To Len(t$) Inc idx sc$(idx,r,0)=Mid$(t$,i,1):sc$(idx,r,1)=Chr$(p) Next End Sub Sub OpenWin(x,y,w,h,titl$,f,b) Local j For j=0 To h -1 Text x*FW,(y+j)*FH,Space$(w),"L",1,1,q(f),q(b) Next Text x*FW, y*FH,String$(w,Chr$(205)),"L",1,1,q(f),q(b) Text (x+2)*FW,y*FH," " + titl$ + " ","L",1,1,q(f),q(b) End Sub Sub CloseWin(x,y,w,h) Local i,j,p,f,b,ch$,curX,curY=y-1 For j=0 To h Inc curY curX=x-1 For i=0 To w Inc curX ch$=sc$(curX,curY,0) p=Asc(sc$(curX,curY,1)) f=(p>>4):b=p And &H0F Text curX*FW,curY*FH,ch$,"L",1,1,q(f),q(b) Next Next End Sub Function DlgBox$(x,y,w,h,Titel$, fc, bc)'DialogBox OpenWin(x,y, w, h, Titel$, fc, bc) Text (x+2)*FW,(y+4)*FH,"Would you like to continue? (y/n)", "L", 1, 1, q(fc), q(bc) Do :DlgBox$=Inkey$:Loop Until Instr("ynYN"+Chr$(27),DlgBox$) CloseWin(x,y,w,h) End Function I uploaded this demo code, originally intended for FM, to Gemini and requested that it add a scroll function. This is the result it produced: 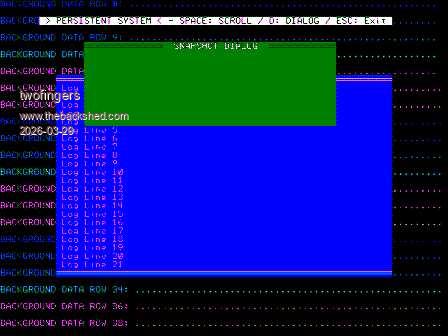 Win for Picomites01.zip Perhaps it will be useful to others? I think adapting the code for the console (VT100) should be easy. It's similar to the "FRAME" code Peter offered about a year ago. Of course, everything would be much simpler if the code were hardcoded into the firmware.  Regards Michael Edit: This is the VT100 (Console)-Version (made by Gemini): scrollVT0012w.zip Edited 2026-03-29 23:11 by twofingers causality ≠ correlation ≠ coincidence |
||||
| Volhout Guru Joined: 05/03/2018 Location: NetherlandsPosts: 5994 |
The Frame command is in 6.02.01 release for rp2350. Volhout PicomiteVGA PETSCII ROBOTS |
||||
| twofingers Guru Joined: 02/06/2014 Location: GermanyPosts: 1767 |
Thanks Harm, I must have missed that. I had the impression Peter had discontinued the project because he ignored multiple inquiries. My Picos are still on version 6.01. But that's certainly good news. I'm looking forward to testing it. Thanks to Peter as well!  Regards Michael causality ≠ correlation ≠ coincidence |
||||
| javavi Guru Joined: 01/10/2023 Location: UkrainePosts: 568 |
Rössler's Strange Attractor A strange attractor is an attractive set in the phase space of a dissipative dynamical system, characterized by a complex fractal structure and chaotic trajectory behavior. Unlike conventional attractors (points or cycles), a strange attractor is not a simple curve or surface, and trajectories within it are unstable and exhibit high sensitivity to initial conditions. 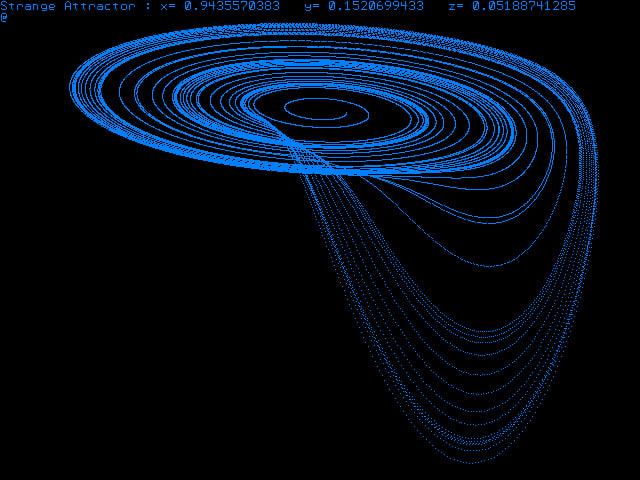 MODE 1 Dim a=0.2, b=0.2, c=5.7 Dim x=0.1, y=0, z=0 Dim dt=0.005 Dim dx, dy, dz Dim INTEGER i, x0=320, y0=110 Dim INTEGER CM(15)=(0,1,2,3,4,5,6,7,8,9,10,11,12,13,14,15) Colour Map CM(),CM() Do Color CM(Int(Rnd*15)+1): CLS 0 x=Rnd For i = 1 To 50000 dx = (-y - z) * dt dy = (x + a * y) * dt dz = (b + z * (x - c)) * dt x = x + dx y = y + dy z = z + dz Pixel x0+x*26+y*8, y0+z*14+y*8 If Inkey$ <> "" Then Exit Do Next i Pause 4000 Loop Edited 2026-04-26 08:26 by javavi |
||||
| The Back Shed's forum code is written, and hosted, in Australia. | © JAQ Software 2026 |
