
|
|
Forum Index : Microcontroller and PC projects : Stepper Project
| Author | Message | ||||
Bryan1 Guru Joined: 22/02/2006 Location: AustraliaPosts: 2136 |
Thanks for that Peter just went Z axis as the enable and no errors  Now I set Stepper Positon to X,Y and Z and now got them showing on the screen So the more I can get done today the less Lyle has to do  |
||||
| Bryan1 Guru Joined: 22/02/2006 Location: AustraliaPosts: 2136 |
Ok thats enough for one day So Lyle now got a second numberbox so the feedrate can be enter on all 3 axis, now trying to get the code right with the CTRL(val) was proving fun so commented it out but got the stepper code running. Have fun mate gui surface grinder1.zip Regards Bryan |
||||
| mozzie Guru Joined: 15/06/2020 Location: AustraliaPosts: 400 |
G'day, Bryan, I have loaded your program onto a PicoMite with a 3.5" ILI9488 screen and so far looking good, all working as expected The 4" LCD's are in transit.There are a lot of different ways we could go about driving the surface grinder, I have given it some thought and would like your feedback on the following: Currently we have: Page 1: Main page and menu Page 2,3,4: Axis and feedrate setup Page 5: Fixed buttons for pg 2,3,4 Should we add an AXIS HOMING button to each axis's page so they can be set individually? Should we add a RUN button to the MAIN page and run the machine from there, or would you prefer the graphic I posted earlier for the RUN page? I normally setup a job on the grinder in the middle of the magnetic table, then run the wheel just past it in the X direction (both ways) and then feed the Y axis before the next pass, so it might be best to set 0,0 in the middle of the table and use the width and length parameters to offset this. Do you do the same? I am playing with the idea of using the Stepper system for the X and Y axis but driving the Z axis directly from MMBasic, this allows us to continue to drive the Z axis after an E-Stop condition to raise the wheel. This would also require the Z axis driver to be permanently enabled, and the default direction to be away from the job with no direction signal driven. Also are you planning to have G-Code files for individual jobs or just set the machine each time? I am currently thinking of having the MMBasic program generate the G-Code for the stepper system as it runs so no actual G-Code program exists. A shame it now takes 3 days to get over 1 late night and a few drinks, it used to be 1 night to get over 3 days of hard drinking  Phil, thanks mate, I probably should have mentioned it was a mates 50th, I passed that milestone last year but its the thought that counts, cheers.  A heap of us around here are all the same age so we have had a string of 50ths in the last 18 months, and there will be another round stating next year for all the younger brothers and sisters. Starting to wonder if I'll survive  Thanks also for alerting Peter to the I2C slave issue, now works much better. Time for bed, hopefully to fully restore the grey cells  Regards, Lyle |
||||
| Bryan1 Guru Joined: 22/02/2006 Location: AustraliaPosts: 2136 |
Morning Lyle I'm 62 in August and yea having a big night does take it out of me and the next day not much gets done as it does take a good day or so to get back to normal. For now mate just so we can move the steppers around using the 2 number box's to set the distance and feedrate then using the toggle switch's to move each axis so each axis can be calibrated will be a great start. This is where I fell down down yesterday with the code as a number was inputted to the numberbox trying to set the control(VAL) to Str$(xpos) resulted in an error saying it had to be a number. So more reading is needed to work out just how this can be done. Once all the axis's are calibrated the code can move forward and more pages made to suit each condition. I will have some play with the code today and see how far I can go as this is a huge learning for this ol' Black Duck Regards Bryan |
||||
| mozzie Guru Joined: 15/06/2020 Location: AustraliaPosts: 400 |
G'day Bryan, Not sure if you've already realized, you don't need to convert to a string for a number box, just use the value: Ctrlval(11) = 12345 etc Also I reckon we need to read the value from the numberbox rather than write it. So to set the xlength parameter in a g-code string we would need: XLENGTH$ = STR$(ctrlval(11)) assuming the control is #11 And XFEEDRATE$ would be: XFEEDRATE$ = STR$(ctrlval(45)) assuming the control is #45 Hope this helps. Regards, Lyle. |
||||
| Bryan1 Guru Joined: 22/02/2006 Location: AustraliaPosts: 2136 |
Mozzie I am at the stage just now trying to get this to work but keep falling over with the stepper code. [197] Stepper GC, G1, X, xPOSil, xfPOSi : Loop While 12 = 1 Error : Unknown parameter sub Toggle select case touch(ref) case 12 ' XToggleL ctrlval(11) = xposil ': gp(3) = 1 ' set X DIR to left ctrlval(45) = xfposi ' get X axis distance Xtravel case 13 ' XToggleR ctrlval(11) = xposir ': GP(3) = 0 ' set X DIR to right ctrlval(45) = xfposi ' get X axis feedrate case 14 'YToggleL ctrlval(16) = yposil ': GP(3) = 1 ' set Y DIR to left ctrlval(46) = yfposi ' get Y axis feedrate case 15 'YToggleR ctrlval(16) = yposir ' : gp(3) = 0 ' set Y DIR to right ctrlval(46) = yfposi ' get Y axis feedrate case 26 'ZToggleL ctrlval(42) = zposil ' : gp(3) = 1 ' set Z DIR to left ctrlval(42) = zfposi ' get Z axis feedrate case 27 'ZToggleR ctrlval(42) = zposir ' : gp(3) = 0 ' set Z DIR to right ctrlval(47) = zfposi ' get Z axis feedrate end select case sub Xtravel Stepper GC, G1, X, xposil, xfposi : loop while 12 = 1 stepper run end sub I had to comment out the GP(3) = 1 as I got the error the pin wasn't set yet I have set GP0 to GP7 as DOUT. Edited 2026-05-19 13:19 by Bryan1 |
||||
| phil99 Guru Joined: 11/02/2018 Location: AustraliaPosts: 3316 |
What is the ": Loop While 12 = 1" for? What happens if you remove it (and its matching DO, if it has one)? |
||||
| Bryan1 Guru Joined: 22/02/2006 Location: AustraliaPosts: 2136 |
thats for when the toggle gui button is pressed down |
||||
| mozzie Guru Joined: 15/06/2020 Location: AustraliaPosts: 400 |
G'day Bryan, You need to let the Stepper system look after the direction, the pins are under its control. So if you have the machine at 0,0 and send "Stepper GC G1 X100 F50" it will move in the POSITIVE direction 100 If you then send "Stepper GC G1 X0" it will move in the NEGATIVE direction 100 back to 0,0 Once you have sent the G-Code the system will complete the command in the background, no need to DO:LOOP or wait. However this is what is going to make JOG difficult and may require not using the stepper system. Maybe just try each command separately until it makes sense, it took me a while to get my head around it also. Regards, Lyle. Edited 2026-05-19 13:42 by mozzie |
||||
| Bryan1 Guru Joined: 22/02/2006 Location: AustraliaPosts: 2136 |
Well down having lunch and thinking about it, now I found I can set each display box to show the input now I hit the toggle button is when it goes into error. So with the Gcode would this be the right way? Steeper GC, Str$(crtlval(11)), Str$(crtlval(45)) nope [197] Stepper GC, Str$(CtrlVal(11)), Str$(CtrlVal(45)) Error : Unknown parameter Edited 2026-05-19 14:02 by Bryan1 |
||||
| mozzie Guru Joined: 15/06/2020 Location: AustraliaPosts: 400 |
Hi Bryan, I think you are still trying to WRITE to the controls rather than READ a value from them: sub Toggle select case touch(ref) case 12 ' XToggleL ctrlval(11) = xposil ': gp(3) = 1 ' set X DIR to left ctrlval(45) = xfposi ' get X axis distance Xtravel I reckon should be: sub Toggle select case touch(ref) case 12 ' XToggleL xposil = ctrlval(11) ' Get pos X distance xfposi = ctrlval(45) ' Get X axis feedrate Xtravel case 13 ' XToggleR xposil = (peek(stepper x) - ctrlval(11)) ' Subtract distance from current position xfposi = ctrlval(45) ' Get X axis feedrate Xtravel Sub Xtravel Stepper GCODE G1,X,xposil,F,xfposi Stepper RUN ' NOT SURE if this should be here. do while peek(stepper active)=1:loop ' Ensure we only do this once per press End Sub The downside of the above DO:LOOP is it will lock up the whole system until the motion is complete, ok while testing. Regards Lyle. |
||||
| mozzie Guru Joined: 15/06/2020 Location: AustraliaPosts: 400 |
Hi Bryan, Looks like our posts crossed, you are heading towards the right track The Stepper system is a bit fussy about how you assemble the G-Code strings, there are 3 options: (assuming I remember this correctly) STEPPER GC is best used directly, no variables STEPPER GCODE works with variables but requires each comma delimited STEPPER GS is the latest addition from Peter and allows us to do all sorts of things. So while: Stepper GC, Str$(CtrlVal(11)), Str$(CtrlVal(45)) won't work This should: Stepper GS "G1 X"+Str$(CtrlVal(11))+" F"+Str$(CtrlVal(45)) Also should: Stepper GCODE G1,X,ctrlval(11),F,ctrlval(45) I will give this a try later but I'm supposed to be working Regards, Lyle. |
||||
| Bryan1 Guru Joined: 22/02/2006 Location: AustraliaPosts: 2136 |
ok just tried that Lyle and when I press the "Toggle +" this is what comes up in MCCC RUN Stepper initialized - 100KHz timer active Warning: Soft limits not configured. Use STEPPER LIMITS to set working area. Hardware limit switches configured Stepper armed - executing buffered commands Already armed Already armed Already armed Already armed Now the actual machine display didn't change the number so the 20 I put in the numberbox wasn't executed. Now every time I push the toggle button that Already armed comes up I did try with both code snippets you gave and both do that Already armed warning. Edited 2026-05-19 14:38 by Bryan1 |
||||
| Bryan1 Guru Joined: 22/02/2006 Location: AustraliaPosts: 2136 |
Ok kept reading the stepper manual and this is the example code Example: STEPPER GS "G1 X" + STR$(x_pos) + " Y" + STR$(y_pos) + " F500" Now my code Stepper GS "G1 X"+STR$(ctrlval(11))+"F",str$(ctrlval(45))+ "F50" Now the error I'm getting in MCCC [200] Stepper GS "G1 X"+Str$(CtrlVal(11))+"F",Str$(CtrlVal(45))+ "F50" Error : Missing value Now I thought it could be spacing after each value and spacing it out didn't change the outcome so what " Missing Value" is there to find So am I on the totally wrong track or am I constantly finding manual examples that are wrong |
||||
| mozzie Guru Joined: 15/06/2020 Location: AustraliaPosts: 400 |
Hi Bryan, The STEPPER RUN in the SUB XTRAVEL is probably causing this, put STEPPER RUN near the top of the program after the axis are setup and it should be ok, you can only use it once unless you use STEPPER CLOSE or STEPPER ESTOP. Try this instead, there was an END SUB missing from this snippet and the STEPPER RUN has been removed: sub Toggle select case touch(ref) case 12 ' XToggleL xposil = ctrlval(11) ' Get pos X distance xfposi = ctrlval(45) ' Get X axis feedrate Xtravel case 13 ' XToggleR xposil = (peek(stepper x) - ctrlval(11)) ' Subtract distance from current position xfposi = ctrlval(45) ' Get X axis feedrate Xtravel END SUB Sub Xtravel Stepper GCODE G1,X,xposil,F,xfposi do while peek(stepper active)=1:loop ' Ensure we only do this once per press End Sub I am working on the assumption that you want to read the values entered in the numberbox's and use them for the distance and feedrate for an axis, is this correct? or are you writing the default value? Regards, Lyle. |
||||
| mozzie Guru Joined: 15/06/2020 Location: AustraliaPosts: 400 |
Hi Bryan, Try taking out the comma after the "F" and put in a + Stepper GS "G1 X"+Str$(CtrlVal(11))+"F",Str$(CtrlVal(45))+ "F50" Should be: Stepper GS "G1 X"+Str$(CtrlVal(11))+"F"+Str$(CtrlVal(45))+ "F50" I would use: Stepper GCODE G1,X,ctrlval(11),F,ctrlval(45) But there are many ways to skin a cat they say. Regards, Lyle. |
||||
| Bryan1 Guru Joined: 22/02/2006 Location: AustraliaPosts: 2136 |
Ok loaded the code up and no errors now on MCCC it does say the stepper is running and after I input numbers for travel and feed the press the toggle switch nothing happens, no change on MCCC and no change on the actual machine position display box.So yes Lyle in order to get the steppers to move my idea is put a distance in the top display box along with a feedrate in the lower display then when the toggle swicth is pressed the axis moves the amount entered then more press's of the toggle button can move it again. Now the numbers in the display box's were done via stepper position in the setup code. Here is a picture of my breadboard setup for testing. 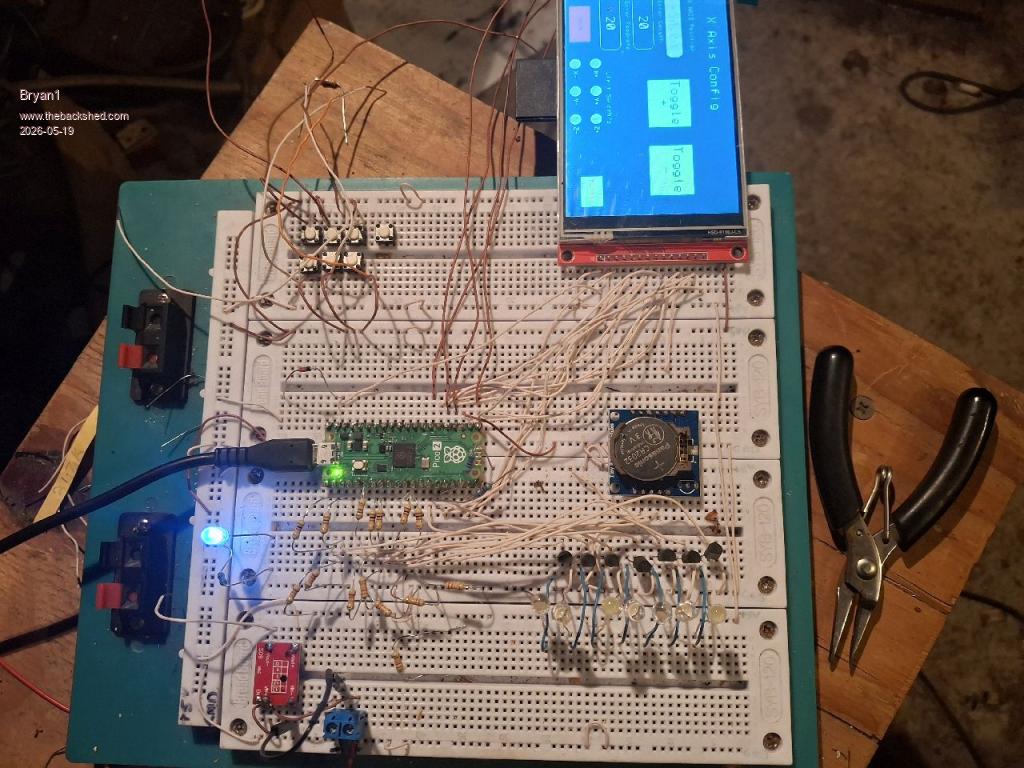 I have white LED's on the the Axis outputs for indicators to make sure the code is working, the 1K and 22K resistors for the outputs is all setup. Now the picture does show the X axis config page. Edited 2026-05-19 15:43 by Bryan1 |
||||
| mozzie Guru Joined: 15/06/2020 Location: AustraliaPosts: 400 |
Hi Bryan, I have made a few changes to your code and re-arranged a few things to make it easier to follow the program flow, you should be able to jog the axis all going well Option EXPLICIT Option DEFAULT NONE Option console serial Colour RGB(white), RGB(black) Const X_POSition = 1, xsetup = 2, Y_POSition = 7, ysetup = 3, zsetup = 4 Const Z_POSition = 5, Page_1 = 6, X_POSition1 = 8, Y_POSition1 = 9 Const Z_POSition1 = 10, XPOS = 11, toggleL = 12, toggleR = 13 Const YPOS = 16, XplusL = 17, XminusL = 18 Const YplusL = 19, X1 = 20, Y1 = 21, Z1 = 22, YmunisL = 23, ZplusL = 24 Const ZminusL = 25, ZPOSi = 28 Const PAGE_1TITLE = 29, Z0 = 30, Xcap = 31, ver = 32, X0 = 33 Const Y0 = 34, XPOSi = 35, YPOSi = 36, Ycap = 37, Lcap = 38 Const Estop = 39, escap = 40, Zcap = 41, ZPOS = 42, axis_show =43 Const axis_adj = 44, XFPOS = 45, YFPOS = 46, ZFPOS = 47, XFtext = 48 Const YFtext = 49, ZFtext = 50 Dim R_Page As integer = 0 On error skip Stepper close CLS SETUP_SCREEN Stepper init 0.05, 150, GP22 Stepper axis X, GP2, GP3, ,,, 600,, Stepper axis Y, GP4, GP5, ,,, 600,, Stepper axis Z, gp6, gp7, gp1,, 600,, Stepper hwlimits gp26, gp27, gp28, gp26, gp27, gp28 Stepper spindle GP0 Stepper POSition X, 100 Stepper POSition Y, 50 Stepper POSition Z, 20 GUI interrupt TOUCHDOWN SetTick 200,Show_POS Stepper RUN Do : Pause 100 : Loop Until Inkey$<>"" Pause 250 Stepper close End Sub TOUCHDOWN If Touch(ref) = 20 Then GUI page 2,5:R_Page = 1 'X1 #20 If Touch(ref) = 21 Then GUI page 3,5:R_Page = 2 'Y1 #21 If Touch(ref) = 22 Then GUI page 4,5:R_Page = 3 'Z1 #22 If Touch(ref) = 6 Then GUI page 1:R_Page = 0 ' If Touch(ref) = 39 Then GUI page 6,5 If (Touch(ref) = 12) and (peek(stepper active)=0) Then Select Case R_Page Case 1 Stepper GCODE G1,X,peek(stepper X)+CtrlVal(XPOS),f,CtrlVal(XFPOS) Case 2 Stepper GCODE G1,Y,peek(stepper Y)+CtrlVal(YPOS),f,CtrlVal(YFPOS) Case 3 Stepper GCODE G1,Z,peek(stepper Z)+CtrlVal(ZPOS),f,CtrlVal(ZFPOS) End Select EndIf If (Touch(ref) = 13) and (peek(stepper active)=0) Then Select Case R_Page Case 1 Stepper GCODE G1,X,peek(stepper X)-CtrlVal(XPOS),f,CtrlVal(XFPOS) Case 2 Stepper GCODE G1,Y,peek(stepper Y)-CtrlVal(YPOS),f,CtrlVal(YFPOS) Case 3 Stepper GCODE G1,Z,peek(stepper Z)-CtrlVal(ZPOS),f,CtrlVal(ZFPOS) End Select EndIf End Sub Sub Show_POS CtrlVal(X_POSition) = Str$(Peek(stepper x),-4,2) CtrlVal(X_POSition1) = CtrlVal(X_POSition) CtrlVal(Y_POSition) = Str$(Peek(stepper y),-4,2) CtrlVal(Y_POSition1) = CtrlVal(Y_POSition) CtrlVal(Z_POSition) = Str$(Peek(stepper z),-4,2) CtrlVal(Z_POSition1) = CtrlVal(Z_POSition) End Sub SUB SETUP_SCREEN GUI setup 1 Font 1,1 GUI caption ver, " Version 0.001", 180, 50 '#32 GUI caption axis_show, "Machine Position", 60, 65 Font 1,2 GUI caption PAGE_1TITLE, "MMBasic Surface Grinder", 70, 20 '#29 GUI caption axis_adj, "Setup Axis", 300, 65 GUI led X1, "X Axis", 320, 110, 15,RGB(green) '#20 GUI led Y1, "Y Axis", 320, 165, 15, RGB(green) '#21 GUI led Z1, "Z Axis", 320, 220, 15, RGB(green) '#22 GUI displaybox X_POSition, 30, 90, 180, 30, RGB(white), RGB(black) '#1 GUI button X0,"X",0,80,20,50, RGB(white) '#33 GUI displaybox Y_POSition, 30, 130, 180,30, RGB(white) '#7 GUI button Y0, "Y", 0,120,20,50, RGB(white) '34 GUI displaybox Z_POSition, 30, 170, 180, 30, RGB(white) '#5 GUI button Z0, "Z", 0, 160, 20, 50, RGB(white) '#30 GUI setup 2 Font 1,2 GUI caption xsetup,"X Axis Config",60,20,,RGB(green) '#2 GUI displaybox X_POSition1, 10, 90, 160, 30,RGB(white), RGB(black) '#8 GUI numberbox XPOS, 10, 145, 120, 40, RGB(white), RGB(black) '#11 GUI numberbox XFPOS, 10, 210, 120, 40, RGB(white), RGB(black) Font 1,1 GUI caption XPOSi,"X AXIS Position", 20, 65,,RGB(green) '#35 GUI caption Xcap,"Enter Length", 20, 125,, RGB(green) '#31 GUI caption XFtext, "Enter Feedrate", 20,190,,RGB(green) CtrlVal(XPOS)=10:CtrlVal(XFPOS)=100 GUI setup 3 Font 1,2 GUI caption ysetup,"Y Axis Config",80,20,,RGB(green) '#3 GUI displaybox Y_POSition1, 10, 90, 160,30, RGB(white), RGB(black) '#9 GUI numberbox YPOS, 10, 145, 120, 40, RGB(white), RGB(black) '#16 GUI numberbox YFPOS, 10, 210, 120, 40, RGB(white), RGB(black) Font 1,1 GUI caption YPOSi,"Y AXIS Position", 20, 65,, RGB(green) '#36 GUI caption Ycap,"Enter Length", 20, 125,, RGB(green) '#37 GUI caption YFtext, " Enter Feedrate", 20, 190,, RGB(green) CtrlVal(YPOS)=10:CtrlVal(YFPOS)=100 GUI setup 4 Font 1,2 GUI caption zsetup, "Z Axis Config",80,20,,RGB(green) '#4 GUI displaybox Z_POSition1, 10, 90, 160, 30, RGB(white), RGB(black) '#10 GUI numberbox ZPOS, 10, 145, 120, 40, RGB(white), RGB(black) '#42 GUI numberbox ZFPOS, 10, 210, 120, 40, RGB(white), RGB(black) Font 1,1 GUI caption ZPOSi,"Z AXIS Position", 20, 65,, RGB(green) '#28 GUI caption Zcap,"Enter Length", 20, 125,, RGB(green) '#41 GUI caption ZFtext, " Enter Feedrate", 10, 190,, RGB(green) CtrlVal(ZPOS)=10:CtrlVal(ZFPOS)=100 GUI setup 5 GUI button Page_1, "MAIN",30,270,80,40,RGB(black),RGB(red) '#6 Font 1,1 GUI led 17,"X+",160,260,10,RGB(green) '#17 GUI led 18,"X-",160,300,10,RGB(green) '#18 GUI led 19,"Y+",220,260,10,RGB(green) '#19 GUI led 23,"Y-",220,300,10,RGB(green) '#23 GUI led 24,"Z+",280,260,10,RGB(green) GUI led 25,"Z-",280,300,10,RGB(green) ' LED's to be hooked up to limit switch pins GUI caption 38, "Limit Switch's",180,230,,RGB(green) GUI button 39,"E_Stop",400,250,60, 40,RGB(red), RGB(green) Font 1,2 GUI button toggleL,"JOG~+",200,80,120,80,RGB(black),RGB(green) '#12 GUI button toggleR,"JOG~-",340,80,120,80,RGB(black),RGB(green) '#13 'gui caption 40, "E_Stop",357,240,,rgb(white) END SUB I haven't actually tried it on a machine yet however it does update the X,Y,Z position so fingers crossed. Hopefully you will see movement  Regards, Lyle. |
||||
| Bryan1 Guru Joined: 22/02/2006 Location: AustraliaPosts: 2136 |
Thanks for that Lyle so in the morning my second caffine intake can while I use this code to see if I get atleast the led's lighting up. I still need to finish wiring up the DM556's and run a solid wire from my cnc where I have a wire with the battery voltage. So the Vcc on the DM556's will be around 26-29 volts depending on the state of my shed battery.So tomorrow hopefully this project will move one step further. Regards Bryan |
||||
| DaveJacko Senior Member Joined: 25/07/2019 Location: United KingdomPosts: 103 |
can anyone point out the error of my ways, not all of them, but specifically, (running 6.03 ) Stepper axis x,gp14,gp27,gp8,0,100,1000,1000 Stepper axis y,gp15,gp28,,0,100,1000,1000 Stepper axis z,gp26,gp29,,0,100,1000,1000 Stepper position home Stepper run Stepper gcode "F,100" '<-------Error : feedrate not set ?????? Stepper gcode "S,1000" Stepper gcode "G0,X,100,Y,100" Stepper gcode "G1,X,200,Y,200" Try swapping 2 and 3 over |
||||
| The Back Shed's forum code is written, and hosted, in Australia. | © JAQ Software 2026 |
