
|
|
Forum Index : Windmills : I finally got an F&P where to now?
| Author | Message | ||||
KarlJ Guru Joined: 19/05/2008 Location: AustraliaPosts: 1178 |
Yes got that bearing from the mob you told me about. One stop the tail goes straight out the back, the other it goes 75 deg to the rotor, given the rotor is raked back at 10deg (est) to give clearance to the tower and the tail goes up as it goes forward, this gives me about 18" of clearance to the blades, as i have no idea how much they will flex, i deemed this to be OK. Im thinking the 20deg I'll be short of being fully furled is OK but certainly will take the feedback, here are shome shots with tail attached. Check out these shots with tail attached. Note going to build a bigger tail, this was an experiment sith some scrap I had laying around, not heavy enough and not big enough either (again open to comment) Shaft is in the right direction (I think), big nut goes on the back with the stator, prop goes on the shaft with the longer splines. Nut will be always trying to do up and without it, the only thing stopping the shaft coming out the front would be the grub screws and the plastic nut on the back of the magnet housing. 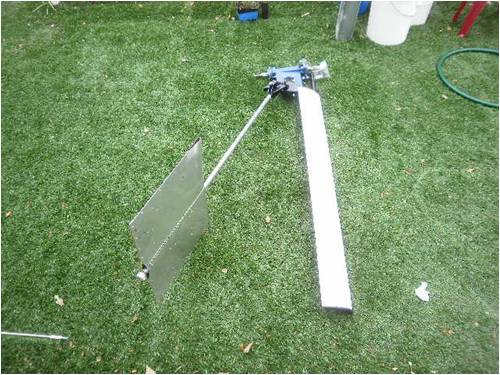
Luck favours the well prepared |
||||
| KarlJ Guru Joined: 19/05/2008 Location: AustraliaPosts: 1178 |
Off topic.... also in the pics the fake grass in the backyard, awesome for the kids to play on and never ever needs mowing or watering! Buckets are catching rainwater off my shade sail over the pool, which i dump into a nearby trap which then pumps into the rainwater tank. Being a Melbourne resident we have a water crisis, I run all my roof to the pit which pumps into the tank then pump into the HOT water, toilets and laundry. Result is a water usage from the mains of just 30L day for a family of 4 (and the kids have a small bath most days and I shower for as long as I like). SO much for 155L/day per person I should be using 600L/day. Pity water is only $2/1000L as this system set me back about $2000 after rebates and will probably never pay itself back -I guess thats not the point, I'm doing my bit. Karl Luck favours the well prepared |
||||
| Gizmo Admin Group Joined: 05/06/2004 Location: AustraliaPosts: 5187 |
I think there's a problem there Karl, the tail is swinging the wrong way. When the tail furls, it should be rotating up and over the F&P hub, it looks like in your pictures its heading down and to the opposite direction to the F&P hub. This is a common mistake, dont feel to bad. Fire up the angle grinder and welder. Its a shame Randy doesn't fit the stops. Have a look at ... http://www.thebackshed.com/Windmill/fp2c.asp http://www.thebackshed.com/Windmill/Docs/Furling.asp Glenn The best time to plant a tree was twenty years ago, the second best time is right now. JAQ |
||||
| KarlJ Guru Joined: 19/05/2008 Location: AustraliaPosts: 1178 |
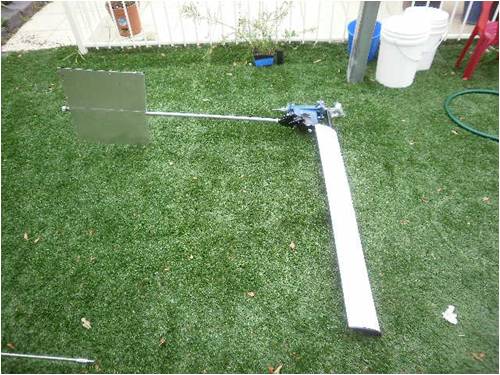
and that is what the forum is for.......... Have cut back the one that is now the stop for the tail over the top and mostly ground back the other side which I'll use some flat bar. Grinding it off is much harder than putting it on!!! Thanks Luck favours the well prepared |
||||
Poss Newbie Joined: 27/09/2009 Location: AustraliaPosts: 30 |
I wonder if someone reading this can point Karl and myself in the right direction with the shaft of the F&P. Is the nut supposed to go to the stator end or blade end. I don't have a problem as far as I can see as I'm using a bearing with a locking collar.Comments and advice appreciated....Poss Karl I can see where you were coming from with the tail being able to swing into blades Thanks for the heads up A brave man may not live for long, but a careful man does not live at all. |
||||
| KarlJ Guru Joined: 19/05/2008 Location: AustraliaPosts: 1178 |
Indeed my theory holds up for the shaft not coming out the front but doesn't hold up too well for it pushing the shaft out the back 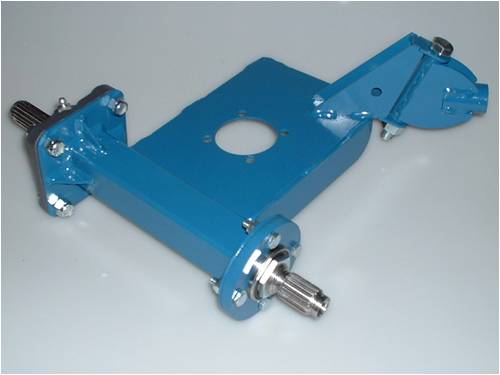
the pic from randys workshop does show the nut on this end though. I have more questions about the tail, reading the page on furling, my 2.5m diameter prop is going to need a massive tail, call it 20KG for arguements sake. Randy reckons 48" (1200mm) works well and he just attaches a piece of marine plywood, now in my mind 20KG is a pretty big lump of ply, I calculate rotating mass at at least 8KG as blades are a good couple of kilos each, plus the hub, add a few more for the weldment and motor, tail and all of a sudden I'm trying to lift 30KG or more onto the top of an old windmill tower 12m up in the air...... Dad insists it must be free standing or the cattle will "worry" it, and I really don't have the resources to design and build a sufficiently rigid non guyed tower. The number of times you boys have your mills up and down worries me in the reliability stakes. 6 monthly yes, monthly no ....daily hell no! Once this thing is up, it has to work- hence newbie mistakes made on the ground far far easier to resolve. Karl 
Luck favours the well prepared |
||||
| Tinker Guru Joined: 07/11/2007 Location: AustraliaPosts: 1904 |
I'm not sure what you will do with your wind generator shaft but on the F&P washing machine the shaft slides into the stator bearings from the coil side with the nut threaded end first. The stator is locked to the shaft protruding from the plastic back of the stator with this large skinny hex nut - this stops it from sliding axially on the bearings. The magnet rotor is then slid over the splines beyond the hex nut and the rotor is locked on with a plastic wing nut. Klaus |
||||
| KarlJ Guru Joined: 19/05/2008 Location: AustraliaPosts: 1178 |
Got some feedback from Randy too, he suggests I have the YAW bearing on the wrong side too. fixed that also. Making progress though, now have a weldment, blades and a tail and the hub and spinner coming from Trev this week, should almost be ready to test. Karl Luck favours the well prepared |
||||
| KarlJ Guru Joined: 19/05/2008 Location: AustraliaPosts: 1178 |
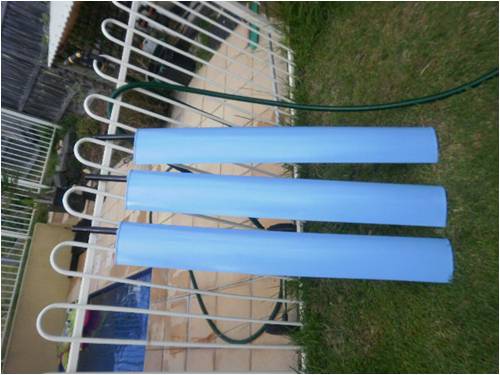
Bearing certainly benefited from some grease (the Yaw bearing) Got my tower box built less the CAPs which are on there way. My 2year old got involved today, selecting sky blue as the colour for the blades and helping paint them. Welded on another tail stop this time in the right direction! Karl 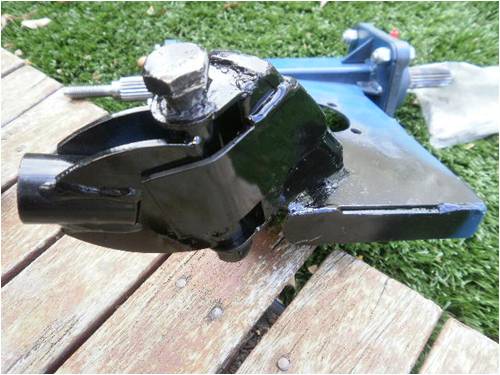
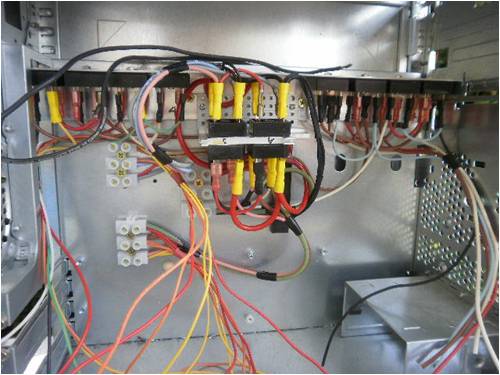
Note this box is set up for a twin stator rig (one of fillm's as soon as concept (of wind power at farm) is prooven. Main current handling regs mounted on a heat sink salvaged from PC power supply, remaining mounted on some aluminium angle. All should fit in the PC case which I will put into something weather proof like an old fridge. Going for a PL20 reg and made the encapsulated resistor from an old oven as described on the forum. I went for 60Vx60V /8ohm =450W which should work fine, if I need more I will parallel another one the same. Next -out with the 12V stator and in with the 48V stator (ie split in half) Question -2.5m rotor with the extruded blades with the cap doubler should I be going for delta or star???? 2.5m is bigger than I thought it would be!!! Karl Luck favours the well prepared |
||||
| Gizmo Admin Group Joined: 05/06/2004 Location: AustraliaPosts: 5187 |
Hi Karl That tail stop is looking much better. In time the metal tab might bend back, see how it goes, but you may have to strengthen it. Star or Delta? Only experimentation will work that out. Try both for a few days each and see what results you get. Glenn The best time to plant a tree was twenty years ago, the second best time is right now. JAQ |
||||
| KarlJ Guru Joined: 19/05/2008 Location: AustraliaPosts: 1178 |
Had another win today in hard rubbish. This fridge doesn't work, still has a good compressor/vac pump for some vac bagging of composite parts if i ever get really carried away. 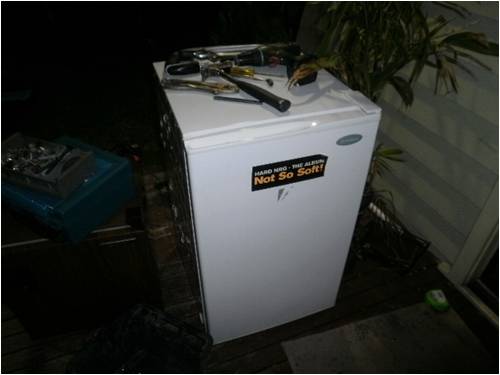
Scored some more F&P's... and my prop hub and spinner arrived from Trev. 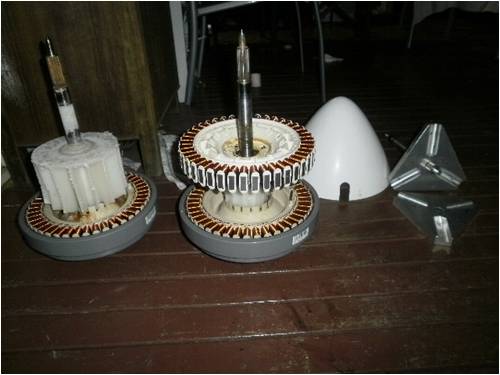
and scored some steel scraps, the perfect sizes to make a windturbine... 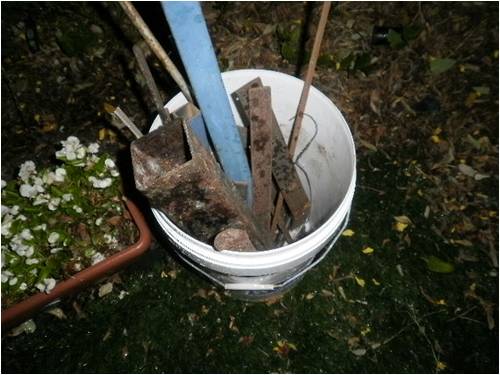
I cut down an F&P bearing holder with a hacksaw and angle grinder, so when I get one of Fillm's machines thats one bit I wont need. i'll use the square section and make a 90deg cut in the large lump of flat bar so the two sides take in the 90 of the box section and use the cut out pieces as additional braces. The prop hub a little harder than I expected, drilling the holes perfectly square is not easy so, i'll go around to a mates place and use his drill press. I think I'll put an extra set of holes so each blade has two bolts holding it in instead of just the one. How do you guys hold the spinners on? I was thinking a healthy dose of silastic.... Karl Luck favours the well prepared |
||||
| JimBo911 Senior Member Joined: 26/03/2009 Location: United StatesPosts: 262 |
Karl Nice work there I really like the desk top PC case housing I think I might go that route. I used three blots to fasten my blades the the iron cores then pop riveted the tubes to the blades as well. Jim |
||||
| Randysworkshop Newbie Joined: 25/10/2006 Location: United StatesPosts: 10 |
My F&P Pivot weldment is not the answer to life, it is only the start for new ideas. A vane stop can be bolted on to the side of the vane pivot support without welding if so desired. 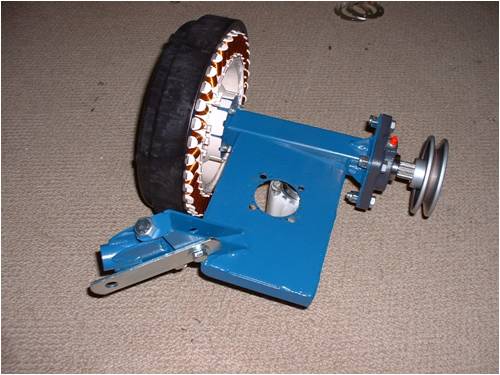
A spacer between the blade hub and the front four bolt bearing will transfer the blade thrust to that bearing. Randy B. www.randysworkshop.com randy burmeister |
||||
| KarlJ Guru Joined: 19/05/2008 Location: AustraliaPosts: 1178 |
Indeed, the new ideas keeping me up at night! Todays new ideas wire support 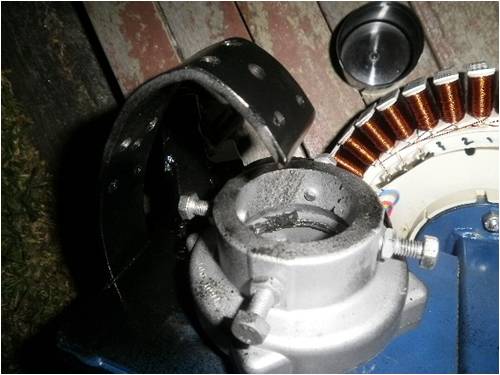
the "spacer" to transfer prop load to bearing. 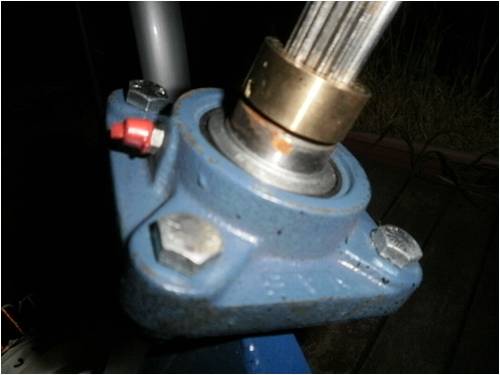
Wire connector to stator (I loctite'd the grub screws to they wont vibrate loose) 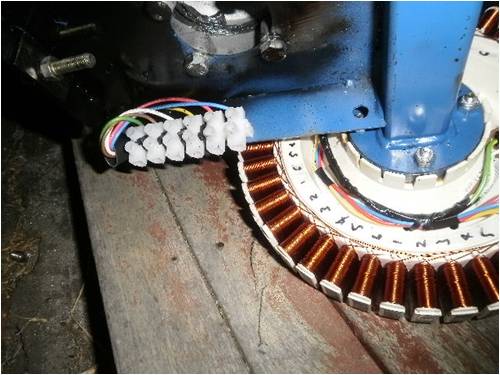
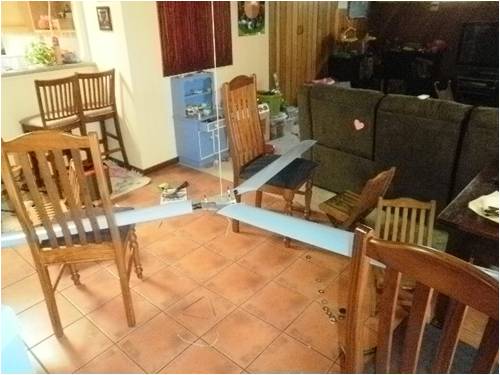
Prop balancing -I'm a bit worried here, dont know why as all the steel is exactly the same lengths and the blades are exactly the same length, but for some reason I have one really heavy blade, one heavy blade and one light blade (i dont have scales so i dont know what the difference is between them) I'm still not done took me a couple of hours to get the setup right. So far some big chunks of steel (2 each side) on one blade and the one next to it will probably get 1 also. I has crossed my mind to drill a 3/8" hole up the guts of the heavy blade, probably only get an inch as I dont want to get close to the through bolt. any thoughts? 
Luck favours the well prepared |
||||
Downwind Guru Joined: 09/09/2009 Location: AustraliaPosts: 2333 |
The further out the blade you add the weight the less weight you need to add for the same result. Pete. Sometimes it just works |
||||
fillm Guru Joined: 10/02/2007 Location: AustraliaPosts: 730 |
You will best get a cheap set of 5kg digital scales from a bargin warehouse , then you will probably find that one PVC blade is heaver , I have seen up to 50g difference , the extrusion must get a bit of a lump in it. PhillM ...Oz Wind Engineering..Wind Turbine Kits 500W - 5000W ~ F&P Dual Kits ~ GOE222Blades- Voltage Control Parts ------- Tower kits |
||||
| JimBo911 Senior Member Joined: 26/03/2009 Location: United StatesPosts: 262 |
Karl I balanced my blades and hub by extending or shorting the iron cores. To add weight I drilled a hole in the end for a 1/4 20 bolt then machined a small piece from the left over stock and bolted it accordingly. Not very big about 1/2 longer or shorter etc. This way their is no external weight visible. So far so good but haven't had a wind storms yet??? Jim |
||||
| KarlJ Guru Joined: 19/05/2008 Location: AustraliaPosts: 1178 |
Yeah.... and when I bought the steel bar there was a lump 300mm left over and he said I could have it but I didnt think i'd be needing any lengths that small, would have been ideal. works out at $2.20 in 20 cent pieces on one blade and $1.40 on another and thats out at the tip!. Bolted on at the hub will be covered by the spinner and wont induce any extra loads out at the tips. Anthony swung by today to check out the problem and has offered to give me a lighter blade for the heavy one, for the moment I'll keep going and if i get stuck ie not enough space for weights i'll do that. It has made him aware of the issue and will now match blades over 1m as best he can as they are cut from separate extrusions (3m long). Great service I reckon, still happy Karl Luck favours the well prepared |
||||
| Downwind Guru Joined: 09/09/2009 Location: AustraliaPosts: 2333 |
Why not tap the shaft ends and add a bolt to each one then use washers or lead rings added to each blade to balance them. By being out at the end of the shaft it would take less weight than at the hub and several washers might do if not some lead sheet cut into washers would work well. Loctite the bolts in after balancing. Pete. Sometimes it just works |
||||
| Downwind Guru Joined: 09/09/2009 Location: AustraliaPosts: 2333 |
Further thought maybe a couple of inches of 1/4 althread fitted to each shaft end and a nyloc nut. Lead sheet you can cut with sissors to make washers. It would be nice if the end caps of the pvc blades had a tube moulded in them that lead shot could be added to balance blades and then a screw plug or silicon to seal it in. I have seen a lot of balance scales calibrated with lead shot. (like used in shotgun shells) very easy to work with. Pete Sometimes it just works |
||||
| The Back Shed's forum code is written, and hosted, in Australia. | © JAQ Software 2026 |
