
|
|
Forum Index : Microcontroller and PC projects : Proto Board for the uMite 28
| Author | Message | ||||
| WhiteWizzard Guru Joined: 05/04/2013 Location: United KingdomPosts: 2991 |
Zonker, Solder everything bridging all pins  and then use wick and flux as described in my PM to you. Even with offset pins and small pitch this method DOES work. and then use wick and flux as described in my PM to you. Even with offset pins and small pitch this method DOES work.
The only time you will have a problem is if a pin overlaps a neighbouring pad - but you won't have this unless you totally misalign the chip. Go for it - you will succeed 
|
||||
| MOBI Guru Joined: 02/12/2012 Location: AustraliaPosts: 819 |
What do you use to clean up the flux residue? I've only used warm soapy water and a hair drier. Is it damaging to the components if the flux is left on the board? David M. |
||||
| WhiteWizzard Guru Joined: 05/04/2013 Location: United KingdomPosts: 2991 |
I use a PCB/Flux cleaner like this. . Simply spray onto a component immediately after you have soldered the component and use a firm toothbrush (not the one you use for your teeth though!) and brush the area clean around the component. If you do this after each component is soldered the board stays very clean and looks very professional. And one can this size lasts ages. I've heard flux does damage components but can't comment from experience since I ensure my PCBs are cleaned properly by using the above method. Hope this helps . . . . From the number of PMs I am getting regarding soldering I may post a video sometime in the future. Depends upon demand. 
|
||||
| viscomjim Guru Joined: 08/01/2014 Location: United StatesPosts: 925 |
Video would be awesome!!! |
||||
| MOBI Guru Joined: 02/12/2012 Location: AustraliaPosts: 819 |
Hmmm I wonder what the flux remover consists of. Once upon a time, we only had resin cored solder and metho and a tooth brush was all that was needed. These days with fully automated PCB populating, fluxes and eutectic soldering etc.... David M. |
||||
| paceman Guru Joined: 07/10/2011 Location: AustraliaPosts: 1329 |
David, The old standard for cleanup was iso-propanol. I use it along with a soft toothbrush and it seems to do a pretty good job. You can get it in the paint section at Bunnings in a spray can (about $8) or a bigger plastic bottle. The spray can lasted me about a year. It's a pretty safe chemical similar to metho but does a much better job on flux residue. Greg |
||||
Lou Senior Member Joined: 01/02/2014 Location: United StatesPosts: 229 |
David, For cleaning boards soldered with resin core I always used 70% isopropyl rubbing alcohol and a toothbrush, then blow dry with compressed air. Wizz, I'd like to see a video. I have never tried your bridging method but it sounds good, we'll try it here with Zonker's boards. I like that little USB chip he used. On the two boards we have built, they both logged right to my winXP computer, didn't have to mess with any drivers. Lou Microcontrollers - the other white meat |
||||
BobD Guru Joined: 07/12/2011 Location: AustraliaPosts: 935 |
I read this yesterday about soldering SMD. It might be worth a look. |
||||
| paceman Guru Joined: 07/10/2011 Location: AustraliaPosts: 1329 |
Gents, Here's some chemistry for you and apologies for those who already know (and my old chem lecturers!)
Iso-propanol is iso-propyl alcohol - same thing, just a shortened name. It's the next alcohol up the hydrocarbon chain from ordinary alcohol, i.e. ethanol. The chain goes CnH(2n+1)-OH.....the -OH makes it an alcohol. So you have methanol(CH3-OH), ethanol(C2H5-OH), propanol(C3H7-OH), butanol(C4H9-OH) etc. getting less volatile as you go up the chain. The iso- bit at the front of iso-propanol just indicates a particular orientation of -OH (i.e. alcohol) part of the molecule, it's just the most common form for propanol. Rubbing alcohol can be many things but it's often basically a 70/30 mixture of propanol (we'll ignore the iso- bit) and water - water and alcohols mix very well. There's also often ethanol in the mixture and that makes it evaporate a bit faster (more volatile). There's also often other things added like oils, scents and other chemicals to make it a bit nicer to 'rub' &/or act as antibiotics. Iso-propanol seems to do a pretty good job of cleaning flux residue and it's volatility is a good compromise. If it's too volatile it evaporates off the board before it gets a chance to be scrubbed, but if it's not volatile enough you'll be waiting all day for it to dry and there's more chance of some component of the board perhaps being partly dissolved. Blowing it off with compressed air while held vertically (or just gently shaking it) after it's scrubbed is handy to dry it faster and physically remove residue which will otherwise just be spread more evenly around the board if it's just left to dry horizontally. So I reckon plain old iso-propanol (from the paint section of your hardware store) is a good flux cleaner, rubbing alcohol can also be good but be careful which brand you use (from chemist or maybe supermarket), and the other specialised flux cleaner mixtures probably do an even better job - but will cost more. Greg |
||||
| WhiteWizzard Guru Joined: 05/04/2013 Location: United KingdomPosts: 2991 |
Thanks for the chemistry lesson - useful for us Wizzards! I prefer mixing coke with my alcohols - tastes zoo much better!
One valid point though is that I don't mind using a flux cleaner at even �5 for 200ml because it lasts for a very long time even if you clean the board after soldering each component. Along with a firm bristle toothbrush it works wonders. What risk is there to the Silk Screen rubbing off when mixing your own cleaners? Or put another way, are there any precautions required to take to avoid this happening? Off to buy some alcohol . . . 
|
||||
mbramwel Regular Member Joined: 10/07/2013 Location: CanadaPosts: 42 |
I grabbed my daughters nail polish remover. Inserted a Q-Tip, and used that to scrub/remove the flux. Works well and the Q-Tip does not make a mess on the board. |
||||
| paceman Guru Joined: 07/10/2011 Location: AustraliaPosts: 1329 |
Hi Mark, Nail polish remover is usually acetone - it's a considerably more aggressive solvent than propanol so you may need to watch it doesn't affect some plastics. The Q-tips are good - I use them too sometimes if there's only a small area to clean and as you say the 'gunk' removed does come off with them. They take a lot longer to clean the board if you've worked on several areas though. I find residues come off pretty easily by giving the area a second spray with the iso-propanol (holding it vertically so that solvent drips off) and then finishing it with another air puff. Greg |
||||
| WhiteWizzard Guru Joined: 05/04/2013 Location: United KingdomPosts: 2991 |
Hi Zonker, Sorry to disturb you guys, but how is the soldering of the DFNs getting on? Please do try to post some photos when you get a spare minute as I'm sure I am not the only person keen in seeing this module come to life!
Regards, Phil |
||||
| Zonker Guru Joined: 18/08/2012 Location: United StatesPosts: 772 |
Evening Gents... Ok... Just got back from Lou's place, after spending the afternoon getting the stuff organized. Lou managed to get another DFN stuck on using a mag-lamp and a good bit of luck.. So, I think it's going to be doable. The good news is the boss at work let me take off a week so we can get a double teem thing going on these units. One thing I would like to try is using a fitting jig to make sure the part is sitting just right. I was thinking of using a tiny drop of that lock-tight SMD glue to stick the part to the PCB, let it dry, then try soldering it. I hope it would be an easier operation without worrying about the part moving around as your moving the iron around. Anyway, I fitted a right angle male connector to a finished board an plugged it into a 200 to 300 center converter board. 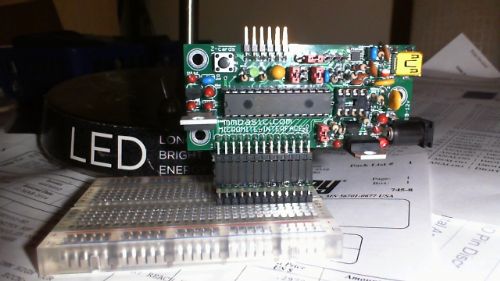
Mounting it vertical seems to leave plenty of space on the vector board... 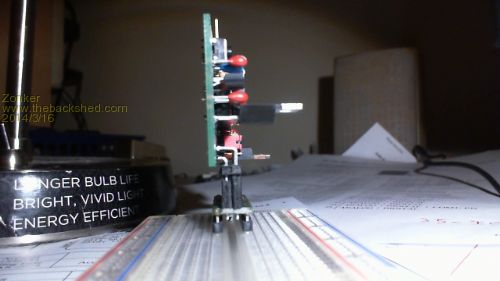
I also managed to locate a female connector that could be used if the board was being used in the stacking configuration... So, I will take a look at getting all the numbers and pricing stuff done Sunday after church. Then Monday we will give it a go making a small group of ready to go units for shipping out...
PS: For those of you who would like to try building these yourself, just send me a PM saying what you want. We have all the parts to go with the bare board and could kit them up and send them out during the week... More info soon... EDIT: After a trip to Lou's place to grab the parts, I got setup at work and spent the morning creating a reference jig to hold the DFN's in place. With the help of the nice staged microscope at work, I managed to get 4 of the DFN,s fitted to the PCB's... I think I'm getting the hang of this... The jig is working great..! I hope to put in more time at it tomorrow.. |
||||
| isochronic Guru Joined: 21/01/2012 Location: AustraliaPosts: 689 |
I guess these can be used with standard software other than the uM/MMBasic, ie there is nothing constraining ? Are they also useable without the anciliary chips, ie with bypasses etc...I am wondering whether to have a bash or will Silicon Chip have its own "official" board etc. |
||||
| Zonker Guru Joined: 18/08/2012 Location: United StatesPosts: 772 |
Evening Gents... Got the first 10 pack of boards "DFN'ed" using the jig and microscope.. Lou stopped by the shop to grab em up, so I gave him a nickel tour of the place.. Ok.. Double team time... Starting the next 10 tomorrow.. 
EDIT: @Cronic.. The schematic show jumpers for control of the OB USB.. There is power selections as well.. |
||||
| WhiteWizzard Guru Joined: 05/04/2013 Location: United KingdomPosts: 2991 |
Sounds like good progress being made there
One quick question regarding the '168hr floor life' unless baked. What are you doing about this? I was going to use the FT230 but decided not to after reading lots of bad things about it if it wasn't 'cooked' prior to usage. Keep up the good work - looking forward to seeing one of these units soon . . . |
||||
| Zonker Guru Joined: 18/08/2012 Location: United StatesPosts: 772 |
Oops.. Sorry Chronic... typo.. Yep, your right Phil.. I have been keeping them tightly sealed in the bag along with the "water absorber" pack.. Hope this helps.. I think this is day 9.. I guess if the USB quits on you, send it back for a refund.. not sure, I hope it doesn't cause any problems.. maybe I should just finish soldering all of them on instead of kitting them an sending them out... yep... good idea... |
||||
| MicroBlocks Guru Joined: 12/05/2012 Location: ThailandPosts: 2209 |
Would be using a 'skillet'/hotplate not be a solution to get them soldered/reflowed. That method works pretty good and fast. You probably do 3-4 board at a time. Microblocks. Build with logic. |
||||
| Zonker Guru Joined: 18/08/2012 Location: United StatesPosts: 772 |
Evening fine people... Well, the end of day 3 and I managed to get the rest of the DFN's glued on.. I just decided to go ahead and bang all of them because if I shipped them in kits the would get to wet... I think keeping them bagged up helped... We will see... I got off the phone with Lou who got the first batch of 10 about half done.. He plugged in the first 5 to see if the USB comes up... 5 for 5 baby... Anyway, I'l be heading over to Lou's tomorrow to start doubled timing this build.. more info soon... BTW.. What does everyone think about what makes up a valid board test..? I was thing of a simple 2 LED test (source/sink) for each pin and a simple Rs-485 test and voltage checks ect... Is there any kind of "standard" board checkout programs..? Feedback welcome..! Thanks Gents.. |
||||
| The Back Shed's forum code is written, and hosted, in Australia. | © JAQ Software 2026 |
