
|
|
Forum Index : Microcontroller and PC projects : Decoding DIGOO remote temperature sensor
| Author | Message | ||||
disco4now Guru Joined: 18/12/2014 Location: AustraliaPosts: 1127 |
This remote temperature and humidity sensor may be of interest. I have had three connected to the weather station that is available to match them. 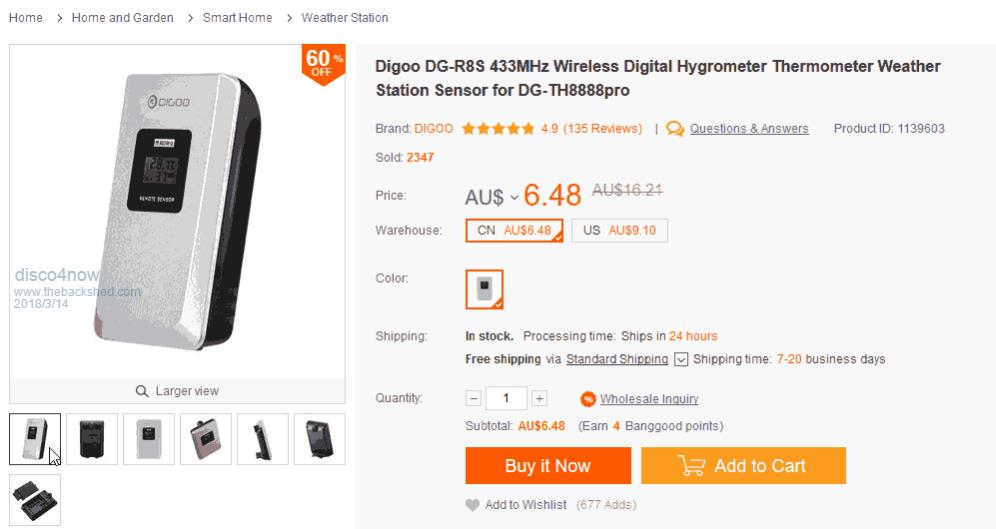 Digoo Remote Sensor $AU6.48 so price is good. I have one for some time and have not had to replaced the batteries on the remote sensor so seem to last pretty well.(Just looked it up just over 1 year on same batteries and still going) I originally got them with the idea of decoding the 433mhz signal and putting the data into my own weather station. As each unit has a unique code you could connect several. After a bit of inspiration from an idea from @tassiejim on here I have managed to decode the signal on a micromite using a 433mhz receiver. 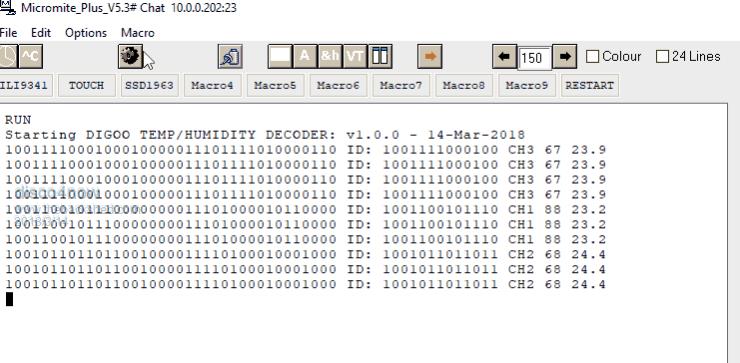 Regards Gerry F4 H7FotSF4xGT |
||||
| Andrew_G Guru Joined: 18/10/2016 Location: AustraliaPosts: 883 |
Gerry, well done! I bet a few shedders will be interested! (I have a network of home-made units that this would supersede - they are much hungrier on batteries). This opens up all sorts of possibilities for decoding 433 signals (Grogster has a thread on this too). {I now see that you have picked up on Grogster's thread.} Some questions that spring to mind (and please forgive my ignorance): - how did you hit on 433.92MHz? (I assume a little off and it doesn't work?) - which "433.92MHz receiver" do you use (ie the hardware setup) because I WANT ONE! - this should work on a MM170? - what sort of range do you get (eg within a two story house and to a 1/4 acre block back yard?) Cheers, Andrew |
||||
| Phil23 Guru Joined: 27/03/2016 Location: AustraliaPosts: 1667 |
Excellent, Can you point a link to the module you are using. I've tried receiving data form my Clipsal Cent-a-meter with this receiver from FreeTronics & an Arduino, but it seems like the code may never have been refined. Would rather do it with an MM if I can & it might be similar to the above. Thanks Phil. |
||||
| RonnS Senior Member Joined: 16/07/2015 Location: GermanyPosts: 123 |
...ingenious  |
||||
| Paul_L Guru Joined: 03/03/2016 Location: United StatesPosts: 769 |
NICE CODING!!! Paul in NY |
||||
| Andrew_G Guru Joined: 18/10/2016 Location: AustraliaPosts: 883 |
Gerry, I can answer two of my four questions above: - you "hit on 433.92" because that is what it is - doh! - yes it should work on a MM170 (as Tassie Jim explains in his inspiration-giving post on Grogster's thread). Cheers, Andrew |
||||
Bill.b Senior Member Joined: 25/06/2011 Location: AustraliaPosts: 245 |
https://www.banggood.com/Digoo-DG-R8S-433MHz-Wireless-Digital-Hygrometer-Thermometer-Weather-Station-Remote-Sensor-p-113 9603.html?rmmds=search&cur_warehouse=CN Bill In the interests of the environment, this post has been constructed entirely from recycled electrons. |
||||
| Phil23 Guru Joined: 27/03/2016 Location: AustraliaPosts: 1667 |
It's actually the receiver module that interests me. Curious as to if it's the same as the ones I have. Phil |
||||
| disco4now Guru Joined: 18/12/2014 Location: AustraliaPosts: 1127 |
This is the one I am using. The range seems to be an issue as its only working for a few feet for now. 433mhz receiver I did see a comparison of various receivers somewhere but can't seem to find it now. OK found it. comparison of receivers Gerry F4 H7FotSF4xGT |
||||
| disco4now Guru Joined: 18/12/2014 Location: AustraliaPosts: 1127 |
I have managed to improve the reception range so these remote sensors may be useful with the micromite. I removed the coil antenna on the receiver and replaced with 17cm wire. This gave some improvement. I opened up one of the remote sensors and the transmitter is a separate unit near the top. 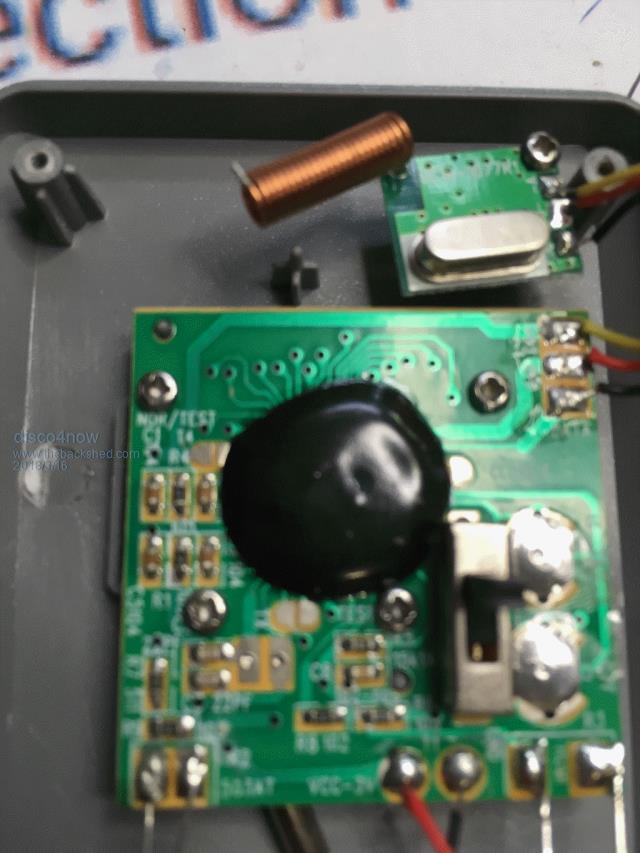 It is easy to remove the coil antenna and add a straight 17cm wire. 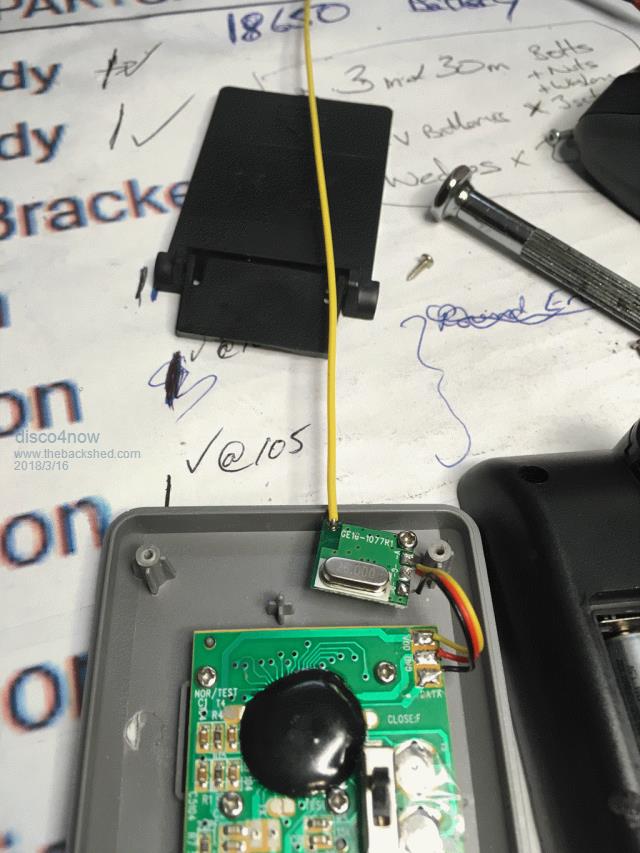 This set up greatly improves the range. I am receiving from a couple of rooms away and one from outside, so getting to the useful range. 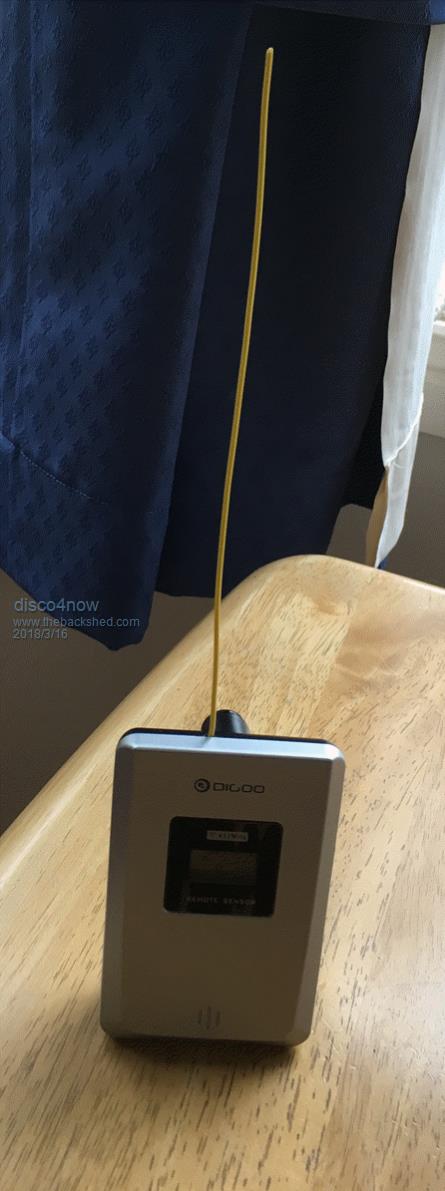 regards Gerry F4 H7FotSF4xGT |
||||
| Frank N. Furter Guru Joined: 28/05/2012 Location: GermanyPosts: 1123 |
Hi Gerry, thanks for sharing your code! I received my 433mhz receiver yesterday - it works really nice with your code and my 3 DIGGOO remote sensors!  (How) did you modified your receiver? (...where is the antenna on this little thing? - I ordered it from your link) THANKS! Frank |
||||
| disco4now Guru Joined: 18/12/2014 Location: AustraliaPosts: 1127 |
Hi Frank, Here is a diagram showing where the antenna is connected. 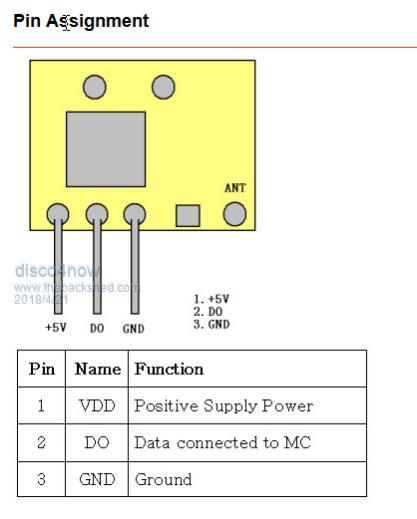 Found it here. I am using this loaded antenna from here. A straight 17.3cm wire also seems to work. Loaded Antenna 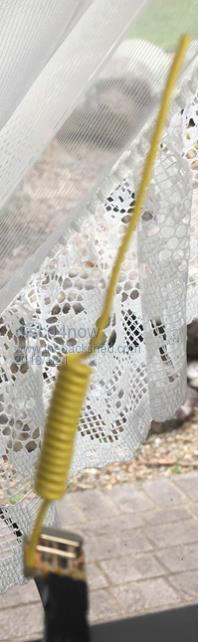 Regards Gerry F4 H7FotSF4xGT |
||||
| Frank N. Furter Guru Joined: 28/05/2012 Location: GermanyPosts: 1123 |
Hi Gerry, thanks a lot! I will try it!  ...did your receiver work with 3.3V? I receive only data when I supply it with 5V... ...did your receiver work with 3.3V? I receive only data when I supply it with 5V...Frank |
||||
| disco4now Guru Joined: 18/12/2014 Location: AustraliaPosts: 1127 |
Hi Frank, I have only used 5V so can't say about 3.3v. Gerry F4 H7FotSF4xGT |
||||
| The Back Shed's forum code is written, and hosted, in Australia. | © JAQ Software 2026 |
