
|
|
Forum Index : Microcontroller and PC projects : CMM2, MicroMite(x) IEEE488 (GPIB) interface
| Author | Message | ||||
| Sasquatch Guru Joined: 08/05/2020 Location: United StatesPosts: 385 |
For those that have a collection of "Vintage" test equipment like I do, I can report that the HobbyTronics "USB Host - Serial Driver" works perfectly with the Prologix "GPIB - USB Controller" I have this setup connected to one of my CMM2's and collecting data from a RACAL model 1992 frequency counter as I type this. Links: https://www.hobbytronics.co.uk/usb-host/usb-host-serial http://prologix.biz/gpib-usb-controller.html Note that the Prologix device is a bit pricey and this is a circuitous route to connect your test instruments (Serial-USB-USB-IEE488) but it's an off the shelf solution and it works perfectly! I have used the Prologix interface with Windows for years and I can recommend it for it's stability and utility and it is fully capable of addressing multiple instruments on the IEEE bus. I just wish they weren't so expensive. There are a couple of open-source Arduino projects that do Serial-IEE488 directly that I will investigate next. I'll report back here with my findings. Before anyone asks about using the CMM2 40 pin I/O or MicroMite ver X for this it is technically possible. At a minimum you will need a 5V bi-directional 8 bit driver for the data and also there are about 8 bus control lines at 5V (I think most are bi-directional OC) so the Arduino looks like a single-chip solution and will interface with any TTL serial port using just 2 pins. -Carl |
||||
| Volhout Guru Joined: 05/03/2018 Location: NetherlandsPosts: 5930 |
Very interesting..... Share your findings please PicomiteVGA PETSCII ROBOTS |
||||
| robert.rozee Guru Joined: 31/12/2012 Location: New ZealandPosts: 2528 |
this may be of some interest: https://www.eevblog.com/forum/projects/ar488-arduino-based-gpib-adapter/ cheers, rob :-) |
||||
| Sasquatch Guru Joined: 08/05/2020 Location: United StatesPosts: 385 |
Thanks for the link Rob! ĀThis looks like updated code for one of the other projects I was looking at. ĀThere are a few of these projects posted online. ĀNow if I can just find some time to sort it all out.... Update: The project Rob has linked above seems to be the most complete that I have found and is also compatible with the Prologix command set. I think I will start with this. I have all the parts and will hopefully have some time to solder a prototype together this afternoon! Edited 2020-10-19 02:28 by Sasquatch -Carl |
||||
| Sasquatch Guru Joined: 08/05/2020 Location: United StatesPosts: 385 |
Ok, I built a prototype of the interface described in the link Rob provided above. ĀIt needs more testing, but so far is working great! I used a China knock-off Arduino ProMini (ATMEGA328, 5V, 16Mhz) This model does not have any USB functionality built in which is not needed for interfacing by serial port, but I did need a FT232 breakout to program the firmware. The Arduino ProMini was $3.20 USD delivered to my mailbox. ĀThe 24pin IEEE488 connector was $3.48 keeping the total cost well under $10.00 USD! Note that the connectors are often listed as "24pin SCSI" or "24pin Centronics" although this is probably not really accurate. ĀI used a "Male" connector as instruments all have a "Female" connector on the back. ĀThis allows the interface to be directly connected to a single instrument or a standard IEEE488 cable (or stack of connectors) ĀThese connectors do not use 0.1" (2.5mm) spacing so they aren't really breadboard friendly. I had expected to spend a few days sorting out all the hardware and software etc. But this project is really complete and well thought out. ĀIf you are looking for an interface to IEEE488 (GPIB) instruments, I think this is a valid and low-cost method. Here is the top of my prototype showing the Arduino ProMini and some of the wiring: 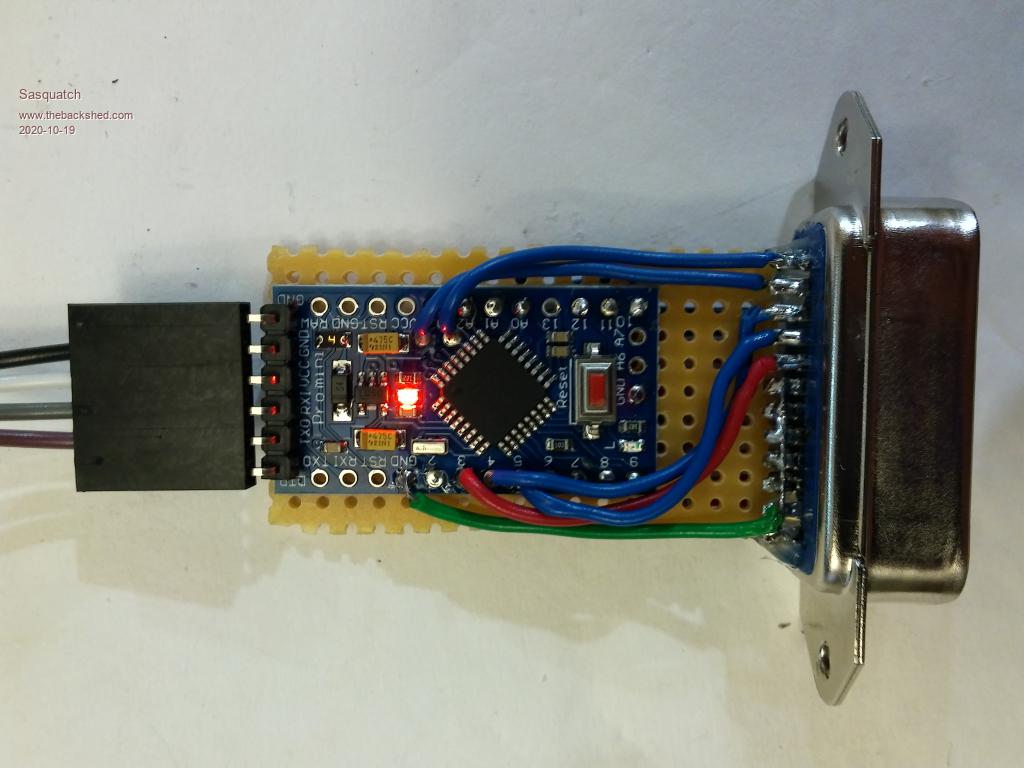 Here is the "bottom" of the prototype showing the bulk of the wiring to the connector. There are 8 data lines, 8 Bus-control lines and a couple of grounds. 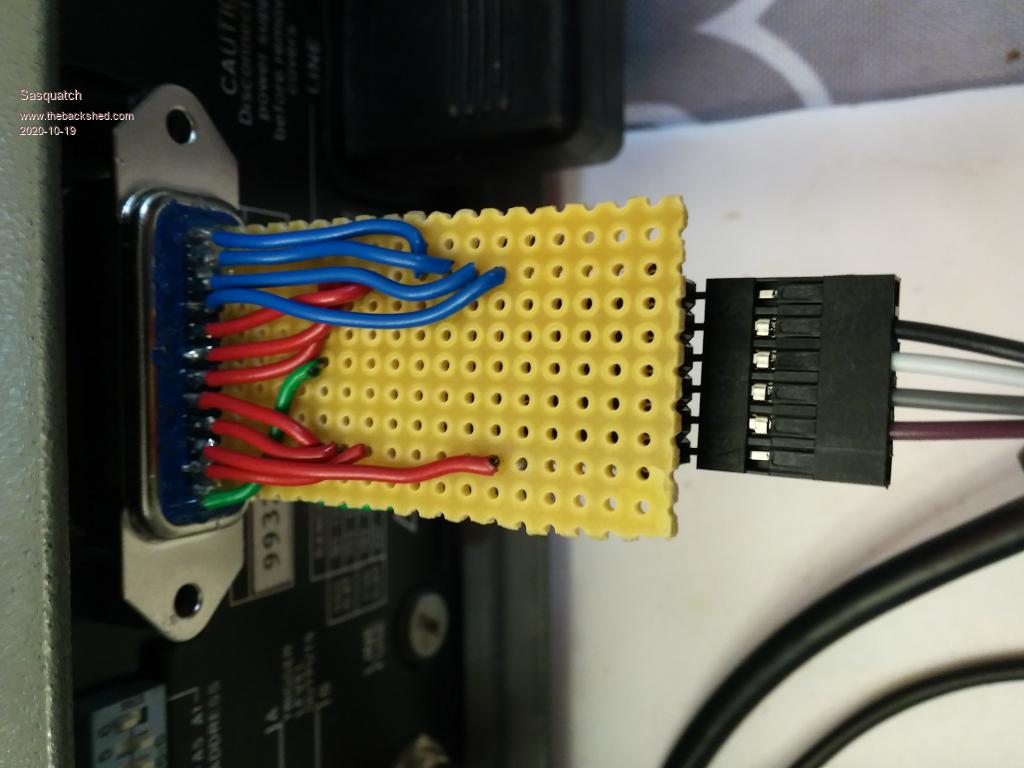 I plan to build another using the Arduino ProMicro (ATMEGA32U4, 5V, 16Mhz) which has built in USB port for use with PC/MAC etc. Edited 2020-10-19 10:23 by Sasquatch -Carl |
||||
| The Back Shed's forum code is written, and hosted, in Australia. | © JAQ Software 2026 |
