| Menu | JAQForum Ver 19.10.27 |
| Menu | JAQForum Ver 19.10.27 |
Forum Index : Solar : Deciding if I should build this solar heater
 I have learned to do this sort of thing without having to line up bolt holes, while suspending the large solar mount frames (done 4 of them now) the last one was 12m long, always use angle or channel and U-Bolts or welded studs, just some method (the frame can sit in) that doesn't require lining up holes, I lifted the frames with the Excavator and bolted the frames to the mounts, had to do the last one with no help from anyone and I had it bolted and secure faster than I could undo the 4 chains that I lifted it with.  The other Bonus is the Excavator didn't drift out of place like the old one did back in those days of fun.  Good luck with your install, be nice to see it up there working for you. |
||||||
That there is wisdom! Wish I had realised that before. I have actually marked it all out and drilled the holes now ... and am pretty comfortable that they are correct ... though I'll have egg on my face if they are wrong. But it has taken a lot of time getting them correct. I took a long length of timber up on the roof and pressed marks into it from the heads of the studs. Then I drilled my first hole in the frame and worked from there, triangulating all the distances and transfering them over. Was especially nice to see a third angle cross over the centrepoint of another two marks ... gives me a lot more confidence. Haha, that could be tricky and dangerous too I imagine. I had enough trouble this morning with the trolley jack sagging as I was trying to level the frame out. I had to support the frame from the ends so my timber would fit across underneath to transcribe these holes ... so the frame was drooping in the middle pretty badly. Would have been easier with some help ... but it's less drama by myself. I had my young fellow up on the roof yesterday holding the tape measure but he isn't fond of heights and I didn't fancy dragging him out again to help.  He did spend a couple hours up in the ceiling with me yesterday and hopefully learned a bit ... and was helpful passing me tools and bolts etc. Thanks for the well wishes ... and yes it will be nice to see it working after all these years. Edited 2025-06-29 14:47 by rogerdw |
||||||
Well I finally got the end cowls from the young lad who was bending them up and welding the ends in. He did a great job and they fit well. One overlaps on the outside of the main cowl and the other fits inside ... to help prevent water creeping in on the downward slope. He suggested rivnuts to attach them, so I bought a cheapie set from Supercheap ... and they also worked well. Coulda saved 20 bucks from aliexpress but a bird in the hand ... I lined up the inner 90 degree duct inside the outer cowl for the hot end and filled it with fire resistant expanding foam. It didn't work all that well but I got the job done and it's still all lined up. The cold input end required a lot of space to be filled ... and so I thought I could do the bulk of it with just normal polystyrene foam, which we have a great stack of from the previous owners ... and then finish off any small gaps with expanding foam. It turned out that I was able to fill the whole thing really tightly with the foam sheets, so didn't need the expanding stuff. I've test fitted the ends a number of times ... and I dread the thought of fitting them on the roof ... having to feed the ducts through the Dektites first ... but I'm sure it'll work okay. This is the cold duct 90 degree input. I had found the short 250mm spigot and plate in the local scrap yard for $10 and I fabricated the rest. 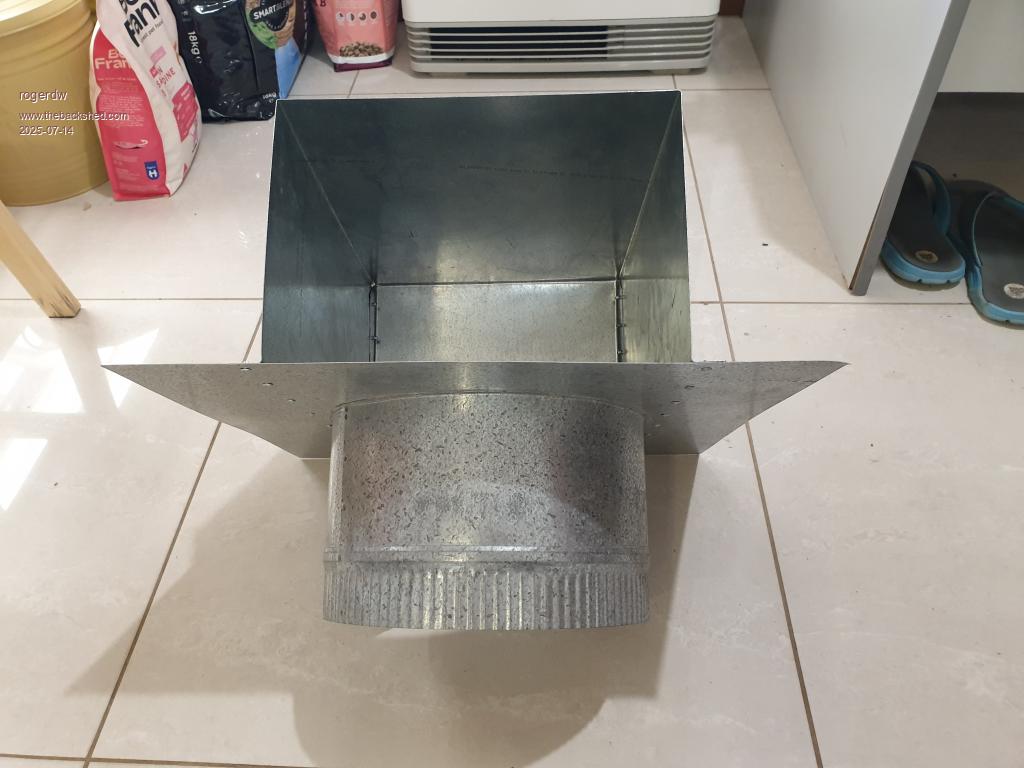 And this is it safely encased in the end cowl. I probably should have had the cowl made much smaller but that would have required a fairly complex shape and fabrication ... so it's huge and matches the other end. .jpg) And this is the hot air outlet all lined up ready to be "encased". You can see the rivnuts and they seem very solid. 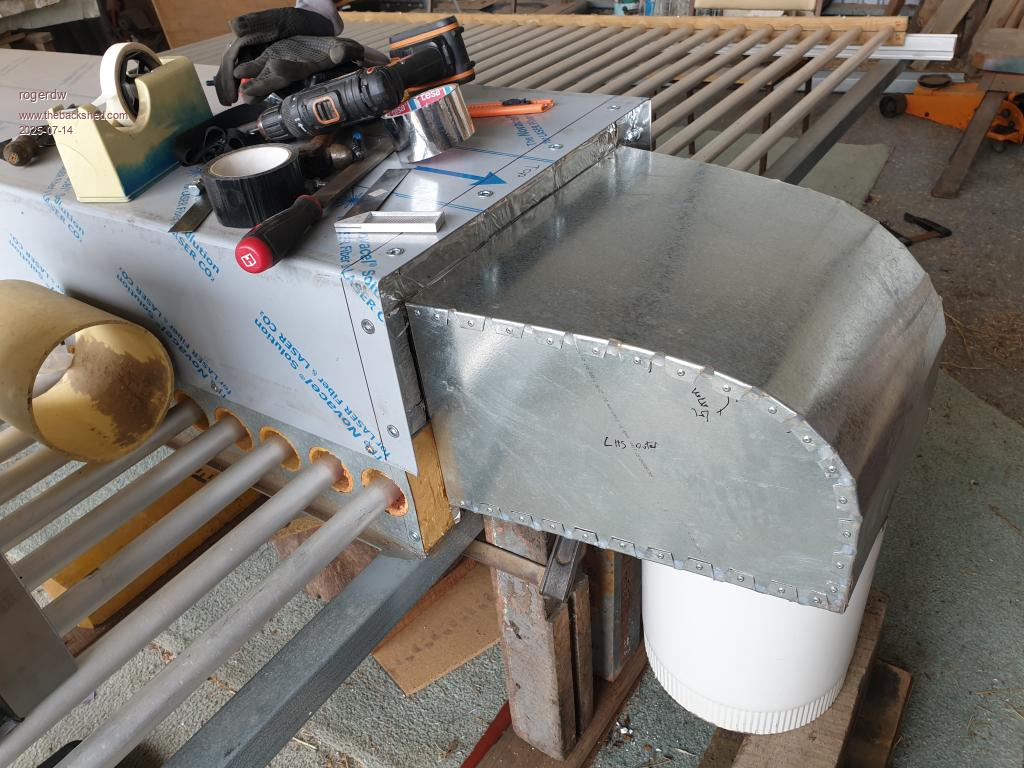 And now fitted to the end ... along with just some of the excess expanded foam. Half filled a garbage bag with it all. Bit of a mess, but I've vacuumed it since and looks a bit more respecable now. Should also look a lot tidier once I peel off all the protective covering from the stainless ... but figure I should leave it there as long as I can. 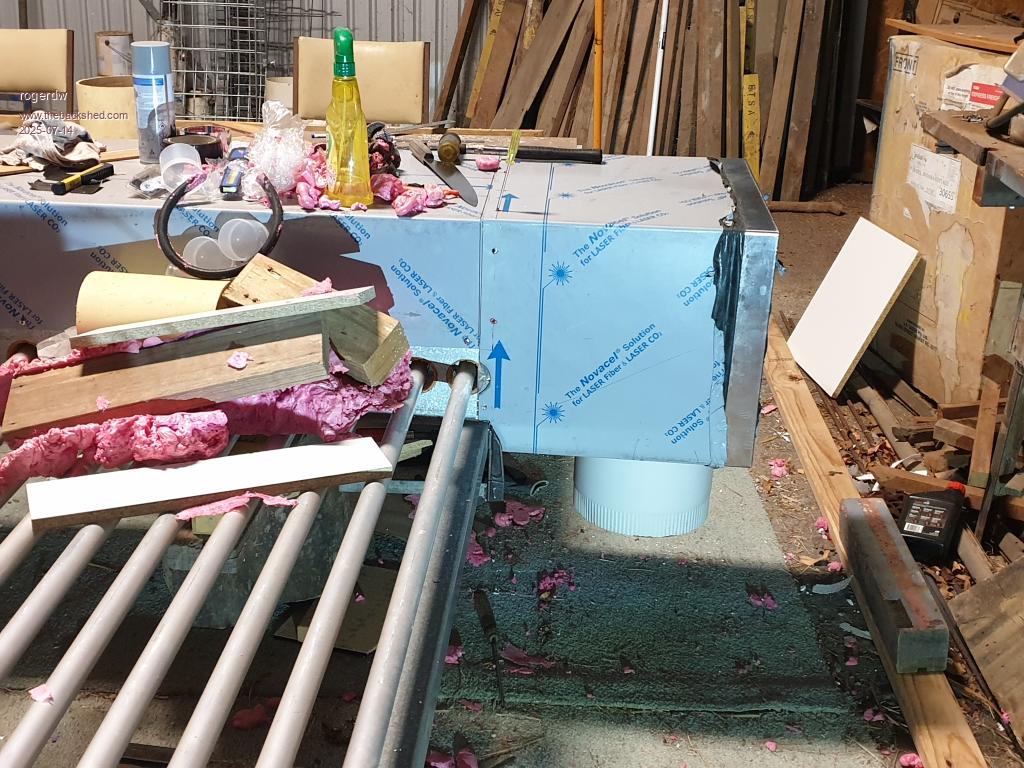 Edited 2025-07-14 01:03 by rogerdw |
||||||
Looks great Roger, that is one big project. I hope it does the job you want it to. Pete |
||||||
Thanks Pete, it's slowly getting closer. I do wonder now what I was thinking back then to take on such a monumental project ... but the fact that the smaller prototype worked so well ... and is still working to this day 5 winters later ... I'm positive it will pay off. Either that or I'll end up with egg on my face and a sizeable ding in my wallet. I've had to learn a few new skills along the way and do stuff I've never done before ... but so far that has worked out okay, other than being agonisingly slow.  |
||||||
Made some fairly major progress today. I think the whole time I've been planning this job, cutting the holes in the roof has scared me the most ... but it all went very smoothly. Phew. Used the timber that I had marked and drilled to locate the anchor bolts ... and transfered the positioning for the ducts that will go through the tiles. Then took that up on the roof and marked out the holes. Certainly didn't want to get it wrong, but pretty happy with how it worked out. I used a tile blade from bunnos in my angle grinder and that chewed through nicely. I then fitted the Dektite roof flashings and sealed them up to keep out any rain. Forgot to take a photo of that. Not really a lot more to do now ... just get the beast up on the roof and hope it all lines up. The ducts on the ends that have to go through the Dektites will be fun to fit ... but they go on afterwards, one at a time. Here I'm transferring the markings out onto the roof ... not just relying on using my tape measure ... not that confident. 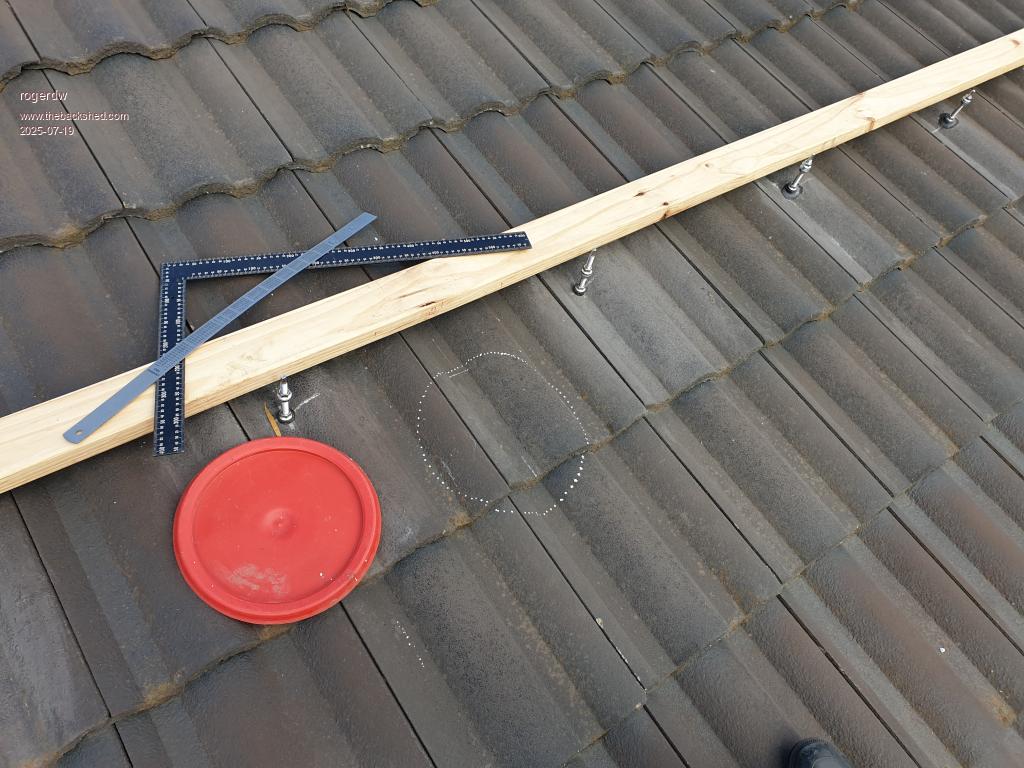 Pretty messy work, but they're done now. 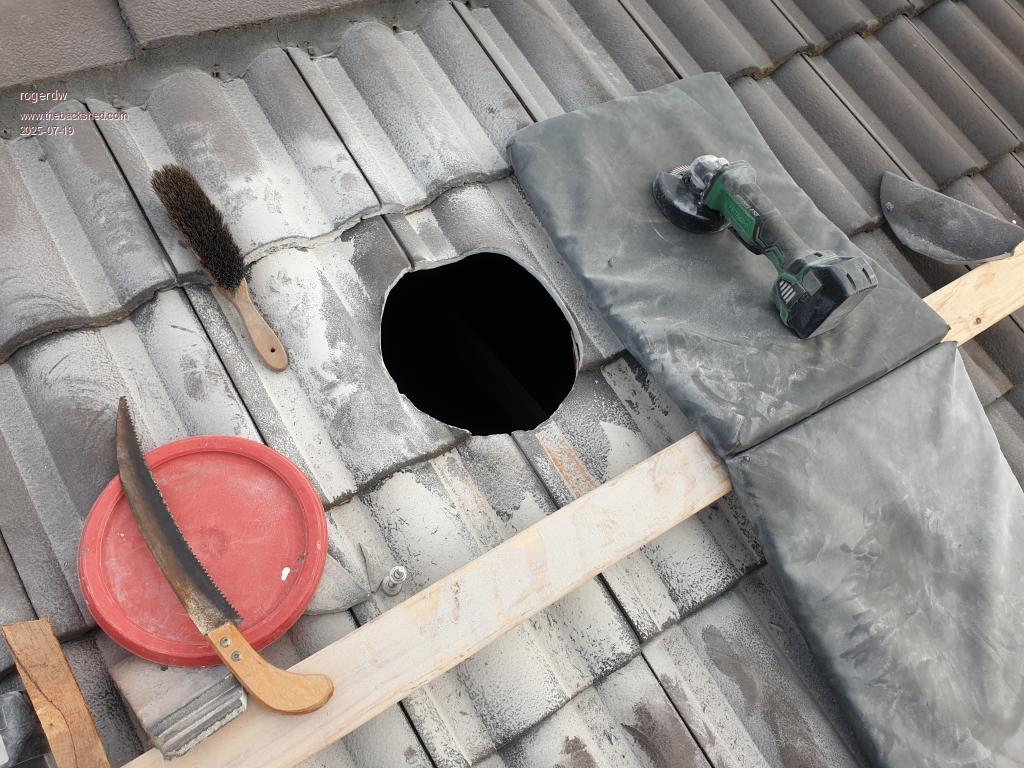 Different angle of the duct elbows. 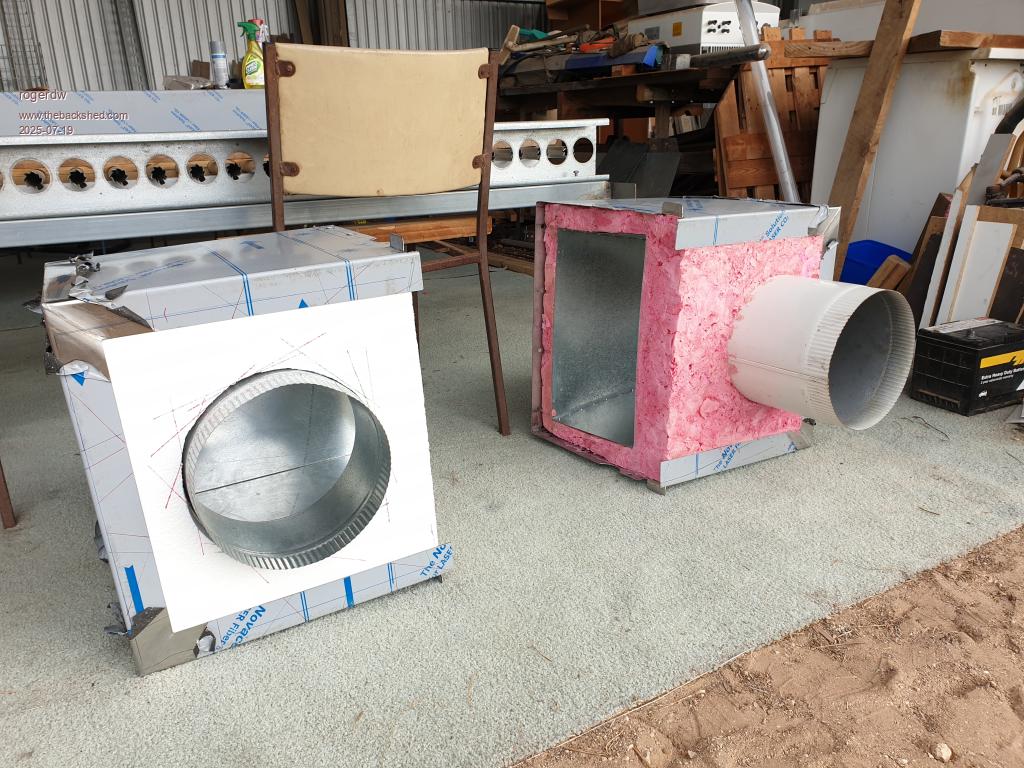 Edited 2025-07-19 22:31 by rogerdw |
||||||
Hi Roger, wow they are some seriously large holes in the roof. I guess you won't be long before the unit goes on the roof now. At least with tiles flashing is easy to fit. Pete |
||||||
Roger looking at BOM this morning we are in for rain all week so do make sure those holes are well sealed mate. Now if you want to put the unit up this week just sing out and I'll come over to help. |
||||||
Yeah, I must have measured everything a hundred times so I had to pull the trigger eventually and make some holes. Once I decided to spend the money to buy the flashings it certainly got easier ... and they fitted well ... a lot better than I expected really. The top one was close to the ridgecap and I didn't want to loosen the mortar ... so I tapped in a couple wedges, just enough to create a 2 or 3mm gap ... then I preshaped the "lead" sheeting on the lower tiles ... and it slid in perfectly. And I'm running out of excuses to call the crane guy and see when he can lift it up for us. I saw a forecast claiming we are going to get 4 inches of rain this week!!! I don't think we've had 4 inches this year yet. I've tied plastic around the rubber and then covered that securely and used strapping bolted to the anchor bolts to hold it all down. I'm pretty confident it will keep the water out and won't blow away, but I'll be keeping an eye on it if it buckets down. Thanks again for your offer to help Bryan, I'll let you know as soon as I get a day and time from the guy. These are the Dektite flashings. 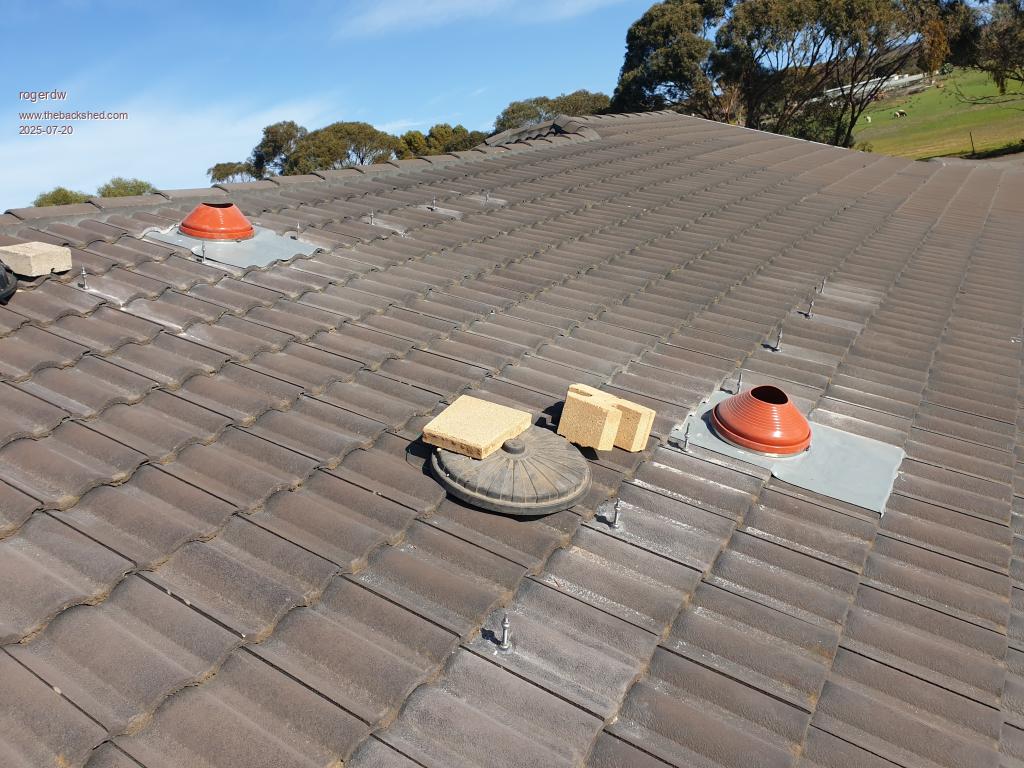 Edited 2025-07-20 19:31 by rogerdw |
||||||
Roger looking at the Mt Barker forecast which is the closest I can get to us Monday 1 to 6mm expected in the afternoon Tuesday 7-20mm all day Wednesday 0-1mm Thursday 0-1mm Friday 3-20mm So Wednesday, Thursday does look the best time to do it, so if it ready to go on the roof mate no more excuses lets just do it. |
||||||
Thanks Bryan, those numbers look a lot more realistic than 4 inches (100mm). The forecast I saw came from a local wannabe weather guru, but he's only relatively new on the scene ... and if he crashes out on this prediction, noone's ever going to take him seriously. Thanks for the encouragement too ... it's time to get this thing working. I wanted to clean all the dust out of the tubes before it goes up there, so I taped a handle to a bottle brush and gave em all a good clean and blow out. I'm running out of excuses to delay any longer. |
||||||
The crane guy hasn't given me a day yet for this week, but I'm as ready as I'm ever going to be. I drilled out some larger holes, cleaned up where I'd welded the galv pipe and put more paint on them ... and a final coat today. Got my lad out to help me peel off the protective film from the stainless. A few scratches but no one's ever going to be close enough to see them. It looks a lot smaller for some reason without the film, which is a good thing. I put a bead of silicone around the mating surfaces and covered them with gladwrap ... then fitted the endcaps on so the silicone would fill the gaps to prevent air leaks. I need to keep the endcaps off for when I lift it on the roof ... and fit them last. Will be a bit tricky feeding the ducts through the Dektite weather seals, but with some help should be doable. The silicone seal actually worked better than I expected and when it set, the gladwrap peels off well. I don't think there'll be any air leaks. I then jacked the whole unit up a couple inches at a time and fitted more chocks each time ... then pushed the trailer in under it and lowered it back down. When I know the crane is coming, I'll tow it around where it's needed to be ready for lift off. I told him he's going to be famous when he can tell everyone he helped build it. I think the rolling eyes means he doesn't believe me. 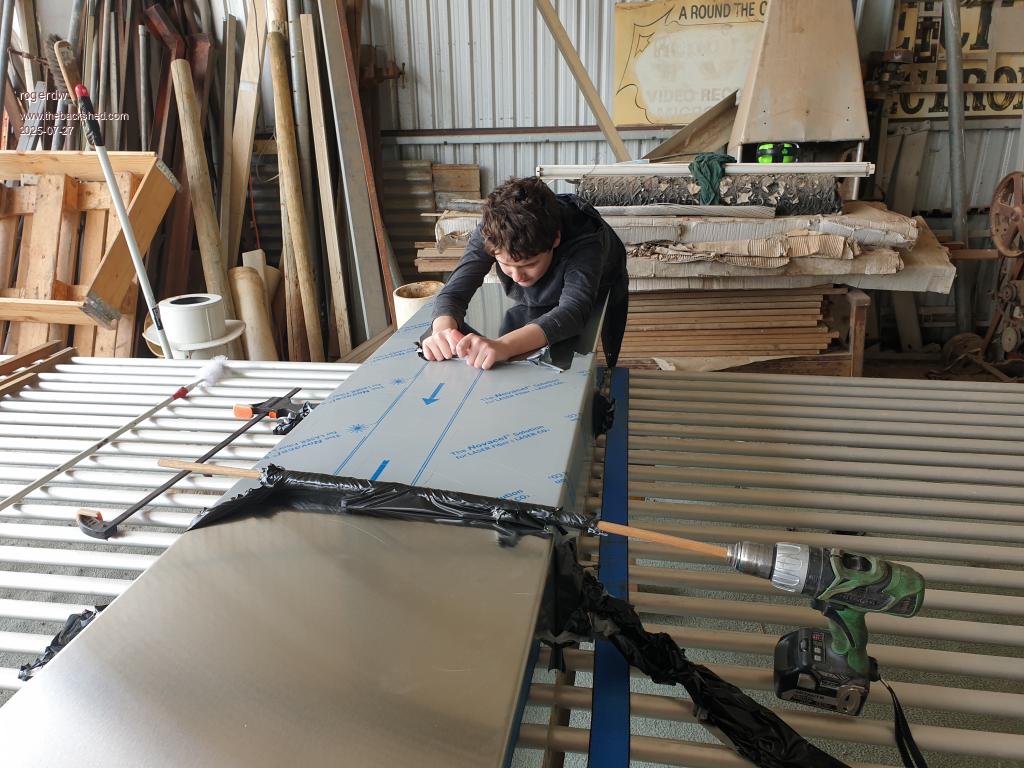 Don't dob me into OH&S ... it does look kinda bad ... but it all went smoothly. 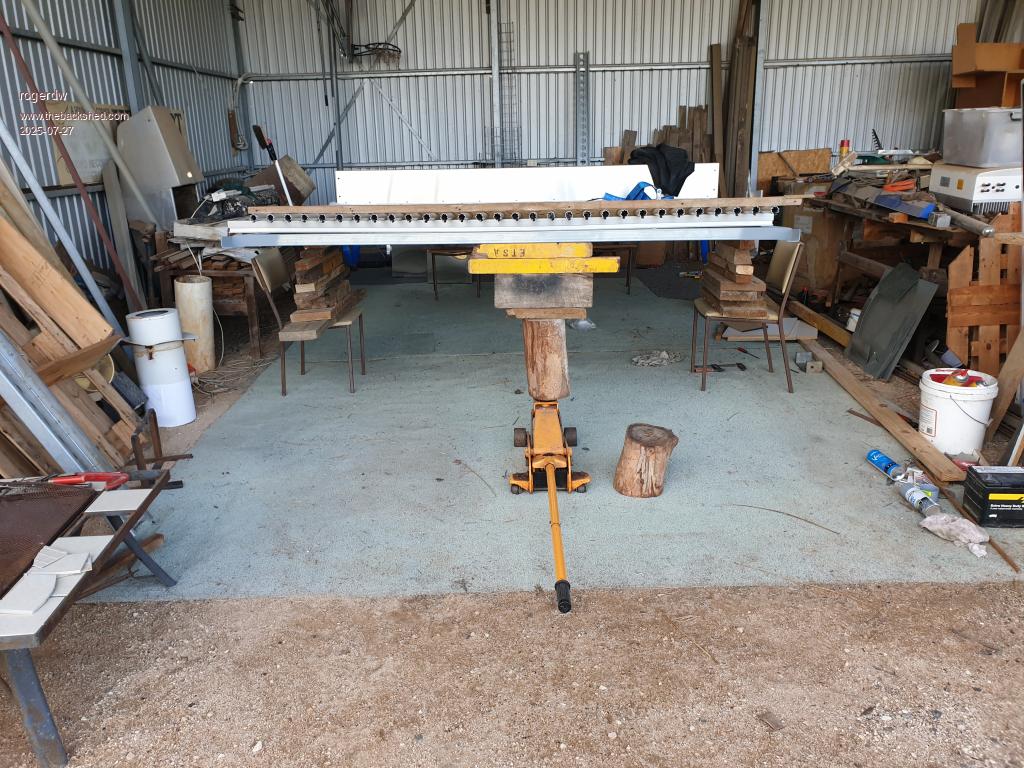 Finally secure on the trailer and ready to be installed. Has been a long road.  |
||||||
Hi Roger after looking at the frame on this I am worried when we try and lift it everything may go pear shaped. With no cross bracing on the lower frame there is a good chance it may buckle at worse when lifted. So while you still have it on the ground some diagonal bracing should be welded in to reinforce the frame. If you like I can come over in the morning and give you a hand with it as I do have a few idea's that may help. Cheers Bryan |
||||||
Hi Bryan, I hadn't considered that. The centre is very solid with cross members all tied together ... so if we lift it closer to the centre, rather than from the extremes, I feel reasonably confident. But if you're coming into town, I'd still appreciate you looking it over just to be sure. I am aiming to put some corrugated iron under the tubes ... as bright and shiny as I can find ... so that would add some rigidity, but had only planned to do that once it is on the roof. Perhaps I should do it before it goes up. I'd better go shopping. Looks like I have enough time now ... I got a call this arvo to say he can't lift it till NEXT Wed arvo!! |
||||||
Hi Roger I have looked at the pictures to get a better idea and come to the conclusion just weld in some lifting lugs will be enough Just put them 500mm each side of the centre and about 50-100 mm out so when the slings/chains go on they don't impact the outer tube. By putting these lifting lugs on will serve the installation and removal if needed and the glass tubes can be installed on the ground as the lifting lug's will balance the load if centred right. Cheers Bryan |
||||||
Thanks Bryan, I had come to the same conclusions and finally decided to just bolt them on. The centre section is quite well strutted and bolted together, so the closer to that the stronger it should be. I made them the other night and have put on an undercoat and a couple top coats. I couldn't get what I wanted in galvanised so I'm using plain steel. There was an engineer type here the other day and he seemed to think that I needed to divide it in thirds and fit the lugs on the outer point of the centre third ... which is exactly where you are suggesting I fit them. If I was a better welder I might have welded them on ... but if/when I want to slide a reflective backing under the tubes ... being able to unbolt the lugs to slide it in will be very handy. I haven't heard any different from the crane guy, so still all set for Wed arvo at this stage. Getting closer. Hopefully it all works well and doesn't ever have to be lifted off again ... but it's no great expense to fit them and just leave them on. The length of steel cost me $8 and the galv bolts about $15 ... and an evening marking out, drilling and cutting. Good investment I hope. |
||||||
Good luck with the lifting and fitting Roger, I hope it all slots into place perfectly. Pete |
||||||
Thanks Pete, we'll know very soon if I marked it out properly. I'm mildly optomistic. Tomorrow I'll fit my lifting brackets on the frame ... and also the roof mount brackets using a string line to make sure it is evenly supported across all rafters ... then I wait. It's on the trailer ready to be moved to the side of the house, so not much more I can do till the crane arrives. Just for something different, we have a small hawk that has taken up residence in the shed above the heater ... and every night I'm out there working it just sits there watching ... and eventually sticks it head under its wing and goes to sleep. When it first arrived, any time I went out there and turned on the lights, it would fly out in a panic ... but it's got so comfortable now ... I can be grinding and cutting away making a terrible racket ... and it just sits there watching. I quite enjoy its company. This morning I backed the car out ... and there it was sitting on the corner of the heater. 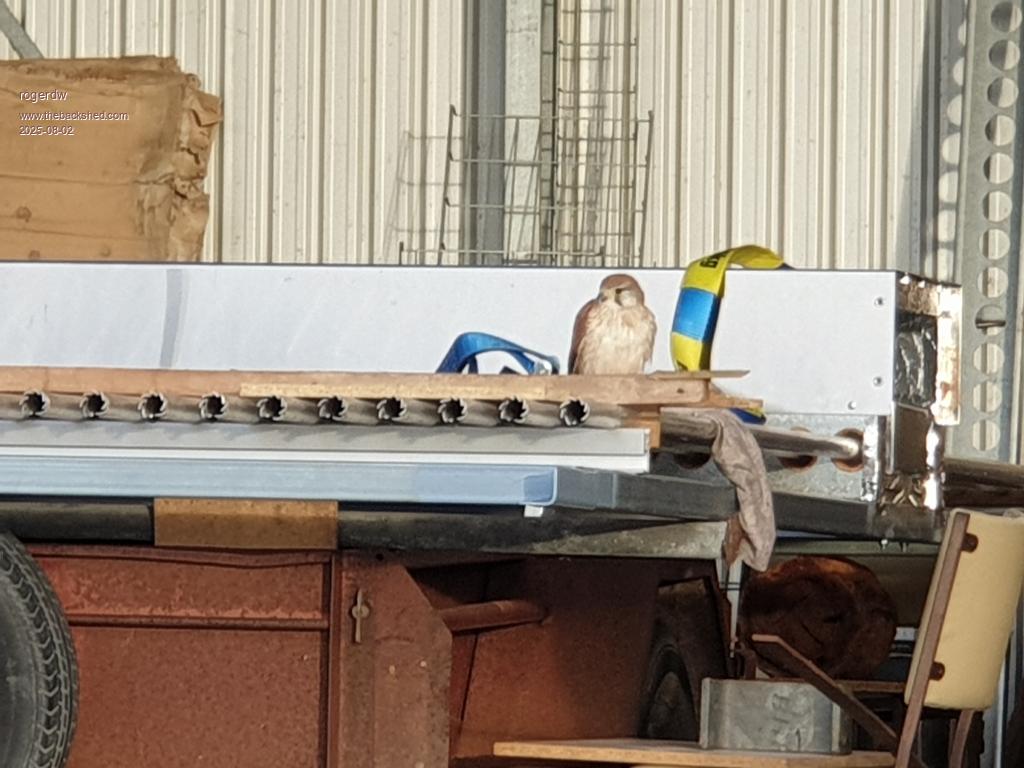 Edited 2025-08-02 20:21 by rogerdw |
||||||
That is beautiful Roger, I love it when animals trust us and hang about like that. I hope the bird finds a nice place to sit when the heater is up. Pete |
||||||
Yeah, it's certainly nice to have it around and not being afraid of me. There's still plenty of junk in the shed for it to sit on once the heater is gone so that won't be a problem. Love them or hate them, we have roos encroaching on us now too. Have seen up to 20 in the paddock alongside us ... and often frighten each other when I go out the back and there's some drinking at the chook's water and they take off. And they are similar too ... I can be making a lot of noise and chain sawing etc ... and they're still grazing away 25 or 30 metres away on the other side of the fence. |
||||||
| The Back Shed's forum code is written, and hosted, in Australia. |


