
|
|
Forum Index : Electronics : 24v Nano/Madinverter
| Author | Message | ||||
renewableMark Guru Joined: 09/12/2017 Location: AustraliaPosts: 1678 |
I have another choke for it, the same size as the one I did at your place, but this one I took my time on and got another two turns on it. Probably wasted on such a small inverter but hey it's just sitting here. 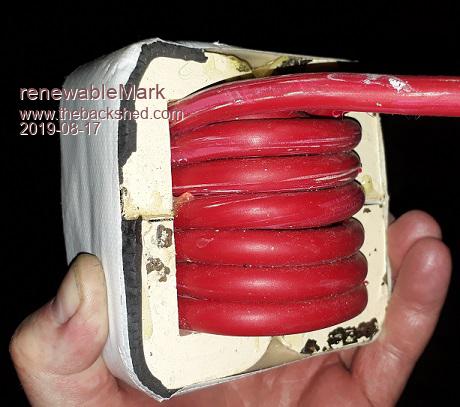 Cheers Caveman Mark Off grid eastern Melb |
||||
| Warpspeed Guru Joined: 09/08/2007 Location: AustraliaPosts: 4406 |
That choke with the same 1mm gap spacer, should do very nicely Mark. Cheers, �Tony. |
||||
mackoffgrid Guru Joined: 13/03/2017 Location: AustraliaPosts: 460 |
Mark, what is the sq mm of that wire, and how many turns did you manage to squeeze in? |
||||
| renewableMark Guru Joined: 09/12/2017 Location: AustraliaPosts: 1678 |
There is two layers there of 25mm2 14 turns. It's made from two of the bigger Aerosharp chokes glued together side by side. Needs a proper clamp made for it yet. Here is a better pic. 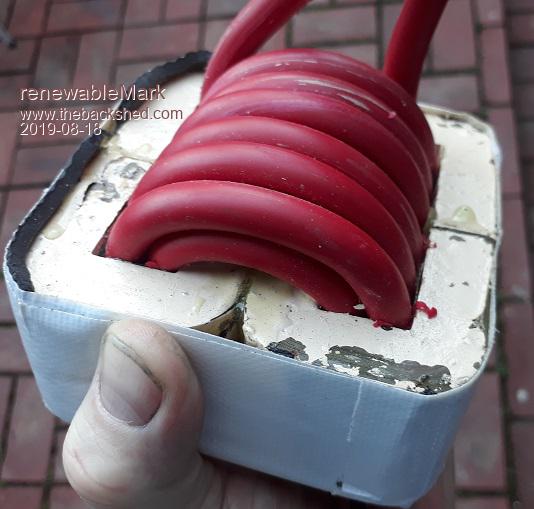 Cheers Caveman Mark Off grid eastern Melb |
||||
| Warpspeed Guru Joined: 09/08/2007 Location: AustraliaPosts: 4406 |
That is Tycab cable part number ABC136403. Its 26.45mm sq and 10.2mm outside diameter, rated 168 amps continuous. Tycab are the manufacturer and they do not sell direct to the public, but their sales rep will tell you who stocks it near your locality. https://www.tycab.com.au/battery-starter/ The slot in those large Aerosharp cores (from memory) is 75mm x 20mm. And with a 1mm air gap, and 12 turns it had about 175uH at 135 amps saturation. Its difficult, but 14 turns are just possible if you try really hard. Its as full of copper as is possible with round wire straight off the drum. Cheers, �Tony. |
||||
| renewableMark Guru Joined: 09/12/2017 Location: AustraliaPosts: 1678 |
I went over to Tony's house today and he tuned my torroid for 75Hz. Thanks for doing that mate  While there I checked the smaller two torroids for the Warpinverter, they both had their secondaries confirmed to be wound correctly, all 4 secondaries were the correct voltage. I didn't test them before doing the subsequent windings as I haven't got a variac to do the smaller voltage torroids. Instead they just got counted 5 times and super checked to make sure the turns were correct. If you are super careful when doing the wind that's all you probably need, but it was nice to tick them off and confirm their 100% status. Just another potential thing that can be ruled out IF an issue does rear it's ugly head. So full steam ahead on both projects. I'll probably concentrate on this one and finish it next as it has so little to complete now. And I need a power source for the caravan as we take it in the bush off grid when we go away. I don't understand why people use bloody caravan parks.... defeats the purpose. But so does playing a DVD of the friggin wiggles out in the bush too. �  � �Here is a pic from a recent trip, we got visited by an emu mum and her 10 or so chics every day. That is something you'll only ever see out in the proper bush.  Edited 2019-08-29 20:03 by renewableMark Cheers Caveman Mark Off grid eastern Melb |
||||
| poida Guru Joined: 02/02/2017 Location: AustraliaPosts: 1432 |
Mark and Madness: I've just built my power board using the smaller version that Madness designed and sells (the 12 FET 4kW board) Advantages: fast to build, not needing lots of parts either. just 12x resistors,diodes and 4x snubbers. Compact too. It's a good soldering PCB as well. I used the offcuts from the large Mad board I built for heat sinks and it works out perfectly (one 3kW Aerosharp heat sink can do both power boards) problems: none at all. The 4 10,000uF caps are a bit tight to fit but I ended up using only 3 of them, to permit the 4.7uF cap to fit in there as well. I will refit the 4.7uF on the bottom of the PCB, then all 4 bulk caps will fit. Here is how it ended up: 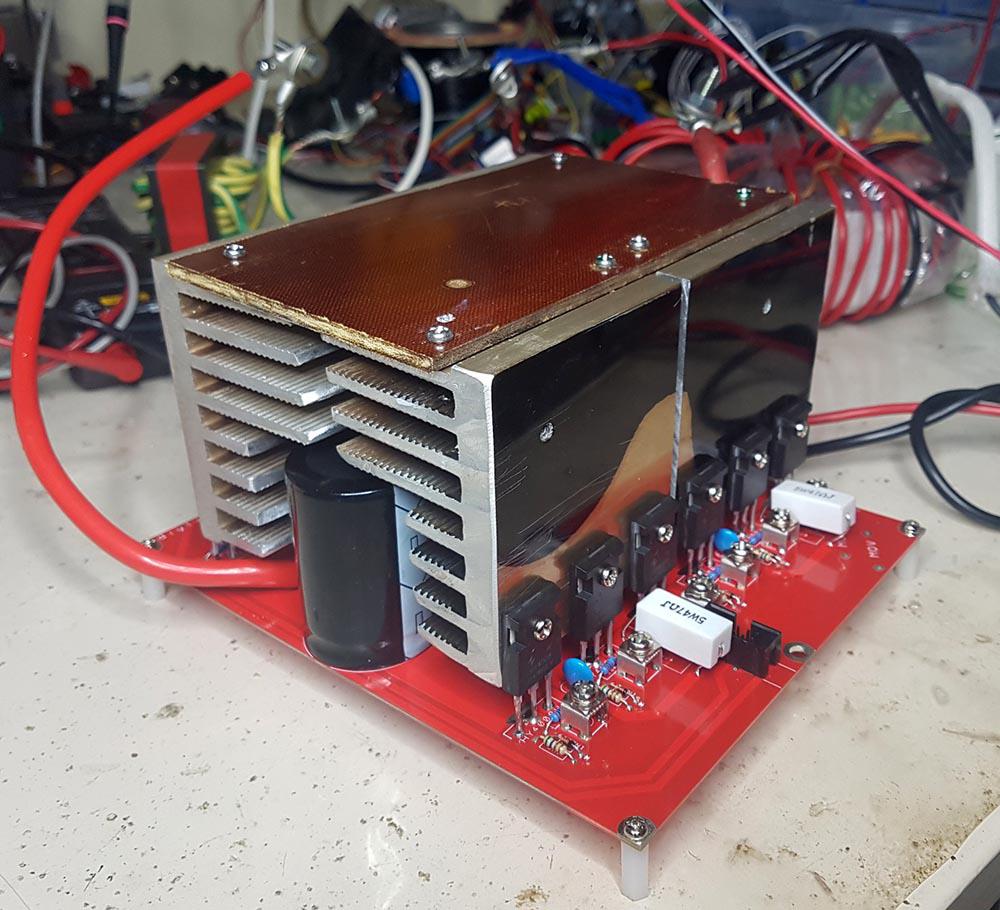 Waveform at idle is very clean and under 200W load becomes a perfect sine. Here is idle: 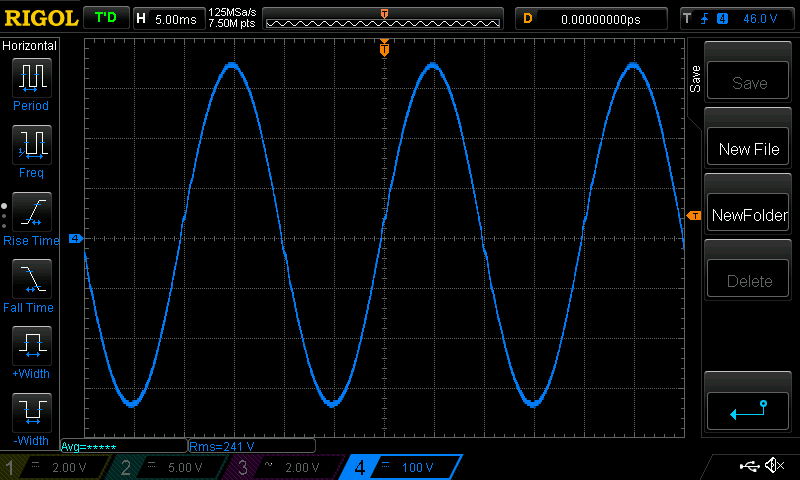 I estimate efficiency (51V DC supply, 200W load) to be about 93.5% With the 3 bulk caps fitted, under the 200W load I saw only about +/- 250mV ripple on the DC supply. These caps are doing a great job. I like this board a lot. And my measure of quality is idle current. (I am obsessed with shoot through...) When driven by the nanoverter, this combination has the lowest idle current of anything I have here. This means smaller shoot through and/or better gate drive rise and fall times that minimise switching losses. I think I can make a 1500W 50V inverter that uses only 10W at idle. wronger than a phone book full of wrong phone numbers |
||||
| renewableMark Guru Joined: 09/12/2017 Location: AustraliaPosts: 1678 |
Good work mate, I'm terribly slow at getting things done. Still haven't finished mine. They are a great size board, and so easy to assemble. 4kw plus surge power should be fine for a lot of small households. What caps are you using that don't fit? I checked the spacing against the 8kw power board and it's the same. In my 8kw inverter (that runs the house) it has fitted the cap in there just fine. These are the ones fitted. 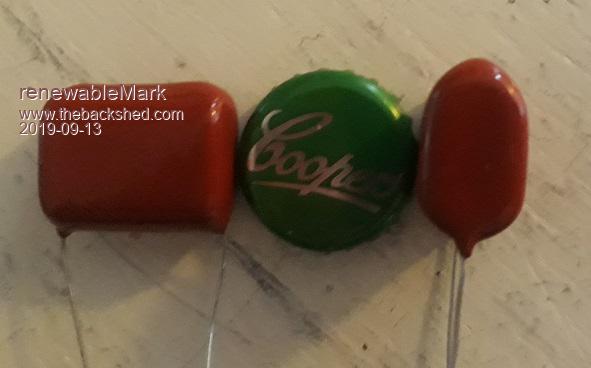 I'll put one in the post or you can swing by and get one. Cheers Caveman Mark Off grid eastern Melb |
||||
| poida Guru Joined: 02/02/2017 Location: AustraliaPosts: 1432 |
I'm good for the 4.7uF I use the yellow $12 each ones from Jaycar. I've since soldered it on the underside and it fits exactly right. Not only do all 4 10,000uF caps fit but the 4.7 when on it's side is the same height as the 3mm plastic posts I used, so I get some automatic mid PCB support too. The weight of the heat sink bends the board a little. What value is the Green cap you got there anyway? wronger than a phone book full of wrong phone numbers |
||||
| renewableMark Guru Joined: 09/12/2017 Location: AustraliaPosts: 1678 |
That greencap is 4.5% Yell out if you need bits, you know me, king of spares. Cheers Caveman Mark Off grid eastern Melb |
||||
| renewableMark Guru Joined: 09/12/2017 Location: AustraliaPosts: 1678 |
This sucker is going in the caravan, so I didn't want to use a big heavy aerosharp box. Ended up making this ugly thing, needs a front and lid yet. Anyway, I was going to do push pull fans like the standard vertical type layout normally has, but with this all sitting flat I was thinking both fans coule push inwards against the torroid and heatsinks. Then fit some grate at the top lid area to let the heat out. What I have found over the years is air blowing directly at something seems to work better than trying to extract hot air from a space. Any brighter ideas? 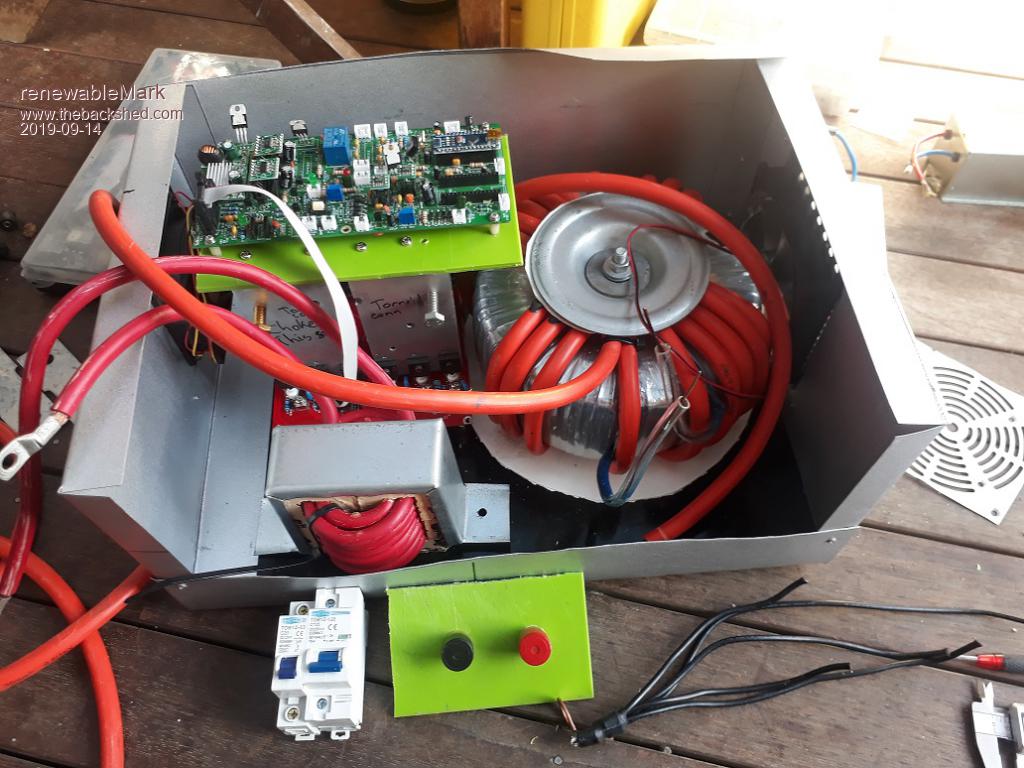 Cheers Caveman Mark Off grid eastern Melb |
||||
| Warpspeed Guru Joined: 09/08/2007 Location: AustraliaPosts: 4406 |
That is definitely true. But two fans facing each other, may also result in bugger all total airflow. Only way to know for sure is a practical test. Cheers, �Tony. |
||||
| renewableMark Guru Joined: 09/12/2017 Location: AustraliaPosts: 1678 |
It probably won't matter much with this unit as it will have a very easy life at 200 watts or so load with the occasional microwave use, or the rangehood fan when using the gas top stove. Heating is with a diesel unit. Fans will probably see little use anyway. It's a really crap layout, but it was done with little care due to knowing the very light loading it will have. Cheers Caveman Mark Off grid eastern Melb |
||||
| renewableMark Guru Joined: 09/12/2017 Location: AustraliaPosts: 1678 |
Oh OK I used two heatsinks to do the large power board, but had half of one as an offcut. How high did you make the heatsink for the big power board? Did you slice it longways first the split it up? Pic might help. Cheers Caveman Mark Off grid eastern Melb |
||||
| poida Guru Joined: 02/02/2017 Location: AustraliaPosts: 1432 |
Mark, I sliced the 3kW heat sink lengthways, "1st cut" in the image. Then I shortened the lower 4 fins, "2nd cut", cutting the now two narrow slices. This gave me 2 long heat sinks that fit well and leave ample room for cooling air and bulk caps. I needed one long and 2 short lengths of this stuff for the large totem pole Madness power board. Some remained after I cut what I needed. Two lengths of about 150mm remained. These two lengths are enough to fit the 12 MOSFET smaller power board Madness sells. 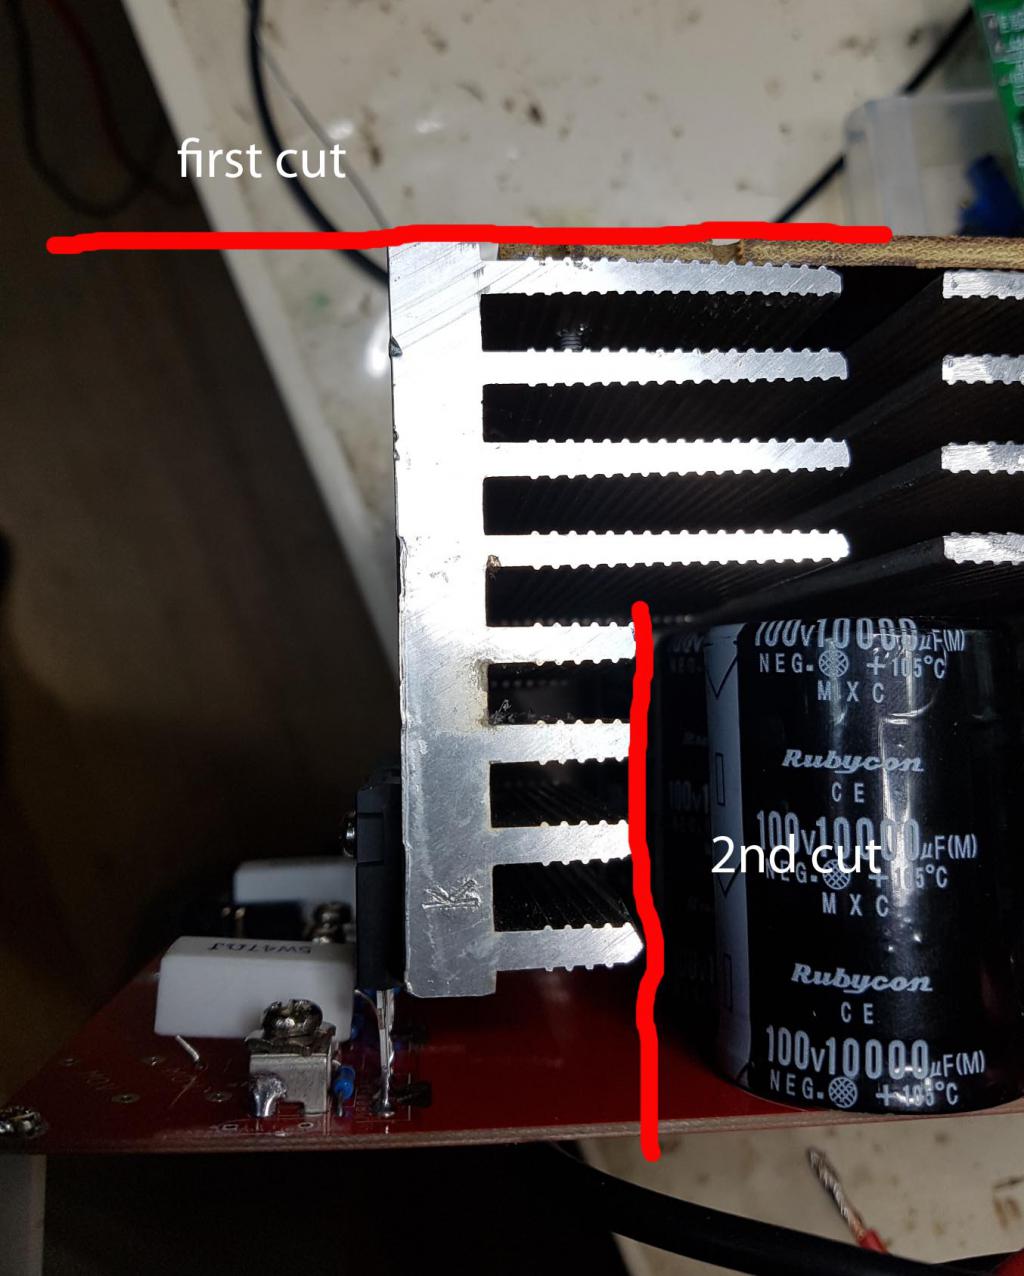 wronger than a phone book full of wrong phone numbers |
||||
| renewableMark Guru Joined: 09/12/2017 Location: AustraliaPosts: 1678 |
Yeah OK, you sliced it in half, so you ended up with 8 fin high heat sinks from one heatsink. I used the full heat sinks and cut the height down to 13 fins or so from memory, then split them into their respective parts. Yours was probably a wiser use really. The top fins in mine most likely never see any of the heat generated before the fans kick in and blow it all away. I think the monster heat sinks most of us use are a bit overboard. With my first build I initially did it your way by mistake, but in hindsight they were probably just fine to use that way. here Edited 2019-09-18 20:06 by renewableMark Cheers Caveman Mark Off grid eastern Melb |
||||
| renewableMark Guru Joined: 09/12/2017 Location: AustraliaPosts: 1678 |
Ready for testing. 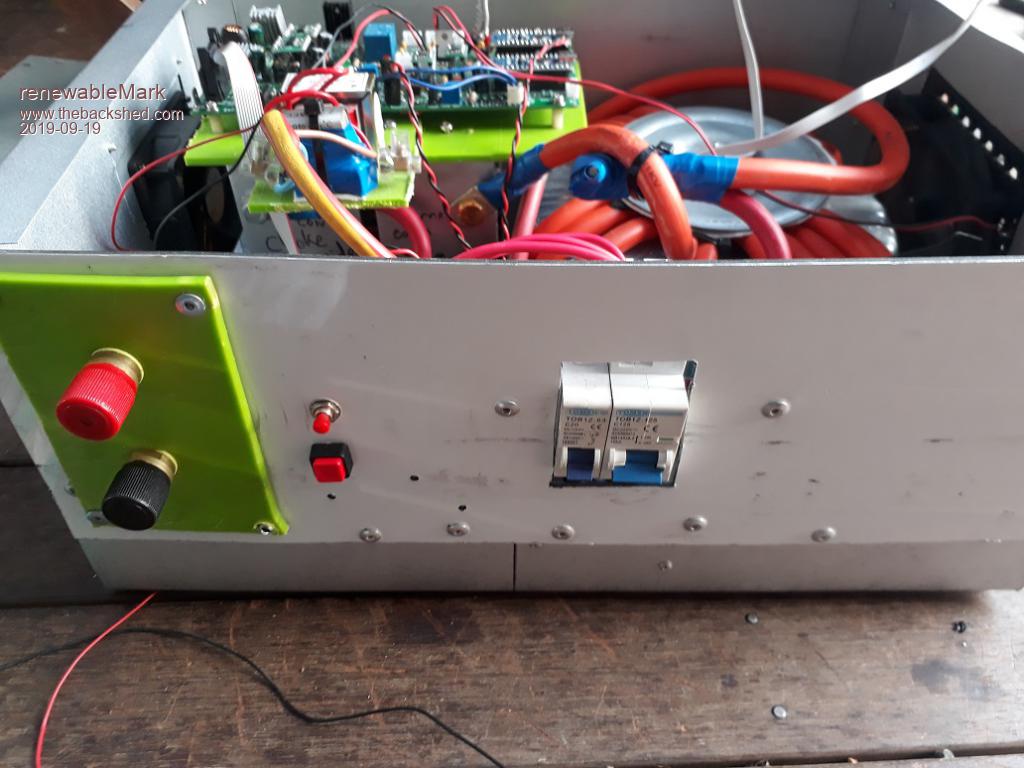 The left breaker powers 2x 33 ohm resistors in series to the pos line (for charging caps) But without the caps fitted first this will be used for restricted power feed for testing the unit. Right breaker is for + battery connection. Square momentary is scr reset and round momentary is on/off 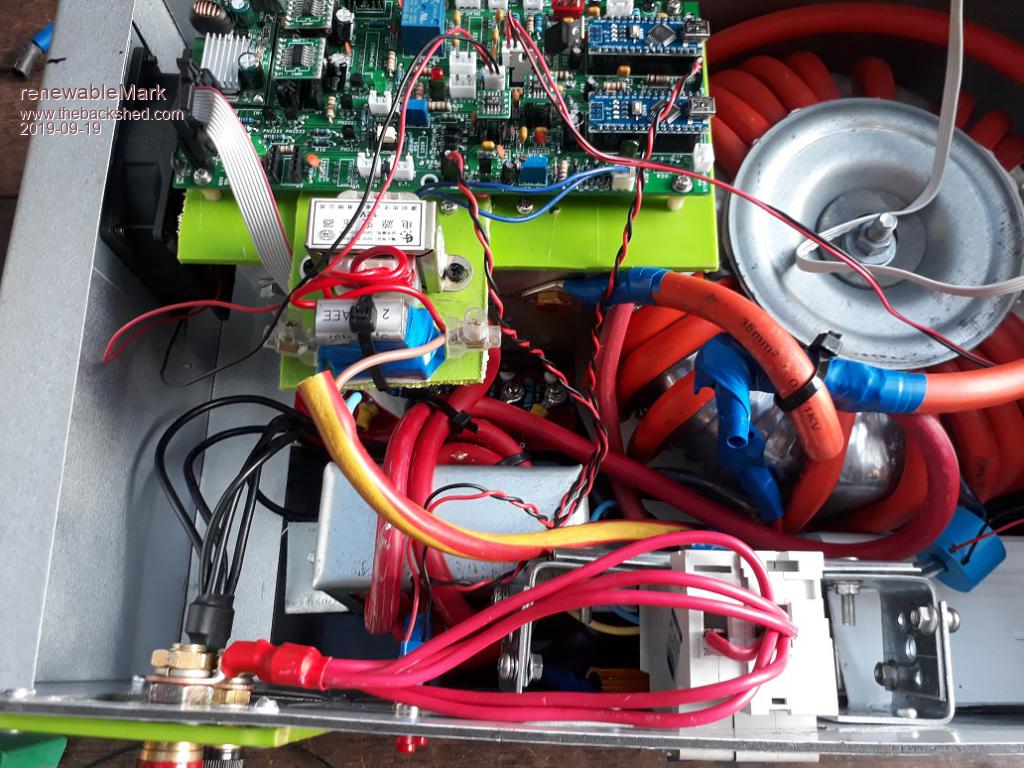 LOL when I had the idea to build a small one the idea came to mind it would be so, so much easier......... Nup all the same bits requires just a smaller power board and a bit less winding on the torroid. Cheers Caveman Mark Off grid eastern Melb |
||||
Revlac Guru Joined: 31/12/2016 Location: AustraliaPosts: 1153 |
Looks good Mark. When charging the Caps, will you have a voltmeter/display, to show that it has reached full voltage, or will the nano show that? Nice work BTW.  Cheers Aaron Off The Grid |
||||
| renewableMark Guru Joined: 09/12/2017 Location: AustraliaPosts: 1678 |
Hi Rev, thanks, she's pretty rough but hopefully it will do the job fine. The nano screen shows that voltage, haven't fitted that yet. Need more short standoffs. You can see the white ribbon cable above the torroid for it, but screen is out of the shot. Cheers Caveman Mark Off grid eastern Melb |
||||
| renewableMark Guru Joined: 09/12/2017 Location: AustraliaPosts: 1678 |
Bugger me, got a machine running without blowing a fet this time.  I did stuff around for a while thinking there was a problem, then found the oscilloscope probe wasn't on properly  Need to calibrate the nano screen yet. Cheers Caveman Mark Off grid eastern Melb |
||||
| The Back Shed's forum code is written, and hosted, in Australia. | © JAQ Software 2025 |
