
|
|
Forum Index : Microcontroller and PC projects : dim var as byte
| Author | Message | ||||
| Mixtel90 Guru Joined: 05/10/2019 Location: United KingdomPosts: 7865 |
I don't mind too much now. The pins are generally laid out sensibly and, even knowing the GP number, you still need to look at the diagram to be sure of it's capabilities. The numbers on the bottom are of limited use even if you could see them. Mick Zilog Inside! nascom.info for Nascom & Gemini Preliminary MMBasic docs & my PCB designs |
||||
| stanleyella Guru Joined: 25/06/2022 Location: United KingdomPosts: 2540 |
Bit late I done it but it's for bread board so dim problemio? still not sure should I use the vga firmware. it's like it's not a ucontroller it's a uprocessor. I don't plug it into anything. 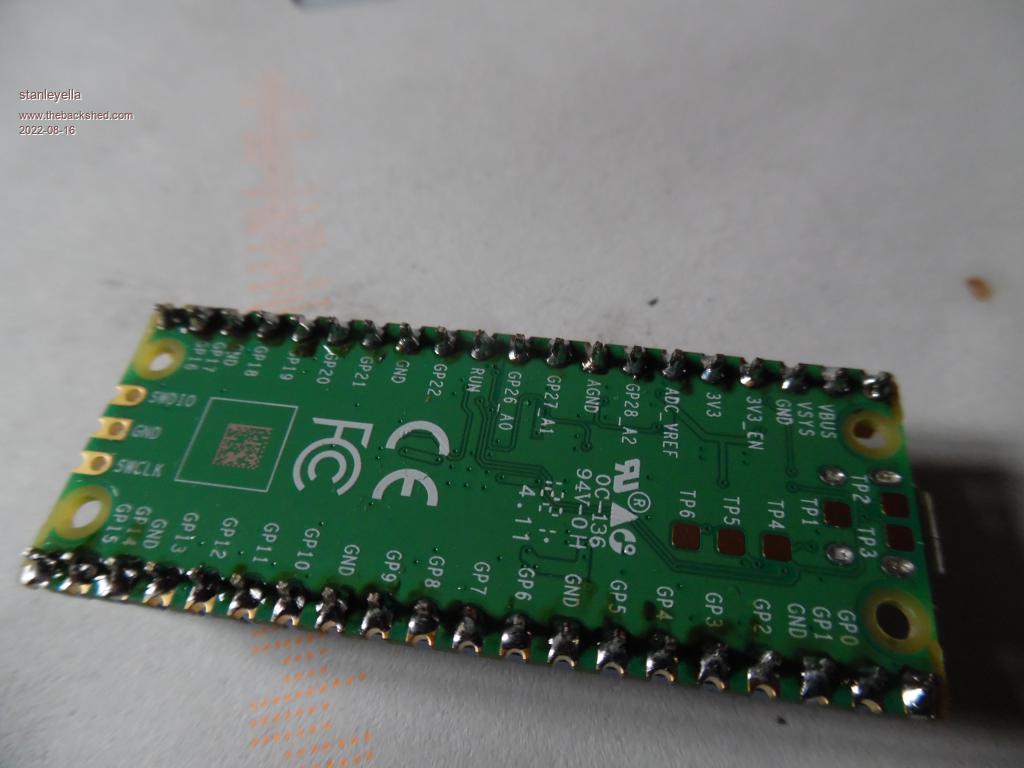 |
||||
| Mixtel90 Guru Joined: 05/10/2019 Location: United KingdomPosts: 7865 |
If you only need it for breadboard then that's fine. :) It has the advantage that you can see the labels and, as such, is very good as a self-contained experimenter's board. You just need to remember that pin 1 is top right and you count clockwise rather then top left and count anti-clockwise. Mick Zilog Inside! nascom.info for Nascom & Gemini Preliminary MMBasic docs & my PCB designs |
||||
| stanleyella Guru Joined: 25/06/2022 Location: United KingdomPosts: 2540 |
Mick sir, my intentions have been a- trying rpipico with mmbasic b- using mmedit to make it more like I was used to... and is fine now. "mite" seems well established, dunno if picomite is as sorted or speced enough but it's great for the price and IS easy even if users like me don't get it at first. mmbasic vga looks interesting if your into coding but I got to sort the non vga mmbasic cos it's really interesting to and lots to try. trig with floats for instance. plenty to keep me busy. cheers. |
||||
| Mixtel90 Guru Joined: 05/10/2019 Location: United KingdomPosts: 7865 |
I'm glad it's working out for you. :) There's a lot to play with, isn't there? The two versions of the PicoMite are the same apart from in the display handling. It's the same MMBasic, but, for example, where TEXT would write to the LCD it writes to the VGA display instead. Obviously, the VGA display isn't an LCD so there are differences, but it's not like learning a whole new system. It's worth having a play with the PicoMite VGA firmware, especially as you only need to add four resistors and a VGA connector. Both the ordinary PicoMite and the PicoMite VGA support the PS/2 keyboard so there's no difference there. It's especially useful with the VGA version though, IMHO - yours may vary as you don't use the built-in editor. Have you had a look at the PicoGAME development thread yet? Integrating VGA graphics, stereo sound and two game controller ports might be of some interest to you. :) Mick Zilog Inside! nascom.info for Nascom & Gemini Preliminary MMBasic docs & my PCB designs |
||||
| stanleyella Guru Joined: 25/06/2022 Location: United KingdomPosts: 2540 |
lots to play with... info overload. I'll add headers to the other pico and load vga firmware. so much effort seems to have been put into it I should try it. no mouse :( |
||||
| Mixtel90 Guru Joined: 05/10/2019 Location: United KingdomPosts: 7865 |
No, unfortunately the PicoMite has no mouse support. They require too much processing overhead. and the Pico is already rather busy. :) You can do a very good look-alike of the old pre-mouse DOS desktops though. Think of the PicoMite as being rather like a mid-range 1980's home computer, but with a much better BASIC, and you won't go far wrong. The amount of work that Peter has put into the PicoMite (and his other ports) is amazing. :) And Geoff, of course: :) (From Geoff's web site) "After another fruitless search for a suitable interpreter on the Internet I came to the conclusion that there was nothing for it but to write my own BASIC interpreter... from the ground up. In what was becoming a common refrain I thought to myself, "just how hard could it be?" ... "To cut a long story short the new interpreter (titled MMBasic) was up and running in 8 days. Those days were very intense, often starting at 5 in the morning and finishing in the early hours of the next day. My partner got used to me hardly eating and walking around distracted while trying to unravel the endless details stuck in my head. " Mick Zilog Inside! nascom.info for Nascom & Gemini Preliminary MMBasic docs & my PCB designs |
||||
| pwillard Guru Joined: 07/06/2022 Location: United StatesPosts: 313 |
The *EASY* way I got into trying out the VGA "home computer experience" PICOMITE was to purchase a PCB from LANDBOARDS, tindie link. It's an easy way to get started, provided you can assemble all the stuff you need. I also needed to buy a PS2 Keyboard to get it working. |
||||
| Mixtel90 Guru Joined: 05/10/2019 Location: United KingdomPosts: 7865 |
The "easy" way is to use one of the several variations that have appeared on this forum. (I've churned out one or two. lol) Very cheap for five at JLCPCB. You just have to wait for postage from China. Much cheaper than $12 + $16 postage if you are in the UK. You do have to solder your own though (unless someone will build it up for you). Be nice to me and I might even do the occasional custom design. �  Edited 2022-08-16 22:40 by Mixtel90 Mick Zilog Inside! nascom.info for Nascom & Gemini Preliminary MMBasic docs & my PCB designs |
||||
| thwill Guru Joined: 16/09/2019 Location: United KingdomPosts: 4302 |
Get the PicoGAME board if you want to write, or dare I say play retro-style games! - one of these days we'll find a reliable source of NES gamepads  . Get something else that exposes more of the GPIO if your primary interest is experimenting with hardware interfacing. . Get something else that exposes more of the GPIO if your primary interest is experimenting with hardware interfacing.And if we're even nicer we might even be able to stop him  . .Best wishes, Tom Edited 2022-08-16 22:48 by thwill MMBasic for Linux, Game*Mite, CMM2 Welcome Tape, Creaky old text adventures |
||||
| Mixtel90 Guru Joined: 05/10/2019 Location: United KingdomPosts: 7865 |
Hehe.... :) I notice no-one's commented on PicoPatch yet. I must be boring you all (or it's too hot to solder). PicoPatchW is already in the works, with support for: > JDY-40 (all 8 GPIO available and COM2) > HC-12 (on COM2. If you are in the UK turn the power right down - the default is way too high - and stick to the few legal channels). Mick Zilog Inside! nascom.info for Nascom & Gemini Preliminary MMBasic docs & my PCB designs |
||||
| stanleyella Guru Joined: 25/06/2022 Location: United KingdomPosts: 2540 |
the postage is $16 for the $12 board and that was at the time, like a rp2040 was $3 but I paid over �5 for a rpipic 2040. inflation? I got ps2 keybords but cut the plugs off 2 for some reason I forget. Thanks for the link. |
||||
| Mixtel90 Guru Joined: 05/10/2019 Location: United KingdomPosts: 7865 |
The RP2040 is one of the chips on the Raspberry Pi Pico board. The board itself is the Pico. Please don't confuse the two as there are other boards available that use the same RP2040 and we have to guess which you are talking about. :) You can buy the RP2040 alone for about $1 but you need other bits to go with it and some SMD soldering. The Pico is usually about �3.90 incl. VAT in the UK, but you'll pay postage on that unless you are lucky enough to live somewhere where you can get one from a shop. If you paid �5 + postage you were done. :) Fancy this design as an alternative to the PicoGAME? 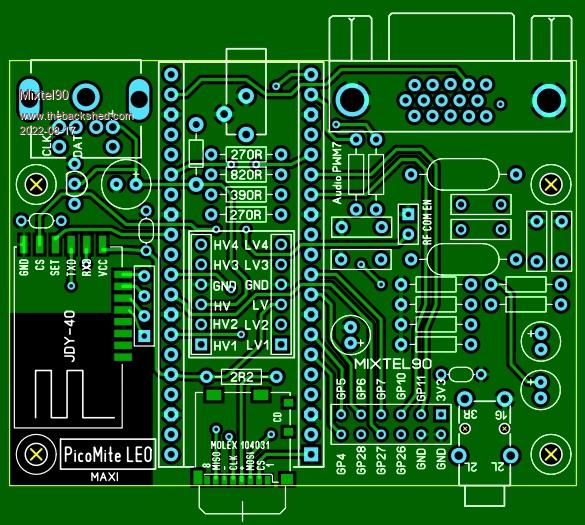 Mick Zilog Inside! nascom.info for Nascom & Gemini Preliminary MMBasic docs & my PCB designs |
||||
| stanleyella Guru Joined: 25/06/2022 Location: United KingdomPosts: 2540 |
looks tidy. a cicuit diagram? You have shown circuits that make vga and ps2 keyboard look easy to wire, if the ps2 kb works. For entertainment, if you run out of ports use a 16 channel 12c controller https://www.youtube.com/watch?v=YtKqmKKk4gk |
||||
| stanleyella Guru Joined: 25/06/2022 Location: United KingdomPosts: 2540 |
ok got ps keyboard and a vga connector just add headers to picomite/rpipico and flash vga firmware.  yeah. I'm mean :) |
||||
| Mixtel90 Guru Joined: 05/10/2019 Location: United KingdomPosts: 7865 |
That's actually the top side of the PCB design. It's a modification of my original LEO design that was intended for use with the "37 Sensor" kits (or whatever they are called). I'm sure you'll be able to knock something together out of that lot. :) Here's the circuit, you'll be able to get the VGA connections from it. I used a level shifter module from ebay and powered the keyboard at 5V, but you could try doing without it and powering at 3V3 or you can level shift using a couple of MOSFETs. PicoMite LEO maxi circuit.pdf Mick Zilog Inside! nascom.info for Nascom & Gemini Preliminary MMBasic docs & my PCB designs |
||||
| stanleyella Guru Joined: 25/06/2022 Location: United KingdomPosts: 2540 |
On bread board I use the linear 3.3/5v regs. 5v for the display but not 3.3v for the pico yet. got to sort 3.3v enable so it gets a clean supply cos I read a-d is noisy with picomite cos it uses a buckboost converter that's noisy and it's the a-d ref voltage. some interesting circuits you posted link to, cheers. 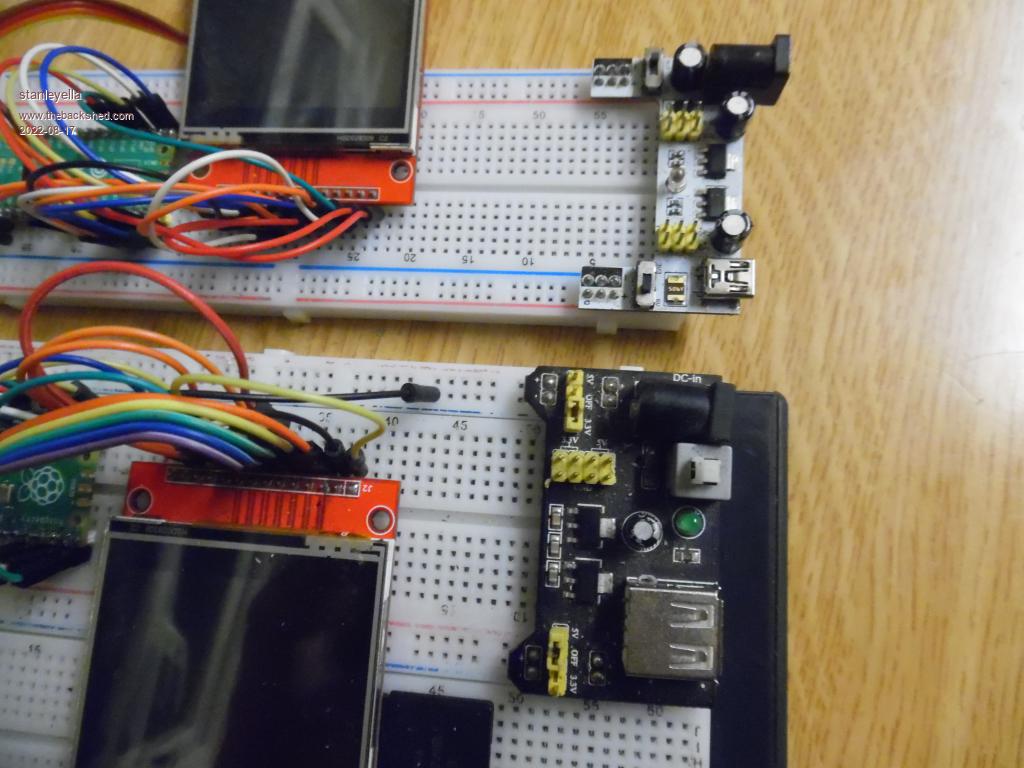 |
||||
| Mixtel90 Guru Joined: 05/10/2019 Location: United KingdomPosts: 7865 |
A-D on the PicoMite isn't good because there is an error on the chip. Treat it as 8-bit. Apart from using a linear regulator you can also improve the noise figure by fitting a LM4040 precision 3V reference from 3V to GND and using OPTION VCC 3.0 to change the input scaling from 0-3.3V to 0-3V, although the linear regulator will be pretty good on its own. The linear reg is very much recommended for audio use as the SMPS is simply too noisy. Mick Zilog Inside! nascom.info for Nascom & Gemini Preliminary MMBasic docs & my PCB designs |
||||
| stanleyella Guru Joined: 25/06/2022 Location: United KingdomPosts: 2540 |
A-D is obviously on the to do list but reading about psu noise and it's 10 bit but first and last are somehow lost. These breadboard psus can give two 3.3v supplies. a-d is a basic often used thing. got to sort it for poor psu noise. big cap?choke? |
||||
| stanleyella Guru Joined: 25/06/2022 Location: United KingdomPosts: 2540 |
lots to be said about pre-built boards. bread board can be a not working birds nest. |
||||
| The Back Shed's forum code is written, and hosted, in Australia. | © JAQ Software 2025 |
