|
|
|
|
Site Navigation
Projects & Information
»General Information»Wind turbine Projects »The F&P Smartdrive »Electronic projects »Microcontroller projects »Miscellaneous Kits & Parts
»Basicly Natural Pty Ltd»PVC & Aluminium blades »Scale model farm windmills »Price Watch Discussion Forums
Handy Links
»Wind»Solar »Electric Vehicles »Electronics »Micro Controllers »General Interrest About TheBackShed Getting Started Privacy Policy |
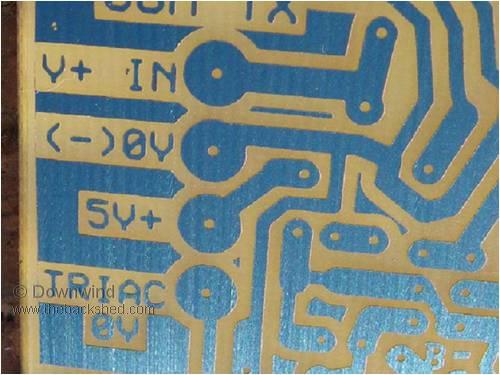
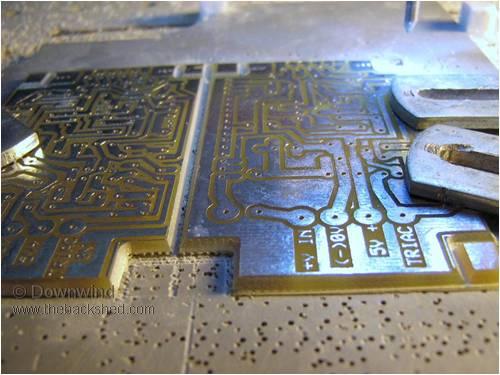
Check the board for any defects and correct them. If you have a bridge between tracks then put a scratch in the green coating, as it will then etch there. If you need to repair a track, I find a CD marker pen works well. Next etch the board and afterwards it should look like this
It is easy to see the quality of detail that can be achieved
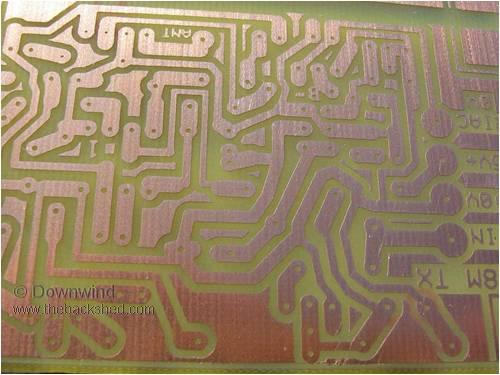
Once the board is etched the green protective film can be removed with methylated spirits on some paper towel. The board cleaned off.
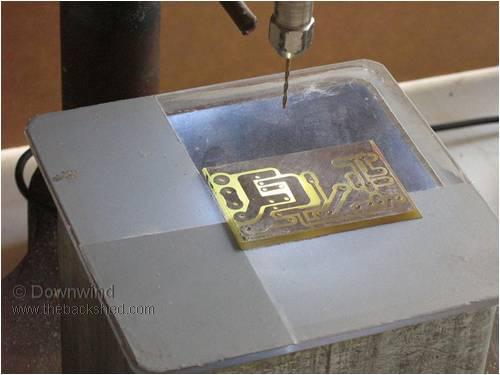
The board is tinned before drilling (or it plugs some of the holes up) I tin my boards with a solder paste and use a electric heat gun. After heating to melt the solder paste, the excess paste washes off in water leaving a thin solder layer behind over the copper areas.
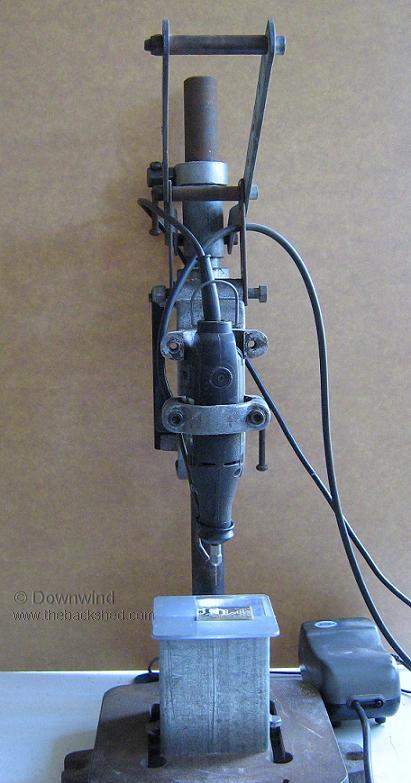
Drilling holes. The part we all love to hate. The better you set up for this the easier it gets. Old method used. I had a dremel tool mounted in an old hand drill press I had found in council rubbish that served me well for many years. A fish aquarium air pump was used to blow the dust away from each hole during drilling
The addition of a ultra bright white led in a under table position shining upwards makes it much easier to see the holes in the pads for drilling. One was mounted in a piece of steel tube with a acrylic clear top attached. Powered from a plug pac off a discarded nokia phone. (note the anti-glare tape. Bright little blighters)
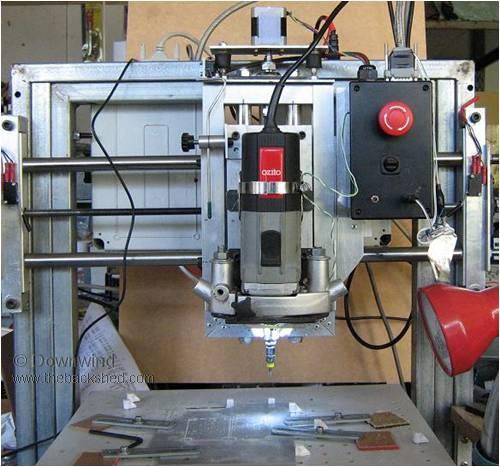
New method. As I loathed the though of drilling another board and with eyesight deteriorating with age alone, and a desire not to have to drill little bloody holes, I built a small desk top cnc router out of junk to do the job for me. Best thing I ever did!!!!
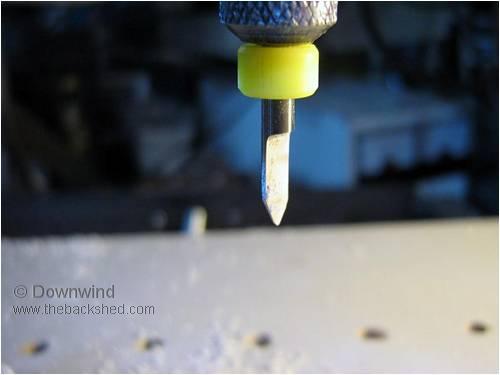
Tungsten carbide 0.85mm drill bits. Well worth the cost for how well they drill. They drill so clean and leave no burs around the holes. Good life to if you don’t break them.
Drilling in process.
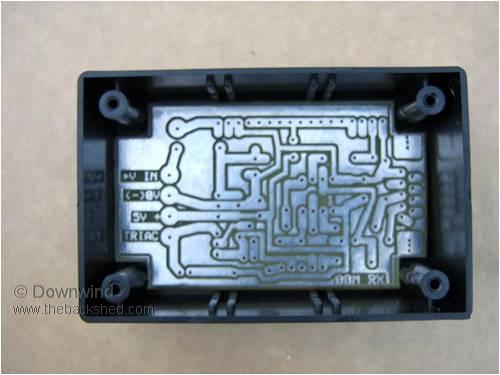
Once drilling is complete I route the board out to the shape required.
A rather well used, blunt looking pcb router bit
Check if all fits within the intended box. It did.
|
||