|
Buliding a 200 watt dump load
A dump load is used to drain off
excess power. This design uses a
few 50watt light bulbs and with
some parts from the junk pile,
shouldn't cost more
than $20 to build |
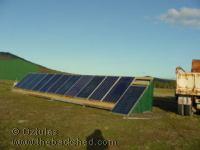
| Make your own Solar Panels! |
Page 1 | 2 | 3 | 4 | 5 |
 Back to Page 1. Back to Page 1.
Sober reflections:
Eva onto toughened glass has a track record, and most folks know of panels that are at least 1/4 of a century old and still running fine. The EVA of today is better than the EVA of yesteryear, and will be less likely to change colour than the older material. I have some BP panels 15 years old, which have clearly changed to a brownish tinge over the cells... from the heat, not the UV alone. The inter-cell spaces are still clear, as are the last 1/2 inch of the outer perimeters of the cells.... but even then, the performance is probably only 10% less than stated on the stickers.
If you build the panels for 50c per watt, and they only last a few years.... then it would have been cheaper to buy them made.... as they should have lasted at least 12 times longer.... so to keep replacing is $6.00/watt......??
To reiterate the preliminary vacuum stage.
With large cells, the metal tab on the front will try to take the pressure of the air when the vacuum is pulled on. It can then try to push the tab wire into the eva, to spread the pressure load. When the air temp is cold, the EVA won't give easily enough, and the silicon cell will try to wrap around the tab wire so it can press against the eva as well.......not being flexable, it will instead split along the tab.
This is easily mitigated by raising the temp up to 50C or more (less than 65C though) for the prevacuum, rather than room temp.
I found room temp fine on a hot day, but too cold at night...... so now use the oven to get 50C. This softens the eva, and makes it easy for the tab wire to sink into the eva, so the silicon presses evenly against the "glass".
Moving right along, we now have an oven to cook the panel in.... we have bought the vacuum pump, and are now prepared to make a test panel/cell..... just to see if it is true.
I decided that it would be best to do a show and tell for a single cell at this point, in a step by step approach.
So here we go:
First get a piece of glass that will fit your cell on.
Wash/dry the glass with alcohol (Methylated spirits).
Grab the bit of your EVA your going to use, I have chosen to build a single 6x3 cell, with some other bits thrown in just to give an interspace between cell and cell bits..... like this: |
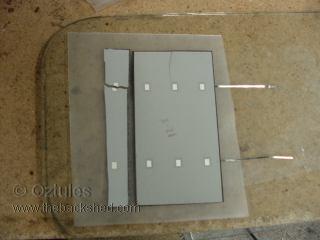 |
| Next throw on the top EVA piece: |
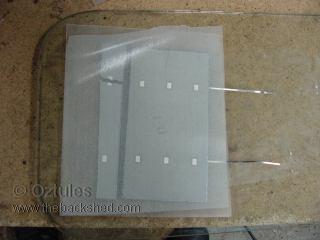 |
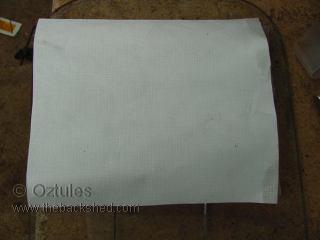
Now a piece of tedlar, or even just sheet plastic ( I used white building wrap this time) anything you want the rear of the cells to wear. It must be non-porous, rot proof, water proof and everything else proof. It only performs the role of keeping the EVA away from anything that may want to harm it.... and to allow you to get the panel away from the vacuum bag.
The EVA cross links into something a bit like silicon. It is rubbery, and not especially strong..... although try getting it off the glass once cross linked and bonded properly and you may decide that it is very strong.
Here we are with a piece of building wrap on the back. (The wrap is porous but the EVA will soak into it and fill the pores.... it has been found to be better to just use plastic sheet... the EVA when heated initially will be a runny liquid.) |
 |
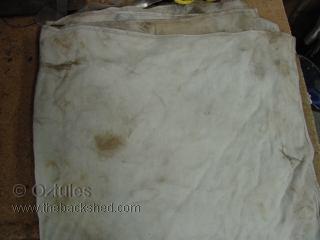
Now we have all the ingredients to make it work, we just need something to allow the vacuum to suck the air through..... an air wick if you will. This can be any porous material you can get hold of. I find for small 60watt panels, that a few thick teatowels covering the back do ok, for bigger panels, it is best to find something a bit better.... beach towels? Glass matting would be good if you have it, I tried shade cloth on the 2mx1m panel, but found that it shrinks a little when it gets heated. Not enough to damage anything, but enough to make the cells not line up as I had placed them. For this show and tell I just folded up a rag that was lying around near me... and it looks like this: |
 |
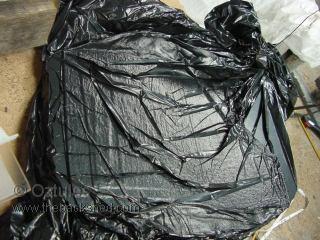
Next we need a plastic bag big enough to place our panel in. Unless your into building big ones like I have, most likely a big garbage bag will be the best for the job... cheap, plentiful, and plenty strong enough for the job. Here I used a transparent one for demonstration of seeing the stuff in the bag |
 |
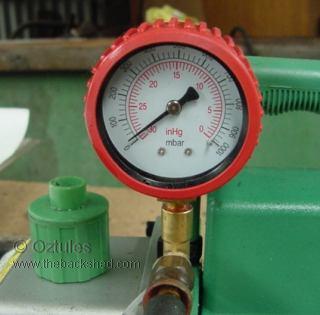
| Next we poke a hose into the bag and seal it up I use plastic wire ties. This seems to hold the bag opening onto the vac hose pretty well.... except for this time. The plastic bag must have a hole in it, as I could not get down to max vacuum...... |
Do NOT place the rubber suction hose over a cell. It will crack that cell, so just place it between your airwick material and the glass... or inside the folds of the material, but away from the cells themselves, and let it suck from there. Provided there are no leaks, all the air will all eventually seep through the wick. If there is a tiny leak, your wick will need to be very very porous to still work. If it is a bit difficult for the air to move through, a leak will kill this project.... if it is a very free wick material, a leak may be tolerated.... best without though. |
 |
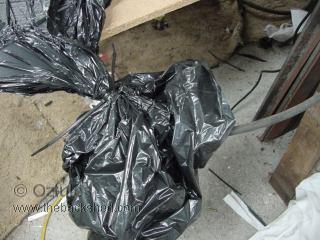
So I have replaced the clear leaky bag with a trusty black garbage bag....
|
 |
| Note the wire ties: |
 |
Now for this exercise I won't use the big oven, but instead will show just how simple this can be.......
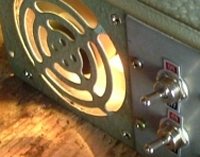
Here is the latest you beaut high tech laminating machine...... or the build it in 1 minute oven..... and it will work every bit as well as an expensive laminator |
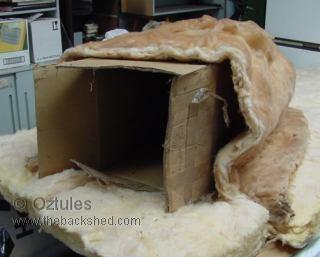 |
Of course we know there is more to it than this ......like the heater.
For this size ... and up to at least a 60W panel, a fan heater pinched straight from the loungeroom would do to get it up to 80-100C..... or if you wanted to prove a point, perhaps broil it in boiling water.....ie half a 44 gallon drum parked over the camp fire........simmer till cooked.
Well I guess that would work too, but I'm trying to make clear that this does not need to be high tech, to get a perfect result.... just temp time and vacuum
.
If you are going with very low temp, then it will take a very long time... ie 80C for 80 minutes, or 140c for 5-10mins
I have toyed with the idea of using the sun... ie use the some of my spare solar glass from the hot water heaters, and make a solar oven... very similar to the solar panel itself... as the oven.... I haven't tried it as yet, but if you can boil water on a hot day with a sheet of glass and the black backing..... then , it can crosslink the EVA easily too.
Note the solar cooking has now been done in Africa to do it similar to this.... but without the vacuum...... they were still happy.
Your trial one will give you an idea of how long to cook it with what equipment you have to get your brand of EVA to crosslink properly and stick to the glass VERY well.
If it has not been left for long enough, you will be able to peel it off the glass, we don't want that..... try just putting it back in and cook some more... noting how many minutes gets the required bonding... if it is too poor this extra cooking may not be enough, but has worked before.
Our trial one looks like this |
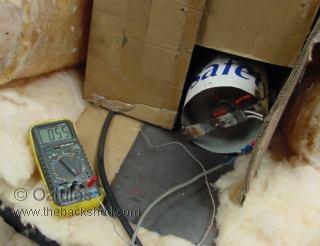 |
| and the whole sophisticated arrangement looks like this: |
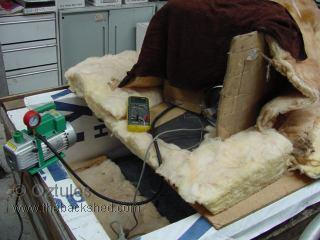 |
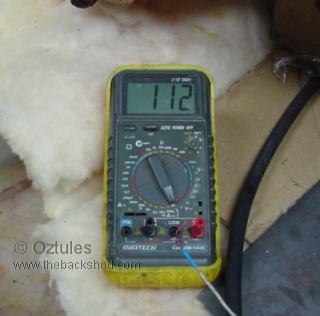
| And yes, it got to .....and stabilized at about 112c... so I cooked it for 45mins anyway. Note the improved insulation (brown towel) pushed the temp up another 20 degrees from the picture first showing the box oven without this high tech improvement. |
 |
I don't think you can overdo the time on these low temp crosslinking exercises, although it is probably worthwhile exercise to use a normal cooking oven with a good thermostat to get an accurate picture of how the stuff bonds to the glass... how long for how well. That is the only critical figure in all of this.... and theoretically then you can always put it back in the oven without any problems at all..... but I haven't had to as yet
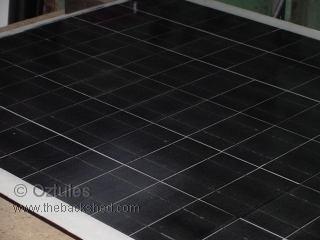
And here is what we have got ourselves.: |
 |
So it does work, and it is dead simple, and very easy to get right.... just test your EVA until you get to know how it works for you.
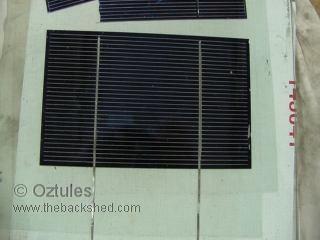
The only difference to doing this size |
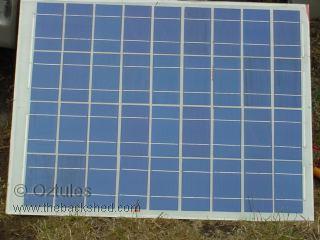 |
or this size: |
 |
It is how much time you have, how many cells you have, and how much glass you can scrounge up
Page 3  |
